Why Is My Thermostat Not Working: A Homeowner's Troubleshooting Guide
Urgent guide to diagnose and fix a thermostat that won’t respond. Learn common causes, step-by-step checks, and when to call a pro for safety.

If you're wondering why is my thermostat not working, start with power and wiring checks. The most common cause is a power issue or dead battery; ensure the unit is receiving 24V, the circuit breaker is on, and the C-wire is connected. If these basics fail, reset the thermostat and test again.
Understanding the problem
When a thermostat stops responding, the first impulse is often frustration, because comfort, energy bills, and even indoor air quality can be affected within minutes. The root cause is rarely mysterious, but it is frequently hidden in plain sight: power, wiring, or software. According to Thermostat Care, many homeowners overlook simple power issues that masquerade as a malfunctioning thermostat. This quick diagnosis focuses on the most likely culprits and guides you toward safe, effective steps you can take today to restore control of your home’s climate. Keep in mind that while DIY fixes work for many cases, persistent symptoms may require professional help to avoid electrical hazards or HVAC system damage.
Common causes at a glance
- Power issues: Tripped breakers, blown fuses, or a dead thermostat battery (for batteries-powered models).
- Wiring problems: Loose or disconnected wires, especially the R and C wires, or damaged insulation.
- Sensor or software glitches: A stale firmware state, incorrect room sensing, or a misconfigured schedule.
- HVAC communication errors: The thermostat is not communicating with the furnace/AC control board due to a fault in wiring or control signals.
- Environmental factors: Extreme outdoor temperatures can sometimes prompt protective shutdowns in smart thermostats.
Check power, wiring, and control signals
Power is the most frequent gatekeeper to a functioning thermostat. Start by turning off the power to the thermostat at the breaker to avoid any risk while inspecting wiring. If your model runs on batteries, replace them with fresh alkaline cells and observe whether the display and controls respond. Next, confirm the R (24V hot) and C (common) wires are firmly connected at both ends. Check for damaged insulation or loose terminals, and if you see corrosion or frayed wires, do not reuse the connection; replace the wire segment. Finally, ensure the thermostat and furnace control board are receiving a consistent signal by listening for humming sounds from the HVAC unit or watching the control LEDs blink in a predictable pattern.
Safe, quick diagnostics you can perform
- Reset the thermostat to factory defaults or perform a soft reset as recommended by the manufacturer.
- Verify that the thermostat is set to the correct mode (heat or cool) and that the setpoint is above or below the current indoor temperature as appropriate.
- Inspect the fuse or breaker for the HVAC system itself; a blown fuse or tripped breaker here can cut power to the thermostat without an obvious display issue.
- Check for recent software updates on smart thermostats and install any available firmware patches; these updates often fix communication glitches with the HVAC system.
Advanced diagnostics and when to test equipment
If basic checks don’t restore function, you may need to perform more advanced steps. Use a multimeter to verify that the R and C terminals are delivering 24–28 volts when the system is powered. For wired units, reseat all connections after power is removed. If your thermostat is connected to a humid environment or directly exposed to dust, clean the internal contacts with care and ensure no moisture is present. For smart thermostats, ensure your home Wi‑Fi is stable, as a flaky connection can impair control despite proper power and wiring. If you discover a faulty control board or compromised internal components, replacement is usually more economical than repair and should be done by a professional.
When to seek professional help and how to choose a technician
Not every thermostat issue is safe to DIY. If you detect burning smells, melted plastic insulation, buzzing noises, or you cannot safely access the junction box or HVAC wiring, stop and call a licensed HVAC technician. A pro can verify electrical safety, diagnose control board faults, and inspect the furnace or air handler for underlying issues that your thermostat alone cannot fix. When selecting a technician, ask about licensing, insurance, and prior experience with your thermostat model to ensure a high-quality, safe service.
Preventing future thermostat problems
Regular maintenance reduces the odds of a non-working thermostat. Schedule periodic checks of the furnace, thermostat wiring, and breaker panel; replace batteries as recommended by the manufacturer; keep the thermostat free of dust and moisture; and ensure the device firmware remains up to date. Consider labeling wires and keeping a quick-reference guide to avoid miswiring during future service. By adopting a proactive stance, you can minimize downtime and keep your climate system responsive when you need it most.
Steps
Estimated time: 40-60 minutes
- 1
Power down and inspect the breaker
Turn off power at the main breaker, then remove the thermostat cover to inspect for burn marks or loose wires. If you see scorching or melted insulation, do not proceed—call a professional immediately. After visual checks, turn the power back on to continue testing, but do so with caution and proper PPE if available.
Tip: Always confirm power is off before touching any wiring. - 2
Check and secure wiring
Verify that all wires are firmly connected to the correct terminals (R, C, W, Y, G). If any wire is loose, re-seat it or replace the terminal block if damaged. Use a multimeter to confirm continuity where appropriate. Reassemble the thermostat cover only after confirming there are no loose connections.
Tip: Label wires before disconnecting to simplify reassembly. - 3
Test power with a reset
With power restored, perform a soft reset (or full factory reset if recommended by the manufacturer). Reconfigure basic settings like mode (heat/cool) and target temperature, then observe whether the display responds and whether the HVAC system engages.
Tip: Do not skip the reset if you notice a glitch in the interface. - 4
Check the HVAC side
Inspect the furnace/air handler for tripped breakers and blown fuses independent of the thermostat. Listen for a hum from the unit when power is restored; a silent system may indicate a control issue or a failed blower circuit. If fuses keep blowing, consult an HVAC pro.
Tip: If you see a tripped breaker, reset only after confirming there are no short circuits. - 5
Re-test system operation
Set a clear cooling or heating target and run a quick test cycle. Monitor for correct activation, maintenance of setpoints, and any unusual delays or cycling. If behavior is inconsistent or unsafe readings occur, stop and call a technician.
Tip: Document any odd behavior (timing, sounds) for the technician.
Diagnosis: Thermostat won't respond to changes or shows inaccurate readings
Possible Causes
- highPower issue (tripped breaker, dead battery, blown fuse)
- mediumWiring problems or loose connections (C-wire, R-wire)
- lowThermostat software glitch or control board fault
Fixes
- easyCheck the main breaker and replace batteries if applicable; restore 24V power
- easyReseat and inspect R and C wires; repair or replace damaged wiring
- easyReset the thermostat or perform a firmware update if available
- mediumIf still non-functional, contact a licensed HVAC technician for in‑depth testing
Questions & Answers
What should I do first when my thermostat stops working?
Begin with a power check: replace batteries if needed, ensure 24V supply, and verify the R and C wires are properly connected. If the display is blank, a reset may restore basic function before deeper testing.
Start with power checks and a reset, then test the system step by step.
How can I tell if the issue is with the thermostat or the HVAC system?
If the HVAC system doesn't respond to temperature changes even after a reset, the problem may lie with the HVAC control board or wiring between components. Test signals at the thermostat and furnace, and check for error codes.
If cycling doesn’t affect the system after a reset, the issue might be in the HVAC system itself.
Is it dangerous to open my thermostat?
Opening a thermostat is generally safe if the unit has a battery cover and you avoid touching live wires. If you smell burning or see melted parts, stop and contact a professional immediately.
Only open if power is off and you follow safety guidelines.
Can a smart thermostat not working be due to Wi-Fi or app issues?
Yes. Many smart thermostats rely on Wi-Fi for remote control and updates. If the device seems responsive locally but won’t update settings, check router connectivity, signal strength, and firmware updates.
Wi‑Fi problems can stop remote control even if the unit itself is powered.
How often should I replace thermostat batteries?
Battery life varies by model, but most provide several years of service. If you notice dim display or slow response, replace batteries and test functionality.
Replace batteries when the display dims or response slows.
When should I replace rather than repair my thermostat?
If the cost of repairs approaches or exceeds a new unit, or if the thermostat is old and inefficient, replacement is wiser. Consider energy savings and compatibility with your HVAC system.
If repairs would cost more than a new unit, consider replacement.
What to Remember
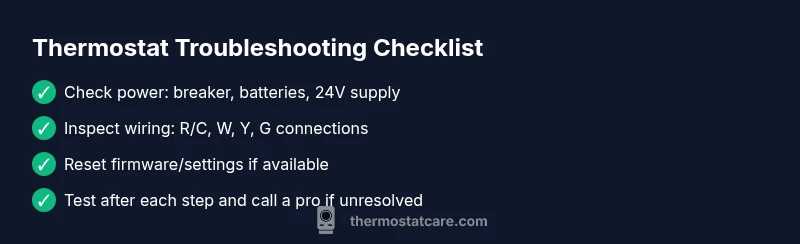
- Start with power checks and wiring
- Loose C-wire is a common culprit
- A simple reset can fix glitches
- If power or wiring fails, call a pro
- Regular maintenance prevents outages