Why Is Your Thermostat Not Cooling? Fixes & Troubleshooting
Discover why your thermostat isn't cooling and how to diagnose it. This guide covers quick checks, common faults, safe fixes, and when to call a professional from Thermostat Care.

Why your thermostat not cooling: common culprits
According to Thermostat Care, many cooling problems start with simple, fixable causes rather than a malfunctioning air conditioner. Common culprits include a misconfigured thermostat (set to heat or an incorrect temperature), a dirty air filter that restricts airflow, a loose or corroded connection in the thermostat wiring, or a faulty sensor that reads the room temperature inaccurately. In some cases, software glitches or outdated firmware on a smart thermostat can prevent proper cooling cycles from starting. By approaching the problem with a systematic checklist, homeowners can quickly rule out the most frequent faults before calling for service. This section covers the most likely reasons and how to address them safely and efficiently.
The Thermostat Care team emphasizes safety first: never bypass protective covers or tamper with electrical components beyond basic inspection. If you detect frayed wires, burning smells, or water around your equipment, stop immediately and call a licensed technician. Start with the simplest checks, then escalate only as needed.
Check basic settings and mode
The most common reason a thermostat won’t cool is an incorrect setting. Ensure the device is in Cooling mode rather than Heat or Auto, and confirm that the setpoint is clearly lower than the current room temperature. For programmable or smart thermostats, verify that any schedule or occupancy-based settings aren’t temporarily raising the target temperature during certain hours. If the thermostat has a fan setting, set it to Auto rather than On, so it runs only when cooling is necessary. Also, inspect the thermostat’s screen for error codes, stale connections, or indicators that require a reset. A quick reset can resolve many software-related freezes or misreads. If you notice a discrepancy between what your thermostat shows and the actual room temperature, calibration may be needed.
Tip: When in doubt, temporarily set a fixed temperature several degrees lower than room temperature for 15–30 minutes and observe whether the unit begins cooling.
Power and wiring checks
Power issues can silently disable cooling cycles. Start by checking that the thermostat has power: for battery-powered models, replace the batteries with fresh ones; for hardwired devices, confirm the circuit breaker hasn’t tripped and that the furnace’s power switch is on. Loose or corroded wiring at the thermostat or at the furnace/air handler can also prevent cooling. If you’re comfortable with basic electrical work, turn off power at the breaker before inspecting terminal screws and wire colors for any discoloration or loose connections. For smart thermostats, ensure the power supply to the control board is stable, and consider a temporary bypass test with a non-smart thermostat to isolate the issue.
Pro tip: If you hear humming or buzzing from the air handler, or if the thermostat shows inconsistent readings, there may be a power or sensor issue that warrants a professional check.
Airflow and ductwork considerations
A restricted airflow can make even a healthy cooling system feel ineffective. Start by replacing the disposable or washable filter, then check supply and return vents for blockages or closed dampers. Vacuum nearby coils and outdoor unit if accessible, and ensure there is at least 2–3 feet of clearance around the condenser unit outdoors. Poor duct design, leaks, or disconnected seams can cause cool air to leak before it reaches living spaces. In winter, you might notice frost on the evaporator coils or ice formation on the outdoor unit if there’s low refrigerant pressure, which can also affect cooling performance. A professional HVAC tech can perform a duct leakage test and verify airflow balance.
Tip: Use a simple airflow test by holding a tissue in front of supply registers; if the tissue remains still, airflow may be restricted and requires attention.
Sensor calibration and temperature readings
Inaccurate temperature readings are a frequent culprit when cooling seems off. Ensure the thermostat sensor is positioned away from direct sunlight, drafts from vents, heat-producing appliances, or lamps. If a room feels warmer or cooler than the thermostat’s reading, consider relocating the sensor away from heat sources and ensuring adequate air circulation around it. Some thermostats allow you to recalibrate or offset the temperature reading; follow the manufacturer’s instructions. If readings continue to diverge from actual room temperature, the sensor or control board could be faulty and may need replacement. Remember that even a small misread can cause long cooling cycles or short cycling, reducing comfort and increasing energy use.
Note: Do not attempt to replace internal sensors without proper training or replacement parts supplied by the manufacturer.
HVAC system performance and refrigerant basics
If the thermostat is signaling cooling is needed but the indoor air remains warm, the issue may lie with the HVAC system itself. Check that the outdoor unit is free of debris, the fan is operating smoothly, and the condenser coils are clean. Low refrigerant levels or a refrigerant leak will prevent proper cooling and require a licensed professional to diagnose and repair. Signs include hissing sounds, oily residues near joints, or ice buildup on the evaporator coil. Do not attempt to recharge refrigerant yourself—the process is hazardous and requires proper equipment and credentials. Regular professional maintenance can detect refrigerant leaks before they escalate.
Smart thermostats: common issues and fixes
Smart thermostats introduce features that can complicate troubleshooting. Ensure the app is connected, firmware is up to date, and the device is paired correctly with your HVAC system. Check for conflicting schedules, geofencing, or occupancy settings that might delay cooling. If a recent update caused odd behavior, a factory reset or reinstallation may restore normal operation. Some models require a dedicated C-wire for power; lack of continuous power can cause the thermostat to reboot during cooling cycles. For simplicity, start with a full power cycle (turn off at the breaker, wait 60 seconds, then restore) and recheck cooling. If problems persist, consult the manufacturer’s support resources.
Maintenance and prevention to avoid future faults
Create a simple maintenance routine to keep cooling performance steady. Change or clean the air filter every 1–3 months, depending on usage and indoor conditions. Schedule seasonal HVAC inspections to check refrigerant levels, electrical connections, and airflow. Keep vents unobstructed, seal leaks in ductwork, and ensure outdoor units have adequate clearance. For smart thermostats, enable energy-saving modes only after confirming stable cooling in your home. By documenting recurring issues, you can spot trends and address root causes quickly, reducing the chance of repeated breakdowns.
When to call a professional
If you’ve ruled out common user-level causes and cooling still underperforms, it’s time to bring in a licensed HVAC technician. Call a pro if you notice persistent ice buildup on the evaporator coil, refrigerant smells, warm air after full cooling cycles, electrical burning smells, or if you’re not confident working with electrical components. A pro can safely diagnose electrical faults, refrigerant leaks, duct problems, or sensor failures that are beyond DIY capabilities. Regular maintenance plans with Thermostat Care-approved technicians can prevent surprises and extend the life of your cooling system.
Actionable next steps you can take today
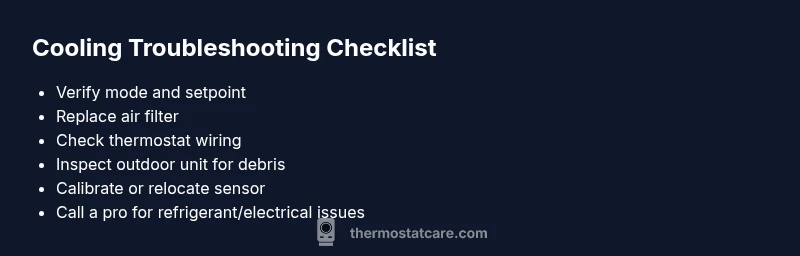
To conclude, start with the simplest checks: verify mode and setpoint, replace the air filter, inspect power and wiring, and test airflow. If readings are inconsistent with actual temperatures, calibrate sensors or relocate them if needed. Document any codes or symptoms you observe; this information helps a technician diagnose faster. Remember, safety first: never handle refrigerant, exposed wiring, or high-voltage components without proper training. By following these steps, you can often restore comfort quickly and minimize energy waste.