Why Your Thermostat Keeps Dropping Temperature: A Practical Troubleshooting Guide
Struggling with a thermostat that keeps lowering temperature? Thermostat Care offers practical, step-by-step troubleshooting to diagnose causes and restore comfort.

Most likely, a faulty thermostat sensor or a mismatched heating cycle is causing the temperature to drop. Start by replacing the batteries if present, then check that the thermostat is calibrated and set to the correct mode (heat, not cooldown). If the problem persists, schedule a professional inspection as soon as possible.
Why temperature drops happen
Temperature drops are usually not the thermostat being 'wrong' per se; they're about readings, calibration, and the HVAC system's response. According to Thermostat Care, the most common culprits are sensor drift, incorrect calibration, mode set incorrectly (cooling instead of heating), or a mis-set schedule that creates longer cooling cycles. External factors such as sun exposure, drafts, or a poorly located sensor can skew readings. Before blaming the furnace, verify the thermostat's reading against an accurate indoor thermometer placed away from heat sources and vents. If the room reads 2-4 degrees cooler than the thermostat displays, you may have sensor bias, power issues, or programming conflicts. In many cases, small changes to placement, offset, or scheduling resolve the problem without touching the HVAC equipment. This section lays the foundation for diagnosing temperature drops quickly and safely.
Common culprits you'll check first
Start with the basics. If your thermostat runs on batteries, replace them with fresh alkaline or lithium cells. A weak battery can cause the display to lag or sensors to misread. If it’s hardwired, ensure the furnace and control board are delivering stable power; a tripped breaker or loose wire can cause intermittent readings. Verify the thermostat is in Heating mode and not in Cool or Auto. Review the programming and hold settings; a misconfigured schedule can create temperature dips. Finally, consider sensor placement: a unit placed near a heater, draft, or sun outlet will report a higher or lower reading than the actual room temperature. Reposition only if possible to a location away from heat sources.
How to measure and verify thermostat accuracy
To confirm accuracy, place a reliable thermometer at a comfortable breathing height away from direct vents. Compare its reading to the thermostat’s display over several hours in different rooms if you have a multi-zone system. If there’s a persistent discrepancy (for example, the thermometer reads 3 degrees warmer than the thermostat displays), you likely have sensor drift or calibration needs. Many modern thermostats let you set a temperature offset to align readings with a trusted thermometer. Record any offset you apply and test again after an hour to verify consistency.
Impact of HVAC system vs thermostat
Sometimes the issue isn’t the thermostat but the HVAC system itself. A furnace struggling to reach setpoints, a clogged air filter increasing airflow resistance, or a cycling problem can cause longer runtimes and uneven heating. Duct leaks or blocked return vents can also create cold spots that the thermostat may interpret as a failing system. If the HVAC unit isn’t delivering expected heat even when the thermostat reports a correct setpoint, the root cause may lie in the furnace, blower, or ductwork rather than the thermostat.
Solutions: quick fixes and safe steps
Begin with the simplest fixes. Replace batteries if supported and perform a power cycle (turn the unit off, wait 30 seconds, then turn it back on). Ensure the thermostat is set to Heating and that a correct schedule is loaded. Check for a temperature offset or calibration option and adjust if needed. Clean the sensor area if it’s dusty or exposed to drafts. For wired thermostats, inspect the wiring or consult a professional if you notice loose or corroded terminals. If the problem continues, consider a reset to factory defaults or a professional replacement, especially if the device is old or showing error codes.
Preventive maintenance to avoid future drops
Regular maintenance helps prevent future temperature drops. Change batteries annually, replace air filters every 1–3 months, and keep the thermostat away from heat sources such as lamps, radiators, or direct sunlight. Schedule an annual HVAC tune-up and verify that the thermostat is still compatible with your heating system. Maintain a simple log of temperature readings vs. thermostat display to identify drift early, and update programming after any home remodeling or seasonal changes.
When to call a pro
If you’ve ruled out batteries, calibration, mode, and basic wiring but the temperature still drops, it’s time to call a pro. A licensed HVAC technician can verify sensor accuracy, diagnose wiring issues, test the furnace or heat pump performance, and check refrigerant lines if relevant. Do not attempt dangerous wiring or refrigerant handling yourself; professional service protects your safety and the system warranty.
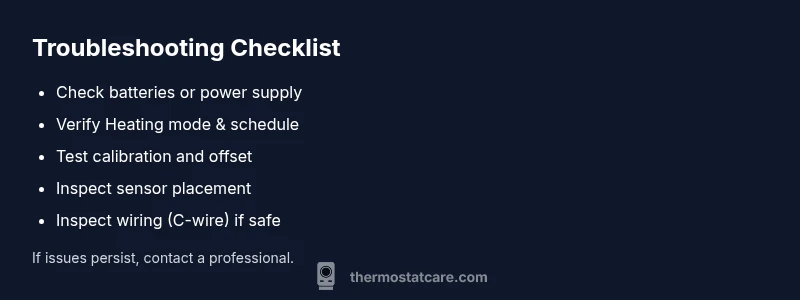
Steps
Estimated time: 60-90 minutes
- 1
Check power and batteries
If your thermostat is battery-powered, install fresh alkaline batteries. For hardwired units, verify the power supply and that the circuit breaker didn’t trip. Then perform a quick reset to refresh readings.
Tip: Keep spare batteries handy and label the thermostat wiring if you’re comfortable inspecting terminals. - 2
Verify heating mode and schedule
Ensure the unit is set to Heating (not Cool or Auto) and that the current schedule matches your daily routine. Disable any conflicting hold settings.
Tip: A mis-set schedule can cause several dips; document changes you make for future reference. - 3
Test calibration and offset
If your thermostat supports offset calibration, adjust by small increments (1–2 degrees) and observe the effect over an hour. Compare to a trusted thermometer to gauge accuracy.
Tip: Record offset changes to revert if needed. - 4
Inspect sensor placement
Check if the sensor is near heat sources, drafts, or direct sunlight. Relocate if possible to a neutral, central location.
Tip: Sensor placement heavily biases readings; even a small move can help. - 5
Check wiring and control board (if comfortable)
Power down, inspect for loose or corroded terminals, and verify the C-wire is secure if used. Do not force connections.
Tip: If you notice burnt or melted insulation, stop and call a pro. - 6
Reset and reprogram
If readings remain inconsistent, reset the thermostat to factory defaults and re-enter your heating schedule carefully.
Tip: Back up your settings if the device offers a cloud sync. - 7
Test HVAC response
Trigger a heat cycle and observe whether the furnace ignites and maintains the setpoint. Listen for short cycling or unusual airflow.
Tip: Record the cycle times; abnormal cycling often signals a system issue. - 8
Call a professional if unresolved
If the above steps don’t restore consistent temperatures, arrange a technician visit to diagnose sensor faults or control wiring.
Tip: A pro can verify sensor accuracy and system compatibility without risking safety.
Diagnosis: Room temperature periodically drops below the set point, despite the thermostat showing a future heating call.
Possible Causes
- highSensor drift or miscalibration
- mediumWeak or intermittent power (batteries or supply)
- lowIncorrect mode or conflicting programming
Fixes
- easyReplace batteries and power-cycle the thermostat; confirm Heating mode and schedule
- easyCalibrate offset or re-setup location; run a sensor test if available
- mediumReset to default settings or replace the thermostat if sensor error persists
Questions & Answers
What is the most common cause of temperature drops on a thermostat?
Sensor drift or miscalibration is the most frequent cause. Check mode, schedule, and batteries first before exploring wiring.
Sensor drift is usually the leading cause; start with mode, schedule, and batteries, then check wiring if needed.
Can a dirty air filter affect thermostat readings?
A dirty filter can affect HVAC performance and air temperature, making it seem like the thermostat is reading wrong. Replace filters if dirty and observe changes.
Dirty filters can distort both airflow and temperature perception; replace them and test again.
Should I replace my thermostat if it’s old?
If calibration and power checks fail consistently, consider replacement with a modern smart model that supports calibration and fault detection.
If the readings stay inconsistent despite fixes, replacing the unit is sensible.
What should I do if the thermostat display is blinking?
Blinking usually indicates a fault or communication error; reset, re-connect power, and check for error codes or manuals.
A blinking display often signals a fault or communication issue; reset and consult the manual.
When is professional help required?
If you’re uncomfortable with wiring or the system still misbehaves after basic troubleshooting, call a licensed HVAC technician.
If basic fixes don’t fix it, a professional should assess the sensors and wiring.
Can I fix this on my own month after month?
Some maintenance is fine, but persistent temperature drops indicate deeper issues that may require pro service to protect equipment and warranty.
DIY fixes are fine for basics, but don’t ignore repeated temperature drops.
Watch Video
What to Remember
- Check power and mode first to rule out basic issues.
- Calibrate or offset readings to align with an external thermometer.
- Sensor placement can skew results— relocate if needed.
- If in doubt, consult a licensed HVAC technician.
- Regular maintenance prevents future temperature drops.