What to Do with Thermostat: A DIY Troubleshooting Guide
Learn practical, step-by-step methods to diagnose, calibrate, and optimize your thermostat for comfort and energy savings. From power checks to smart upgrades, this guide helps homeowners troubleshoot common issues confidently.

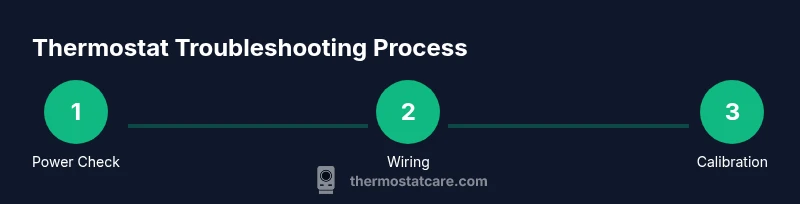
To fix thermostat issues, start by powering down and back up, confirm heat/cool mode and schedule, replace batteries if needed, and verify wires are secure. Calibrate readings and test HVAC response. For smart thermostats, ensure Wi‑Fi is connected, apps are updated, and firmware is current. If problems persist, follow the detailed steps below or contact a professional.
what to do with thermostat: essential primer
Your thermostat is the nerve center of your home comfort system. When it misbehaves, you may experience cold or hot spots, wasted energy, or unexpected HVAC cycles. This section introduces the core goal of what to do with thermostat and how to approach troubleshooting with a calm, methodical plan. You’ll learn to distinguish simple user errors from genuine hardware faults, and how to prioritize fixes that save energy and improve reliability. Small changes in settings can have a big impact on comfort and cost. According to Thermostat Care, most issues stem from wiring, power supply, or misconfigured schedules, not from a failing control board. Resetting, recalibrating, and updating software are often enough to restore normal operation, without professional help. If you’re using a smart thermostat, connectivity and app settings matter as much as hardware health.
The role of a thermostat in home comfort and energy savings
A thermostat isn’t just a dial on the wall; it’s the command center for your heating and cooling. A well-configured thermostat balances comfort with efficiency, reducing run times and preventing short cycling. Common sources of waste include overly aggressive cooling, uncalibrated temperature readings, and poorly timed schedules. By understanding how your thermostat interacts with your HVAC system, you can make informed decisions that lower energy bills while maintaining consistent indoor temperatures. Thermostat Care emphasizes that proper setup—habits, not just hardware—drives long-term savings and reliability. Regular checks can catch drifting settings, dead batteries, or weak connectivity before they become obvious failures.
Check power, placement, and basic wiring
Power, placement, and wiring are the most frequent culprits behind thermostat troubles. Ensure the unit is powered, the circuit breaker is on, and that any batteries are fresh if your model uses them. The thermostat should be mounted away from direct sunlight, drafts, or heat sources that skew readings. Inspect the wiring for loose, frayed, or displaced wires and confirm they’re securely connected to the appropriate terminals. If you’re unsure, take a photo before adjusting and consult the manual. Small wiring issues can cause large behavior changes, including inaccurate readings or unresponsive controls.
Troubleshooting common issues: no heat, no cool, erratic temp
No heat or no cool often signals a misconfigured setting or a tripped circuit, not a failed HVAC system. Check that the thermostat is in the correct mode (heat or cool), confirm the fan isn’t stuck on, and verify the schedule hasn’t overridden the current setting. Erratic temperatures may stem from sensor drift or a loose wire. For smart thermostats, verify Wi‑Fi connectivity and app permissions, then check for firmware updates. If you still observe irregular responses after these checks, document the behavior and compare it with the expected HVAC cycle to pinpoint the discrepancy.
Calibrating and programming for comfort and energy savings
Calibration aligns the thermostat’s reading with the actual room temperature. Start by placing a trustworthy thermometer near the thermostat and noting any offset. If there’s a mismatch, use the thermostat’s calibration feature to adjust by a degree or two, then re-test. Program schedules to align with your daily routine and seasonal needs; avoid leaving the system on continuous hold unless you’re home. For smart thermostats, explore adaptive scheduling and occupancy modes to boost efficiency without sacrificing comfort. Regular calibration and thoughtful programming are the quiet engines of long-term savings.
Upgrading to a smarter thermostat
If your current thermostat feels limited, upgrading to a smart model can simplify control and improve energy efficiency. Smart thermostats offer remote access, learning capabilities, and more precise scheduling. Before buying, verify compatibility with your HVAC system, confirm wiring requirements (C-wire availability), and check your Wi‑Fi setup. When installing, follow the manufacturer’s wiring diagram exactly and reset your system to factory defaults if you swap models. A proper upgrade can provide better temperature accuracy, actionable energy data, and easier maintenance.
Safety, maintenance, and when to call a pro
Electrical work around a thermostat carries risk, especially when dealing with high‑voltage components or 24V control circuits. Always power down at the breaker before removing the faceplate, and never touch exposed conductors. Keep the faceplate clean, avoid moisture, and replace batteries in accordance with the manual. If you encounter damaged wires, persistent power issues, or signs of a faulty control board, pause troubleshooting and contact a licensed HVAC technician. A professional can perform a thorough inspection and safely replace components when needed.
Authority sources and further reading
For additional guidance, consult reputable sources on thermostat use and energy efficiency:
- Energy.gov: Thermostats and energy-saving tips
- Energy Star: Thermostats product guidance
- EPA Indoor Air Quality: How temperature control affects comfort and health Thermostat Care recommends cross-referencing these sources to ensure best-practice troubleshooting and maintenance.
Tools & Materials
- Screwdriver set (Phillips and flathead)(Size #2 commonly fits thermostat screws)
- Non-contact voltage tester(Verify there’s no live current when removing the plate)
- Fresh batteries(For battery-powered thermostats)
- Smartphone or tablet with Wi-Fi/app access(Needed for smart thermostat setup)
- Owner’s manual or model number(To verify compatibility and wiring)
Steps
Estimated time: Total: 20-40 minutes
- 1
Power down and remove the cover
Switch off the HVAC circuit breaker and carefully remove the thermostat faceplate. Take a photo of the wiring before touching anything, so you can restore connections accurately.
Tip: Label wires with tape if you’re unsure where they go. - 2
Inspect wiring for secure connections
Check each wire for looseness or corrosion. Re-seat any loose wires firmly to the correct terminals. If wires look damaged, replace or consult a professional before proceeding.
Tip: Use the photo you took as a reference during reattachment. - 3
Check power sources and batteries
If your unit uses batteries, replace them with fresh alkaline batteries. If it’s powered by 24V, ensure the transformer is delivering power and that the breaker is on.
Tip: Never mix battery types and avoid overtightening screws. - 4
Verify mode, settings, and schedule
Confirm the thermostat is set to the correct mode (heat or cool), and that any schedules match your current routine. Disable hold unless needed to test real-time responses.
Tip: Test by triggering a heat or cooling call to observe system response. - 5
Test HVAC response and calibrate if needed
Turn the system back on and monitor how quickly it reacts to the thermostat’s commands. If temperatures don’t align with the reading, use calibration or offset settings as appropriate.
Tip: Allow 5–10 minutes for the system to stabilize after changes. - 6
Reinstall and verify overall operation
Reattach the faceplate, restore power, and run a full cycle test (heat and cool) to confirm stable operation. If problems persist, proceed to a professional diagnosis.
Tip: Keep a log of observed behavior for the technician.
Questions & Answers
What should I do first when my thermostat stops working?
Begin by confirming power to the unit, then check mode, schedule, and batteries. If the problem persists, follow our step-by-step guide to isolate the issue.
First, check power, mode, and batteries. If it still fails, follow the step-by-step guide to troubleshoot further.
How do I know if my thermostat needs new batteries?
If the display dims, auto-sleep occurs, or the thermostat won’t wake from sleep, it likely needs new batteries. Replace with fresh alkaline cells and test again.
If the display dims or it won’t wake, replace the batteries and test again.
Can a faulty thermostat cause high energy bills?
Yes. A miscalibrated or faulty thermostat can cause your HVAC to run longer than needed, increasing energy use and costs. Calibrate and verify settings to reduce waste.
A faulty thermostat can make your system run longer, raising bills. Calibrate and verify settings to cut waste.
How often should I calibrate my thermostat?
Calibrate whenever you notice temperature variances or after replacing the thermostat. Routine checks during seasonal changes help maintain accuracy.
Calibrate when you notice temperature drift or after changes; do seasonal checks for accuracy.
Is it safe to change thermostat wiring myself?
Only if you’re comfortable with electrical work and power is off. If uncertain, hire a licensed technician to avoid shock or damage.
Only do wiring if power is off and you’re confident. When in doubt, hire a pro.
When is upgrading to a smart thermostat worth it?
If you want remote control, learning schedules, and energy insights, a smart thermostat is often worth it, especially for energy savings and comfort gains.
If you want remote control and energy insight, upgrading can be worthwhile.
Watch Video
What to Remember
- Troubleshoot methodically from power to programming.
- Calibrate readings to align with actual room temperature.
- Smart thermostats require reliable Wi-Fi and current firmware.
- Safety always comes first; shut off power before work.
- Know when to upgrade or call a professional.