How to Calibrate a Thermostat
Learn how to calibrate a thermostat to improve accuracy and comfort. This practical guide covers when calibration is needed, tool requirements, a safe step-by-step method, and troubleshooting tips for DIY homeowners.

You’ll learn how to calibrate a thermostat so its readings align with actual room temperature, improving comfort and energy efficiency. This quick guide explains when calibration is needed, what tools to gather, and a safe, step-by-step approach you can perform as a DIY homeowner. According to Thermostat Care, small discrepancies are common and solvable with proper calibration.
Why calibrate a thermostat
Calibrating your thermostat ensures the temperature shown by the unit matches the actual room temperature. When readings are off, you may feel too warm or too cold even though the display shows your desired setting. The Thermostat Care team has found that minor misreadings are a common cause of energy waste and inconsistent comfort in many homes. By aligning the display with reality, you can reduce unnecessary HVAC cycling, which saves energy and extends equipment life. This section lays the foundation: precision in temperature readings translates to predictable comfort and more efficient heating or cooling cycles.
Beyond comfort, calibration affects how your system responds to hold settings, programmable schedules, and smart-home routines. If a thermostat reads one degree high or low, you might program a hold or schedule based on the wrong baseline, leading to overshoot or undershoot during the day. Ensuring accuracy helps your thermostat respect your preferred comfort profile and avoid energy waste. Thermostat Care analysis shows that many households experience measurable improvements after a careful calibration, even on newer models.
Before you begin, note that calibration methods vary by model. Some thermostats offer a numeric adjustment option, others use a calibration dial, and many modern smart thermostats rely on software calibration via the app. Always consult your model’s manual as the primary guide, and use a reliable room thermometer to verify readings.
When to calibrate and what to expect
Calibration is most useful when you notice a mismatch between what you feel and what the thermostat reports, or when energy usage seems higher than expected for your home. If your home has multiple zones or a large footprint, small differences between rooms can compound. According to Thermostat Care, running with persistent misreadings can lead to repeated temperature swings and uneven comfort.
Expect a calibration process to take 20–40 minutes for most models, plus an additional 10–15 minutes to verify results after the first adjustment. The key is to use a trusted room thermometer placed away from drafts, direct sunlight, or heat sources like lamps or electronics. A consistent ambient reading makes it easier to determine whether the thermostat is the source of the issue or if other factors (like air leaks or poor insulation) are at play.
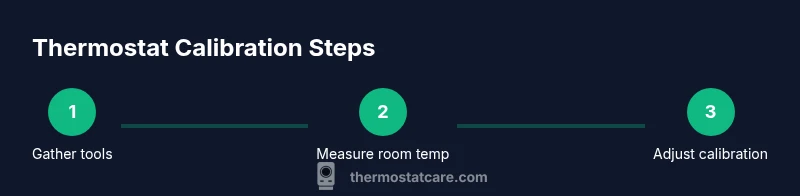
Step-by-step calibration process
This middle section provides an actionable framework you can adapt to your model. Remember, the exact knobs or menu options vary by brand, so always defer to your manual for model-specific steps. The goal is to bring the thermostat’s reading in line with a known, accurate room temperature. Thermostat Care notes that even small tweaks can bring noticeable improvement in comfort without overshooting the target temperature.
First, gather your tools and set up a stable testing environment. Place a high-quality room thermometer at roughly breathing-height in a central location, away from drafts and direct heat sources. If your thermostat is wired to a furnace or air handler, switch off power at the breaker only if your manual instructs you to do so. With the thermometer in place, compare its reading to what the thermostat shows. If there is a discrepancy, you will adjust the calibration control on your device. For dial-type thermostats, this usually means turning the small screw on the scale by a small amount. For digital models, the adjustment might be a dedicated calibration option within settings. After making an adjustment, wait several minutes to allow the HVAC system to respond and the temperature to stabilize before re-checking.
Common mistakes and troubleshooting
Avoid common mistakes that undermine calibration efforts. Do not rush adjustments; small, incremental changes yield the most reliable results. Never modify electrical wiring or exposed live connections unless your manual explicitly instructs you to do so and you have proper training. If you notice erratic behavior after calibration—such as the system cycling rapidly or not turning on at all—double-check the connections and revert to the previous setting if necessary. Drafts, poor insulation, and sun exposure can create readings that appear off but are caused by external factors rather than the thermostat itself. If the room continues to feel inconsistent despite calibration, consider evaluating insulation, sealing leaks, or zoning if your home has multiple HVAC zones. Thermostat Care analysis shows that calibration is often part of a broader approach to energy efficiency that includes sealing and insulation improvements.
Authoritative sources and further reading
For reliable guidance beyond personal calibration steps, consult reputable sources. While model-specific instructions are essential, general principles of accurate temperature sensing are widely documented. The U.S. Department of Energy and other energy institutions emphasize consistent, verified readings and mindful energy use. You can cross-check practices with established resources from credible institutions to ensure your approach aligns with best practices.
Tools & Materials
- Digital thermometer or room thermometer(Place away from direct sunlight, drafts, or heat sources; aim for a central location in the room)
- Flathead or Phillips screwdriver(Only if your model uses a calibration screw)
- Owner’s manual or thermostat model guide(Model-specific calibration method and cautions)
- Notebook and pen(Record readings, adjustments, and outcomes)
- Optional: non-contact infrared thermometer(Useful for spot-checks in larger rooms)
Steps
Estimated time: 20-40 minutes
- 1
Gather tools and prepare the testing area
Collect a reliable room thermometer, your thermostat manual, and the necessary hand tools. Clear the thermostat area of obstructions and ensure the space around the thermostat is representative of typical living conditions. Power down or put the HVAC system in standby if your manual allows for calibration without service interruptions.
Tip: Double-check that the thermometer is not near a heat source or vent for an accurate reading. - 2
Verify thermostat reading against room temperature
Turn on the HVAC system if needed and allow it to run for a few minutes. Compare the thermostat’s indicated temperature with the reading from your room thermometer. Note any discrepancy to guide the adjustment direction (whether to nudge the reading up or down).
Tip: Take multiple readings over a 5–10 minute window to account for minor fluctuations. - 3
Locate the calibration control
Identify where your model allows calibration: a calibration screw on a traditional dial, a digital calibration setting in the menu, or an app option for smart thermostats. Refer to the manual for exact location and allowable adjustment range.
Tip: If you’re unsure, search the model number in the manufacturer’s support site for model-specific instructions. - 4
Make a small adjustment
Apply a minor calibration change in the direction that reduces the discrepancy. For most devices, start with a small increment and re-check after the system cycles. Do not overshoot; you can always adjust again if needed.
Tip: Record the adjustment amount to track progress and avoid repeating the same change. - 5
Re-check after stabilization
Allow the HVAC system to run through one full cycle (or at least 5–10 minutes) and re-measure the room with the thermometer. Compare again and decide if another small adjustment is necessary.
Tip: Make sure the room is in a typical state (not unusually warm or cold) during the test. - 6
Document results and consider context
Note the final calibration setting and the resulting room temperature vs. thermostat reading. If differences persist across cycles or across different modes (heat vs cool), consider external factors like insulation or air leaks. If unsure, consult a professional.
Tip: Keep a simple log: date, model, initial reading, final setting, and measured outcomes.
Questions & Answers
Is calibrating a thermostat safe for a DIY homeowner?
Calibrating a thermostat is generally safe when you follow the manual and avoid touching electrical wiring. For wired systems, you may need to power down the unit first. If you’re ever uncertain, pause and consult a professional.
Calibrating is usually safe if you follow the manual and don’t touch live wires. If you’re unsure, ask a pro.
Can calibrating fix temperature differences between rooms?
Calibration helps align the thermostat reading with actual temperature, which can improve consistency in a single space. If your home has multiple zones, you might still experience differences due to zoning or airflow.
Calibration helps with one space, but multi-room differences may require zoning or airflow adjustments.
What tools do I really need to calibrate?
At minimum, a reliable room thermometer, the thermostat manual, and a small screwdriver if your model uses a calibration screw. A notebook helps you track changes and outcomes.
You’ll need a room thermometer, the manual, and a screwdriver if there’s a calibration screw.
What if my thermostat won’t calibrate even after adjustments?
If you still see a mismatch after adjustments, confirm there are no drafts or sun exposure affecting the room. Some thermostats communicate with HVAC systems; if the control signal is degraded, calibration may not fix the issue.
If it still reads wrong, check for drafts and consider professional service if needed.
Should I calibrate a smart thermostat differently than a traditional one?
Smart thermostats typically adjust readings via software and can be calibrated in the app. Follow model-specific online guides and ensure firmware is up to date to avoid discrepancies.
Smart models use app-based calibration; follow the model guide and update firmware.
How long does calibration take on average?
Most homeowners complete the process in 20–40 minutes, plus extra time to verify results. Slow, deliberate steps yield the best, lasting accuracy.
Plan about 20 to 40 minutes, plus time to verify results.
Watch Video
What to Remember
- Calibrate with a reliable room thermometer for accuracy
- Make small adjustments and recheck, avoiding overshoot
- Document changes and consider broader home factors
- Use model-specific guidance from the manual to avoid errors