How to Check a Thermostat: A Step-by-Step Home Guide
A practical, expert guide for homeowners and DIYers on how to check a thermostat, verify accuracy, and troubleshoot common issues safely. Learn tools, steps, and tips from Thermostat Care to keep your HVAC running efficiently in 2026.

Learn how to check your thermostat and confirm it accurately reflects room temperature and properly controls your HVAC. You’ll verify power, battery, wiring, and sensor readings, then test the system to ensure the setpoint matches the room. This quick guide also notes safety steps and essential tools. According to Thermostat Care, a careful check now prevents bigger heating and cooling problems later.
How thermostats work and why to check
Thermostats are the control center for your heating and cooling system. They measure room temperature and compare it to a setpoint, then send signals to the HVAC to warm or cool accordingly. Over time sensors can drift, wires can loosen, and power supplies can degrade, causing the actual room temp to diverge from the display. Regular checks help you catch issues early, improve comfort, and save energy. According to Thermostat Care, homeowners who perform routine checks report more consistent temperatures and fewer unexpected HVAC cycles. In this overview, we’ll demystify how the thermostat communicates with your furnace or air conditioner and outline the signals you should monitor.
- How the device reads: sensors measure ambient temperature, while the user-selected setpoint tells the system when to act.
- The difference between display temperature and actual room temperature can reveal sensor drift or poor air distribution.
- Power sources vary: some thermostats run on batteries, others on a wired C-wire; power issues are a common cause of erratic behavior.
- Common symptoms of a misbehaving thermostat: if the display is dim, unresponsive, or you notice wrong temperatures, investigate before calling a technician.
According to Thermostat Care, understanding these fundamentals helps homeowners diagnose at a high level before stepping into more involved fixes.
Safety-first: before you touch anything
Safety is the foundation of any thermostat check. Power can be present in multiple parts of the system, and some steps involve exposed wiring. Always start by turning off the thermostat at the display if possible, and flip the corresponding HVAC breaker or disconnect switch if you need to inspect wiring more deeply. Dry hands and a stable stance are essential. If you notice moisture, burn smells, or sparks, stop immediately and call a pro. This approach minimizes the risk of electric shock or damage to your equipment. Thermostat Care emphasizes caution: when in doubt, step back and reassess or hire a licensed technician.
- Ensure your work area is dry and well lit.
- Never bypass safety devices or jumpers just to get a reading.
- If you’re uncomfortable with wiring, skip ahead to battery or sensor checks and consult a professional.
Gather the right tools and prep the testing area
Before you begin, assemble the essentials. A screwdriver set (Phillips and flat-head), fresh batteries if your thermostat uses them, a digital room thermometer for independent temperature checks, and a camera or phone to document wiring. Keep a notepad handy to record readings and any odd behavior. Create a calm testing space: avoid direct sunlight and drafts that could skew room temperature. Having everything on hand minimizes interruptions and keeps you focused. Thermostat Care recommends photographing the back of the thermostat before you touch anything so you can revert to the original wiring if needed.
- Place the thermostat away from heat vents, direct sunlight, or lamps.
- Use a thermometer that measures ambient air, not surface temperature.
- If you must remove the faceplate, perform the reattachment steps in reverse order to avoid miswiring.
Understanding readings: what the numbers mean
Your thermostat’s setpoint is the target temperature, while the displayed current temperature is what the sensor reads in the room. A mismatch between these readings signals potential causes: sensor drift, poor air circulation, proximity to heat sources, or a weak battery. If you notice a consistent gap between the setpoint and actual room temp, consider recalibration if supported, or re-seat the sensor. Remember that some thermostats compensate for humidity or sun exposure, which can explain slight deviations. Thermostat Care highlights that most modern devices include diagnostics to help you identify when calibration or replacement is needed.
- A small offset doesn’t always indicate a fault; some models apply adaptive learning over time.
- Environmental factors (kitchens, bathrooms, or electronics) can affect sensor accuracy.
- Battery health is often the simplest fix for display or sensor instability.
Step-by-step checks you can perform at home (overview)
This section provides a practical pathway to verify the thermostat’s health without diving into risky rewiring. Start with the basics: battery condition, display responsiveness, and power supply. Move on to sensor checks by comparing room temperature against the thermostat’s reading, then inspect the C-wire connection if present. If any step reveals a discrepancy you cannot explain, refer to the device manual for calibration options or seek professional support. This overview aligns with a conservative, safety-first approach recommended by Thermostat Care.
- Keep a log of readings and fixes to track patterns over time.
- Do not force buttons or displays that are unresponsive.
- When calibrating, only adjust what your model explicitly supports.
Checking temperature accuracy and sensor readings
To verify accuracy, compare the thermostat’s displayed temperature with a trusted room thermometer at several points across the home and at different times of day. If you consistently see a gap, you may need to recalibrate or replace the sensor. Some models offer an offset or calibration option; follow the manufacturer’s instructions to apply the correct adjustment. If the thermostat is integrated with a smart home system, ensure the hub or app isn’t introducing latency or a misread due to connectivity delays. Thermostat Care notes that consistent digital readings depend on clean sensors, proper placement, and stable power.
- Take multiple readings to account for natural temperature fluctuations.
- When measuring, keep the thermometer away from sources of heat or drafts.
- If you recalibrate, test the HVAC response immediately after to confirm the effect.
Troubleshooting common issues by scenario
If the HVAC doesn’t respond to setpoint changes, start with power and connectivity checks, then inspect the device’s mounting position and wiring. A display that flickers or goes blank often points to power or battery issues. For models with a C-wire, confirm the wire is securely connected to both the thermostat and control board. If you suspect sensor drift but cannot recalibrate, consider replacing the thermostat or moving it to a more favorable location. The goal is to restore accurate readings and reliable control, which reduces energy waste and improves comfort. Thermostat Care suggests documenting issues as they occur to help identify trends over seasons.
- Always test the system after any adjustment to verify the result.
- If the thermostat still misreads after calibration, consider external factors or a device replacement.
When to replace or call a pro and maintenance schedule
If persistent misreadings or unresponsive controls persist after basic checks, a professional assessment is warranted. Seasonal maintenance—spring and fall—offers a window to verify wiring, sensors, and power supplies before the heating season or cooling peak. Regularly cleaning the thermostat’s interior, updating firmware if applicable, and inspecting connections can extend the device’s life. Thermostat Care’s experience shows that a well-maintained thermostat contributes to steady comfort and energy savings, but safety and warranty considerations should guide major interventions.
- Schedule professional service if you encounter electrical concerns or impossible calibration.
- Keep the thermostat clean and free from dust and debris that can affect sensors.
- Record maintenance dates and outcomes for future reference.
Brand considerations and best practices
Different brands and models offer varying calibration options, power methods (battery vs C-wire), and diagnostics. Always start with the manual for model-specific steps, and avoid mixed instructions across brands. If you’re unsure, choose a model that aligns with your existing HVAC control strategy and supports remote monitoring without compromising safety. The Thermostat Care team recommends sticking to manufacturer guidelines and, when in doubt, consulting a qualified technician to prevent costly mistakes.
Tools & Materials
- Screwdriver set(Phillips head #2 or flat-head as needed)
- Fresh batteries(Check model type (AA/AAA) and replace before testing)
- Digital room thermometer(Place away from heat sources; read at mid-wall level)
- Camera or smartphone(Document wiring before disconnecting; helps reassembly)
- Non-contact voltage tester(Optional for power verification on exposed terminals)
Steps
Estimated time: 30-45 minutes
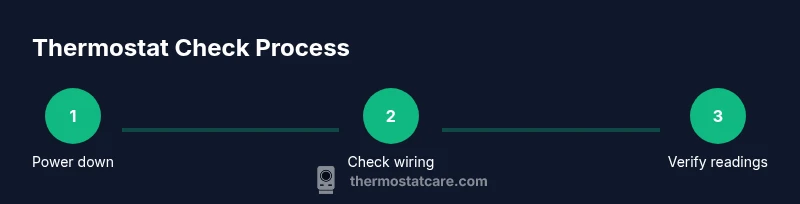
- 1
Power down and remove the cover
Turn off the thermostat from the display, then switch off the corresponding HVAC breaker if you need to access wiring. Gently remove the faceplate to expose terminals. Do not touch live conductors; keep everything dry and hands clean.
Tip: Take a photo of wiring before touching anything to ensure correct reassembly. - 2
Check the power source (batteries or C-wire)
If your thermostat uses batteries, replace them with fresh ones and test the display. If it relies on a C-wire, ensure the wire is securely connected to both the thermostat and the control board. A loose power source is a common cause of erratic readings.
Tip: Use a multimeter or non-contact tester only if you’re comfortable; otherwise, rely on battery replacement and visual inspection. - 3
Inspect and reseat wires
Carefully inspect all wires for corrosion or loose terminals. If a wire is loose, reseat it firmly in its terminal. Note color coding before removing any other connections.
Tip: Document the current wiring with photos; this makes reassembly safer. - 4
Compare thermostat reading with room thermometer
Place a digital thermometer at mid-wall height away from direct heat sources and compare its reading to the thermostat display. If there’s a gap, consider calibration if your model supports it or locate sensor drift.
Tip: Take multiple readings over 15–20 minutes to account for minor fluctuations. - 5
Calibrate or adjust offset (if supported)
Access your thermostat’s settings to see if an offset or calibration option exists. Apply the recommended adjustment and save changes. Re-test after 10–15 minutes of normal operation.
Tip: Only adjust settings the manufacturer explicitly supports; avoid wiring changes unless you’re trained. - 6
Test heating and cooling response
Set the thermostat to a higher/lower setpoint and observe how quickly the HVAC responds. Check both heat and cool modes if your system supports them. Make sure the system cycles normally without excessive short cycling.
Tip: If the system doesn’t respond, stop and recheck power or call a pro before continuing. - 7
Reassemble and perform a final test
Reattach the thermostat faceplate and restore power. Allow the system to run through a full cycle and verify that the display aligns with the room temperature. If issues persist, consult the user manual or contact support.
Tip: Keep a record of readings and changes for future reference.
Questions & Answers
Why is my thermostat reading different from room temperature?
Differences can arise from sensor drift, proximity to heat sources, or drafts. Calibrate if supported, or relocate the thermostat away from heat sources to improve accuracy.
Differences between thermostat readings and room temperature can come from sensor drift or nearby heat sources. Calibrate if your model allows, and move the thermostat away from heat sources to improve accuracy.
Can I calibrate a thermostat myself?
Many thermostats offer calibration or offset options in their settings. Refer to the manual for model-specific steps and avoid changing wiring unless instructed.
Yes, many models let you calibrate in the settings. Check your manual for model-specific steps.
What should I do if the display is blank?
First, check the power source and replace batteries if needed. If the C-wire is used, ensure power is applied to the system. If the problem persists, seek professional help.
If the display is blank, check power and batteries first. If it persists, contact a professional.
How often should I check thermostat performance?
Seasonal checks are recommended, especially during seasonal transitions. Do quick spot checks if you notice odd temperature swings.
Check it seasonally, and whenever you notice odd temperature swings.
Do smart thermostats require a C-wire?
Most smart thermostats require a common wire (C-wire) for stable power. If you lack a C-wire, consider a model that works without it or use a compatible power adapter.
Most smart thermostats need a C-wire. If you don’t have one, use a model that works without it or a power adapter.
What basic tools do I need to check a thermostat?
You’ll want a screwdriver, fresh batteries, a digital thermometer, and a way to document wiring. A non-contact tester is optional but helpful.
Screwdriver, fresh batteries, a thermometer, and a way to document wiring will do. A tester is optional but handy.
Watch Video
What to Remember
- Verify power and battery first before touching wiring.
- Compare thermostat readings with a room thermometer for accuracy.
- Document wiring with photos and follow manufacturer instructions.
- Calibrate only if the model supports it and test results immediately.
- If issues persist, consult a professional.