What to Do When Your Thermostat Stops Working
A step-by-step, urgent guide for homeowners and DIY enthusiasts to diagnose and fix a thermostat that won’t work, with safe fixes, diagnostic flow, and when to call a pro.

Most thermostat outages come from power issues or battery depletion. Start simple: replace batteries if applicable, confirm the furnace and thermostat have power, and perform a quick reset of both devices. If there’s still no response, move to a structured diagnostic flow to identify the faulty component.
Common Causes That Break Thermostats
When a thermostat stops working, it’s usually something simple rather than a mysterious fault. The first culprits are power and batteries: a dead battery (for non‑hardwired models) or a tripped breaker can render the display dark or unresponsive. Another frequent issue is loose wiring or a degraded C‑wire connection, especially after renovations or seasonal temperature swings. For smart thermostats, app integration problems, outdated firmware, or a weak Wi‑Fi signal can also cause erratic behavior. Finally, age matters: a thermostat with a worn sensor or cracked circuit board may fail without warning. According to Thermostat Care, many outages are repairable with basic checks, and most homeowners can resolve them without replacing the entire unit. Being methodical and patient helps prevent unnecessary parts swapping. The goal is to narrow down the root cause, not to guess.
Additionally, consider how the thermostat interacts with your HVAC system. Some failures aren’t the thermostat itself but the furnace or air handler not receiving the proper call for heat or cooling. For example, a faulty thermostat signal can leave your house uncomfortable while the system remains idle. Use a calm, systematic approach to isolate the issue before deciding on replacement.
Thermostat Care analysis shows that a large share of outages involve power or wiring issues rather than a full unit failure, so focus your early checks there.
Safety First: Power and Wiring Checks
Power and wiring are the low-hanging fruit when your thermostat stops responding. Before you touch any wiring, switch off the power to the thermostat at the circuit breaker to avoid shocks or damage.
- Verify batteries: If your thermostat uses replaceable batteries, replace them with fresh alkaline or lithium cells. If the display brightens but readings are erratic, a weak battery is often the culprit.
- Check the power source: For hardwired models, ensure the thermostat’s HVAC circuit is energized. Look for a tripped breaker or a blown fuse in the main panel and reset or replace as needed. If you rely on a 24V transformer, confirm it’s delivering the correct voltage at the thermostat’s terminals.
- Inspect wiring: With power off, gently loosen and reseat wires on the thermostat terminals. Look for loose, corroded, or damaged wires, especially the C‑wire. If you see signs of damage, plan a wiring repair or consult a pro.
- Check the furnace/air handler: A non‑responsive furnace can mimic thermostat failures. Confirm the furnace switch is ON and that the inducer, blower, or control board aren’t tripped by a separate fault.
If you’re unsure about any step, pause and consider professional help to avoid compromising safety or equipment.
Quick Fixes You Can Try Right Now
When time is of the essence, these quick fixes can often restore basic functionality and comfort. Start with the simplest actions and escalate only if needed.
- Battery replacement: If your unit uses batteries, install fresh ones, matching the polarity. A single dead battery can disable the display or cause the thermostat to reboot constantly.
- Power cycle: Turn off power to the thermostat and HVAC system for at least 60 seconds, then restore power. This can clear minor glitches or memory faults in the control electronics.
- Re-pair or reconnect: For smart thermostats, use the official app to reconnect to Wi‑Fi or re‑pair with the HVAC system. Update firmware if prompted.
- Check temperature sensors: Ensure the room temperature in the app matches actual readings. A miscalibrated sensor can cause the thermostat to misinterpret the environment.
- Inspect the environment: Dirty or obstructed sensors, extreme temperatures near the device, or blocked vents can affect readings and operation.
If the thermostat still won’t respond after these steps, move to the diagnostic flow to pinpoint the exact cause.
Resetting and Reconfiguring a Smart Thermostat
Smart thermostats bring convenience, but they also introduce complexity. A reset can clear stubborn software hiccups, but it should be the last resort after basic checks.
- Soft reset: Many models support a soft reset from the settings menu. This preserves most programming while refreshing the control logic.
- Factory reset: Use caution—the factory reset erases all schedules and connections. Back up any custom settings in the companion app and re‑enter Wi‑Fi credentials afterward.
- Re-pairing: After a reset, re‑pair with the HVAC system and re‑install in the home app. Confirm device visibility on the network, update any permissions, and re‑enable any smart home routines.
- Firmware: Check for and install any firmware updates. Updates often fix bugs that cause non‑responsiveness or erratic readings.
If the problem persists, a hardware fault may be at play, and you should consider professional evaluation.
When to Call a Pro and What to Expect
Some thermostat issues require professional attention, especially when power wiring, gas furnaces, or complex control boards are involved. If you smell gas, hear unusual buzzing, or the HVAC system behaves erratically after basic resets, stop and call a licensed technician immediately. For smart thermostats, if the device is still unresponsive after a factory reset and app re‑installation, a pro can diagnose wiring faults, sensor failures, or control board problems without risking your equipment.
What to expect from a visit:
- A safety assessment of power and wiring
- Verifying C‑wire continuity and 24V integrity
- Testing the thermostat’s communications with the HVAC system
- Replacement of defective components or a full unit if necessary
Preparation tips for the visit include having model numbers, any error codes, and a summary of recent changes (renovations, new wiring, firmware updates).
Maintenance and Prevention to Avoid Future Outages
Prevention is the best remedy for inconvenient thermostat outages. Regular maintenance reduces the risk of sudden failures and helps extend the life of your system.
- Schedule annual checks: Have a licensed HVAC technician inspect wiring, connections, and the control board. This ensures everything remains within spec and catch issues early.
- Clean and inspect sensors: Dust and debris can affect readings. Gently vacuum or wipe around sensor openings to keep readings accurate.
- Replace batteries proactively: For battery-powered thermostats, replace batteries on a schedule (e.g., every 12–18 months) before they fail.
- Keep the environment stable: Avoid placing the thermostat in direct sunlight, near heating vents, or behind closed doors where the environment can skew readings.
- Update firmware and apps: Enable automatic updates for both the thermostat and any home automation apps to fix bugs and improve compatibility.
Proactive maintenance aligns with Thermostat Care’s guidance and helps you stay ahead of issues before they disrupt comfort. The Thermostat Care team emphasizes routine checks as a practical habit for 2026 and beyond.
Glossary: Key Thermostat Terms You Should Know
Understanding common terms helps you troubleshoot more effectively and communicate with pros. Here are quick definitions for the most frequent terms you’ll encounter.
- C-wire: The common wire that provides a constant 24V power supply to the thermostat. A loose or missing C-wire is a frequent cause of power loss.
- Setpoint: The target temperature you want the system to maintain. Changes in setpoint can trigger unexpected cooling or heating if misconfigured.
- Hysteresis: The temperature band the system uses to turn the heating or cooling on and off; improper hysteresis can cause short cycling or uneven comfort.
- Heat/Cool anticipators: Devices or software routines that predict heating or cooling needs; malfunctions can cause delayed or abrupt responses.
- Firmware: The software that runs the thermostat. Updates fix bugs and improve compatibility with HVAC equipment.
Knowing these terms helps you interpret error messages, app notifications, and explanations from technicians. With clear language, you can make informed decisions and reduce downtime when your thermostat stops working.
Steps
Estimated time: 60-90 minutes
- 1
Power down and inspect obvious issues
Turn off power to the thermostat at the circuit breaker. Check for obvious visual issues like loose wires, corrosion, or damaged connectors. This initial check prevents shocks and helps you identify clear problems.
Tip: Take a photo of wiring before you touch anything. - 2
Check and replace batteries
If your thermostat uses batteries, replace with fresh ones of the correct type. A weak battery can cause reboot loops or a blank screen.
Tip: Keep spare batteries on hand to avoid repeat trips. - 3
Test power to the HVAC system
Confirm the furnace or air handler is powered, and the 24V transformer is delivering power to the stat. Reset the breaker if needed and recheck after a minute.
Tip: If the display returns briefly and then goes out, note any error codes. - 4
Reseat wires and check C-wire
With power off, loosen terminals and reseat wires. If using a C-wire, ensure it’s firmly connected and not damaged.
Tip: Use a multimeter to verify 24V across R and C if available. - 5
Reset the thermostat
Perform a soft reset via the settings menu, then a factory reset only if necessary. Reconfigure schedules and network settings after a factory reset.
Tip: Back up settings if the app allows it. - 6
Update firmware and re-pair
Install any available firmware updates and re-pair the thermostat with the Wi‑Fi network and HVAC system.
Tip: Ensure strong Wi‑Fi signal during pairing. - 7
Call a professional if unresolved
If the issue persists after all checks, a licensed technician can diagnose wiring, sensor, or control board faults safely.
Tip: Don’t attempt internal repairs beyond basic checks.
Diagnosis: Thermostat does not respond to user input or displays inconsistent readings
Possible Causes
- highPower issue (tripped breaker, blown fuse, dead battery)
- mediumLoose or damaged wiring, especially C-wire
- lowFaulty thermostat component or sensor
Fixes
- easyRestore power to the thermostat: reset breakers/fuses, replace batteries, and power cycle the unit
- mediumReseat and secure wires, verify C-wire continuity, and inspect the furnace control board for burns or corrosion
- hardReplace the thermostat or call a professional if a broken sensor or control board is identified
Questions & Answers
Why won’t my thermostat respond to commands even though the display is on?
Unresponsiveness is most often caused by a power issue, a weak battery, or a loose wire. Start with fresh batteries, power cycling, and reseating connections. If the problem persists, consider resetting the device or contacting a professional.
If your thermostat won’t respond, first check power and batteries, then try a quick reset. If it still won’t respond, a professional evaluation may be needed.
What should I do first if the thermostat screen is blank?
First confirm power to the unit and replace any dead batteries. Check the circuit breaker and ensure the HVAC wiring is secure. If the screen remains blank, a deeper diagnostic may be required, possibly by a pro.
If the screen is blank, start with power and battery checks, then verify breakers and wiring. If it remains blank, seek professional help.
Is it safe to reset my thermostat myself?
Yes, a soft reset is generally safe and can fix minor glitches. A factory reset should be a last resort because it erases schedules and connections. Always back up settings if possible.
Resetting is usually safe if you follow the device’s steps; a factory reset is only if necessary.
How often should I update the thermostat firmware?
Check for updates monthly or whenever you notice issues. Firmware updates improve stability and compatibility with your HVAC system and apps.
Check for updates regularly to keep your thermostat working smoothly.
When should I call a professional for thermostat issues?
If power issues persist after basic checks, or if you smell gas, hear unusual noises, or suspect wiring problems, contact a licensed technician for safety and accuracy.
If basic checks don’t fix it, or you sense electrical hazards, call a pro.
Can a faulty thermostat cause HVAC damage?
A malfunctioning thermostat can lead to improper furnace operation and short cycling in rare cases. If you notice odd furnace behavior, seek professional diagnosis.
A bad thermostat can affect HVAC operation; get a pro if behavior is abnormal.
Watch Video
What to Remember
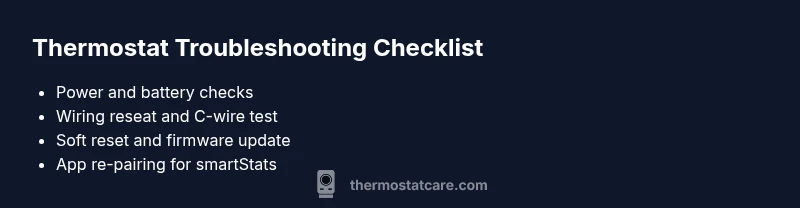
- Check power and batteries first.
- Reset and reconfigure before replacing hardware.
- Verify wiring, especially the C-wire.
- Call a pro if electrical or gas hazards appear.
- Maintain yearly HVAC checks to prevent outages.