What to Do When Your Honeywell Thermostat Is Not Working: Quick Troubleshooting
Comprehensive, urgent guide to diagnose and fix a Honeywell thermostat not working, with step-by-step checks, safety tips, and when to call a pro.

Your Honeywell thermostat isn’t responding or failing to hold the set temperature. Start with the basics: check the power, ensure the thermostat is properly wired, and confirm the display is on. If simple resets don’t help, re-pair the thermostat with your system or check the circuit breaker. If the screen is blank or readings jump, proceed with more advanced troubleshooting or call a professional.
Quick Start: Immediate checks for a Honeywell Thermostat Not Working
If your Honeywell thermostat isn’t responding, start with the basics before diving into wiring or firmware. According to Thermostat Care, the most common failures begin with power, simple settings, or connectivity. First, check that the thermostat display is on. If the screen is dim or blank, confirm the unit is receiving power from the HVAC circuit or its power adapter. Make sure the thermostat is not in off mode or sleep mode. Verify the room sensor is properly placed and not obstructed.
Next, inspect the circuit breaker or fuse feeding the thermostat and furnace. A tripped breaker will cut power to all components. For battery-powered models, replace the batteries with fresh ones and reseat the battery compartment. If your thermostat is a smart model, verify it is connected to Wi‑Fi and that the mobile app is not reporting a connection issue. Then, attempt a simple reset per the Honeywell model’s instructions. If the display resumes and the system responds, test by raising or lowering the setpoint a few degrees and listening for HVAC activity.
If these quick checks don’t restore function, proceed to the deeper flow described below and consider whether you need a professional assessment.
Common Causes of Honeywell Thermostat Malfunction
Most thermostat problems fall into a few recurring categories. Thermostat Care analysis shows that power issues, faulty wiring, dead batteries, sensor problems, and app connectivity are the frequent culprits. A brief checklist in this section helps you sift quickly between causes.
- Power and circuit issues: A tripped breaker or an outlet without voltage can render the thermostat unresponsive.
- Wiring faults: Loose, frayed, or misconnected wires between the thermostat and the furnace control board can prevent commands from reaching the HVAC equipment.
- Battery and sensor problems: Non‑wired or old batteries can cause the display to fade or lose accuracy in readings.
- Connectivity: Smart thermostats rely on Wi‑Fi; a weak network can cause delays or missed commands.
- Firmware and compatibility: Outdated firmware or mismatched components can degrade performance.
Understanding these categories helps you target the right cause and avoid unnecessary replacements. The Thermostat Care team emphasizes a methodical approach rather than guesswork.
Safety First: Power, Wiring, and Battery Safety
DIY work on thermostats usually involves electricity and furnace wiring. Always turn off power at the breaker before touching any wires or the thermostat base. If you’re unsure about wiring, avoid using metal tools near live terminals and consult a pro. For battery models, use fresh batteries from a reliable brand and reseat the compartment securely. Keep the thermostat away from moisture and protect the wall plate from dust. Finally, never bypass safety features or re‑wire components in ways not described by the manufacturer. Safety protects you and your HVAC system, and it helps prevent costly damage. According to Thermostat Care, when in doubt, pause and seek professional help rather than guessing.
Diagnostic Flow: Symptom to Diagnosis
A simple, repeatable diagnostic flow reduces confusion. Start with the most visible symptoms and move to the least invasive fixes.
- Symptom: Display blank or unresponsive screen.
- Step: Confirm power and circuit status, then check for firmware updates.
- Symptom: Readings drift or commands don’t reach the HVAC.
- Step: Inspect wiring at both ends and verify C-wire continuity.
- Symptom: Connectivity issues on a smart model.
- Step: Check Wi‑Fi signal strength and re-pair the thermostat to the network.
If the symptom remains unresolved after these steps, consult the guide’s later sections for deeper fixes, and remember that a pro can safely handle electrical tasks beyond basic checks.
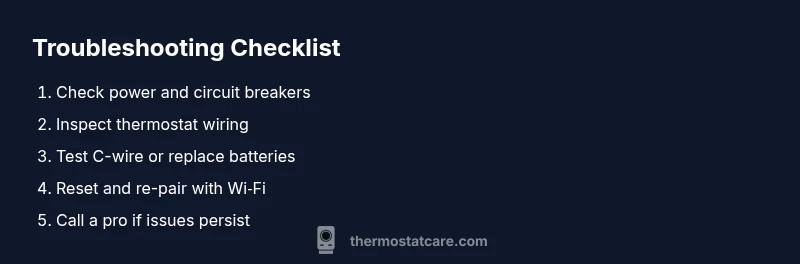
Step-by-Step Fix: Addressing Power and Wiring Issues
This section provides a concise, practical sequence you can follow to fix the most common root causes. It lays the groundwork for the detailed, model-specific steps in the next section.
- Power down and safety: Turn off power to the thermostat at the breaker and confirm the HVAC system is also de-energized. Tip: Use a non-contact tester if available to confirm no live voltage.
- Verify power at the thermostat: Look for a visible display or status lights. If there’s no power, recheck the breaker and outlet supply.
- Inspect wiring: Remove the faceplate and inspect all wires for looseness or damage. Reseat connections on both the thermostat and furnace control board. Tip: Take a quick photo before disconnecting wires to aid reassembly.
- Check C-wire and batteries: Ensure C-wire continuity if applicable; replace batteries in battery-powered units.
- Reset and re-pair: Do a factory reset following the model manual, then re-pair to Wi‑Fi or the furnace control board. Tip: Record network credentials before reconnecting.
- Test the system: Set a new temperature and observe a response from the HVAC system in both heating and cooling modes. Tip: If there’s any hesitation, stop and verify wiring again.
- Call for help if needed: If the thermostat still won’t respond after these steps, schedule professional service. Pro tips: keep model numbers and recent changes handy to speed diagnosis.
TIPS & WARNINGS for Safe DIY
- Pro tip: Label wires before disconnecting to simplify reassembly.
- Warning: Never work on live electrical components near the furnace.
- Note: Keep the thermostat away from heat sources and direct sunlight to prevent misreads.
- Pro tip: For smart thermostats, verify Wi‑Fi stability and firmware updates to prevent disconnects.
Prevention and Maintenance for Long-Term Reliability
Set a seasonal reminder to inspect and clean the thermostat’s faceplate and surrounding area. Confirm there are no drafts or obstructions affecting readings, and ensure the unit remains on a stable power source. Avoid over cycling the system and secure wires to prevent loosening. For smart thermostats, maintain a reliable Wi‑Fi network and apply firmware updates promptly. Thermostat Care recommends keeping a simple log of any issues to spot recurring patterns early.
Final Thoughts and When to Seek Help
The Thermostat Care team recommends following the step-by-step guide and the diagnostic flow above to restore function quickly and safely. If you’ve checked power, wiring, and network and your Honeywell thermostat still won’t work, professional service is the best course. With careful checks and proper resets, most common issues resolve without replacement.
Steps
Estimated time: 30-60 minutes
- 1
Power down and safety
Turn off the breaker for the thermostat, then remove power from the HVAC system to ensure safety while inspecting wires.
Tip: Always start with safety and confirm power is off. - 2
Verify power at the thermostat
Check that the display is on and not stuck in sleep mode; if needed, test the circuit with another device to confirm power availability.
Tip: A working outlet elsewhere can help verify supply. - 3
Inspect wiring
Remove the faceplate and check wires for loose connections; reseat and secure all terminals at both ends.
Tip: Take a photo before disconnecting wires for reference. - 4
Check C-wire and batteries
For wired models, confirm C-wire continuity; for battery-powered models, install fresh batteries.
Tip: A bad C-wire can mimic power issues. - 5
Reset and re-pair
Factory reset according to the model manual, then reconnect to Wi‑Fi or the HVAC control board.
Tip: Have network credentials ready before reconnecting. - 6
Test the system
Set a new temperature and observe HVAC activation; test both heating and cooling modes.
Tip: If there’s any delay, recheck wiring and power once more. - 7
When in doubt, call a pro
If the unit still won’t respond after these steps, professional inspection is the safest option.
Tip: Provide model number and symptoms to speed diagnosis.
Diagnosis: Thermostat is unresponsive or displays incorrect readings
Possible Causes
- highPower issue (outlet, breaker, or supply)
- mediumLoose, damaged, or misconnected wiring between thermostat and furnace control board
- lowDead or weak batteries (for non‑powered models)
- mediumConnectivity problems (smart thermostat, Wi‑Fi, or app)
- lowInternal sensor fault or outdated firmware
Fixes
- easyCheck the thermostat’s power source: circuit breaker, outlet, and supply
- mediumInspect and reseat wiring at both ends; secure loose connections
- easyReplace batteries if applicable or ensure a proper C-wire connection
- mediumReset or re-pair the thermostat with Wi‑Fi or the HVAC control board; update firmware if available
- hardIf problems persist, contact a licensed HVAC technician or thermostat specialist
Questions & Answers
What should I do first when my Honeywell thermostat stops responding?
Begin with power and display checks, ensure the unit is on, and test a simple reset before moving to deeper fixes. Confirm no battery or Wi‑Fi issues block operation.
First, check power and display, then try a simple reset. If that doesn’t fix it, move to deeper steps.
Can a dead battery cause a blank thermostat screen?
Yes, especially on battery-powered thermostats. Replace with fresh batteries and reseat the compartment to restore display and responsiveness.
Yes, replace the batteries and reseat the compartment to restore the screen.
Is it safe to tinker with wiring or furnace connections?
Only if you have electrical training. Always power down at the breaker and consult a professional for any advice beyond basic inspections.
No—if you’re unsure, stop and call a pro.
Should I reset my Honeywell thermostat to factory settings before replacing it?
A factory reset can fix software glitches, but it won’t repair hardware faults. Check the model’s manual and back up settings if possible.
A reset might fix software glitches, but hardware faults may remain.
When should I replace a Honeywell thermostat rather than repair it?
If recurrent issues persist after fixes, or the control board and sensors show wear, replacement is often more cost-effective than continued repairs.
If problems keep coming back, it’s usually time to replace.
Watch Video
What to Remember
- Start with power checks before touching wiring.
- Verify C-wire connectivity and battery status on the thermostat.
- Reset and re-pair the device before considering replacement.
- Call a pro when DIY fixes fail or involve electrical work.