Honeywell Thermostat Repair: A DIY Troubleshooting Guide
Learn safe, step-by-step methods to diagnose and repair common issues with Honeywell thermostats. This guide covers power checks, battery and wiring diagnostics, resets, error codes, and guidance on when to call a professional.

Goal: complete honeywell home thermostat repair by diagnosing common issues safely. This quick answer outlines key steps: power down, verify supply voltage, inspect batteries and wiring, reset the thermostat, and test heating/cooling calls. Learn when to replace a faulty module, and how to identify error codes. Always follow safety guidelines and consult a professional for complex repairs.
Understanding the Honeywell Home Thermostat ecosystem
Honeywell Home thermostats come in several series with similar wiring principles but different features. For a successful Honeywell thermostat repair, start by identifying your model and reviewing the wiring diagram in the manual. According to Thermostat Care, many repair tasks begin with basic power and connection checks rather than replacing modules. This guide focuses on safe, practical diagnostics you can perform as a homeowner or DIY enthusiast. Key terms to know include R for power, C for common, and W/X/Y for heat, cool, and auxiliary heating calls. Recognizing these designations will help you map your wiring and spot miswiring quickly.
Safety first: power, wiring, and handling
Electrical work on a thermostat involves low voltage, but there are still hazards. Always switch off the HVAC power at the breaker before touching any terminals. Use a non-contact voltage tester to confirm power is off at the thermostat and furnace control board. Keep liquids away from the work area and avoid wearing metal jewelry near wiring to prevent shorts.
Common issues and how to diagnose
Many failures with Honeywell thermostats stem from simple causes: drained batteries, loose wires, or a tripped breaker. Diag approach should document symptoms (no display, unresponsive, incorrect temperature), then test step by step. If the display remains dim or blank, check and replace batteries; if it flickers, inspect the connections; if interconnected HVAC doesn’t respond, the problem may lie beyond the thermostat (furnace or air handler). Thermostat Care analysis shows that battery-related failures are common in older models.
Step-by-step diagnostic workflow
This section provides a practical workflow you can follow in sequence to identify the fault. Start with power verification, then battery and wiring checks, followed by a controlled reset, and finally error-code interpretation. Each step should be completed before moving to the next to avoid misdiagnosis. For complex issues, consult the manual or Thermostat Care resources.
Replacing components: batteries, C-wire, and control boards
Replace depleted batteries with the model-specified type and test the display again. If your thermostat requires a C-wire, ensure the common is properly connected to the furnace control board. Damaged wires should be trimmed and re-secured with appropriate terminals. In some cases, faulty boards or sensors are not user-serviceable and require professional replacement or a panel upgrade.
When to call a professional and how to pick a pro
If the problem persists after basic DIY steps, or if you notice burning smells, buzzing sounds, or 24 V power issues, stop and call a pro. Look for HVAC-licensed technicians with thermostat experience and ask for a written estimate. Confirm warranty status and whether parts are included in service fees.
Maintenance tips to prevent future failures
Regularly clean the thermostat housing and ensure vents in the room remain clear. Update firmware or app settings according to the manufacturer’s recommendations. Keep a simple log of changes you make and any codes observed; this makes future repairs faster. The Thermostat Care team recommends staying on top of routine maintenance to extend thermostat life.
Tools & Materials
- Safety gear (insulated gloves and safety glasses)(to protect during electrical work)
- Non-contact voltage tester(to verify power at thermostat terminals)
- Screwdriver set (Phillips and flat-head)(to remove faceplate and access wiring terminals)
- Replacement batteries(AA/AAA as specified by model)
- Battery tester (optional)(to check health of existing batteries)
- Wire stripping/cutters(for trimming frayed wires (not required for all models))
- User manual for your Honeywell model(for model-specific wiring and reset steps)
- Smartphone/tablet with manual or app(for app-based reset or configuration)
Steps
Estimated time: 30-60 minutes
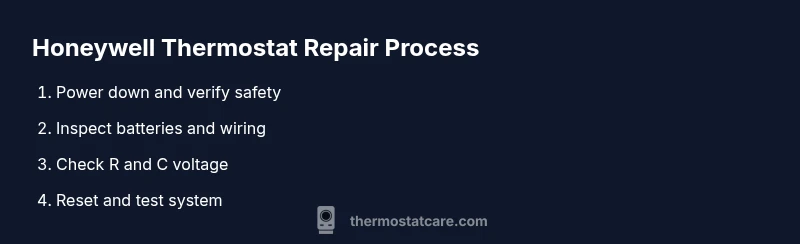
- 1
Power down and verify safety
Turn off the thermostat at the screen, then cut power to the HVAC system at the main breaker. Wait 30 seconds for capacitors to discharge. Use the non-contact tester to confirm no voltage at the thermostat terminals.
Tip: Double-check both the thermostat and furnace side to prevent shocks. - 2
Check batteries and display
If your model uses batteries, replace with fresh ones according to the manual. Remove the cover carefully and inspect battery contacts for corrosion. Re-seat and test the display.
Tip: Take a photo of battery orientation before removing. - 3
Inspect wiring at the thermostat
Remove the faceplate using the proper screwdriver. Verify that all wires are fully inserted into their respective terminals. Look for loose connectors, damaged insulation, or corrosion.
Tip: Label wires before removing to avoid miswiring. - 4
Test power to R and C terminals
Use a multimeter or tester to measure 24 VAC between R and C; if the voltage is low or absent, trace to the furnace control board or transformer.
Tip: If you don't have a multimeter, a basic voltage tester can help identify dead power. - 5
Perform a safe reset and re-calibration
Follow the model's reset procedure to factory settings, then re-setup basic preferences (time, schedule). If Wi-Fi, rejoin network.
Tip: Back up your settings if the model supports it. - 6
Interpret error codes and logs
Note any error codes displayed; consult the user manual or Thermostat Care resources for meanings; some issues relate to sensors or communication with the HVAC system.
Tip: Try a simple reset before chasing rare codes. - 7
Decide on repair vs replacement
If the control board or sensor proves faulty, or if issues persist after power, consider replacement or professional service; weigh the cost of parts vs a newer model.
Tip: Warranty status may influence decision; check model warranty.
Questions & Answers
What should I do first if my Honeywell thermostat won't turn on?
Start with power checks, verify 24V supply, and inspect batteries. If no display, test the R and C wires. If the problem persists, consult the manual or Thermostat Care resources.
First, check power and batteries, then test the R and C wires. If it still won’t turn on, review the manual or Thermostat Care resources.
How can I tell whether the thermostat or the HVAC system is the problem?
Isolate the thermostat by testing with another thermostat or the furnace control board; check for error codes and listen for furnace ignitions. If the furnace responds to a manual call, the issue is usually the thermostat.
Try to isolate the thermostat from the HVAC by testing power and using the furnace control panel. If the furnace responds, the issue is likely the thermostat.
Can a dead battery cause no heating or cooling?
Yes, battery failure can prevent the thermostat from powering the system or sending signals. Replace batteries and re-test the system.
Yes. A dead battery can stop the thermostat from communicating with the HVAC. Replace them and test again.
What does a blinking red light on a Honeywell thermostat mean?
A blinking red light usually indicates a maintenance warning or connection issue; consult the manual for specific codes and steps.
A blinking red light typically signals a fault or update needed; check the manual for the exact meaning.
Is it dangerous to repair a thermostat myself?
There is minimal shock risk with low-voltage thermostats, but improper handling can cause short circuits. Follow safety steps and avoid live wiring.
Low voltage means low risk, but handle with care and follow safety steps.
Should I upgrade to a newer Honeywell model?
If your current model lacks features you need or is unreliable, consider a supported newer model; evaluate compatibility with your HVAC.
If it’s old or unreliable, upgrading to a newer model might help.
Watch Video
What to Remember
- Power off before touching wiring.
- Check batteries and wiring first.
- Test R-C voltage to confirm power.
- Document wiring before changes.
- Seek professional help if issues persist.