How to Make Honeywell Thermostat Work: A Homeowner's Guide
A practical, step-by-step guide to troubleshoot and fix common Honeywell thermostat issues. Power checks, wiring verification, resets, and best practices for DIY homeowners.

This guide shows how to get a Honeywell thermostat working again by verifying power, confirming wiring, and ensuring correct settings. You’ll learn safe, DIY steps you can perform, plus indicators for when to call a pro. By the end, your thermostat should display correctly and respond to changes reliably.
Why Your Honeywell Thermostat Might Stop Responding
If your Honeywell thermostat won't wake, display is blank, or it ignores temperature changes, start with the basics. A majority of common issues stem from power problems or misconfigured settings rather than a faulty HVAC system. According to Thermostat Care, most DIY fixes involve checking that the device is powered, the batteries are fresh (if applicable), and that the configuration matches the current HVAC setup. This section helps you diagnose the root cause without guessing. Remember, taking methodical steps protects your equipment and your time. If the display is completely dark, you’re likely facing power loss or a dead battery; if you see a faint glow, power delivery might be unstable. In any case, proceed with structured checks to prevent accidental damage and ensure you’re addressing the real problem.
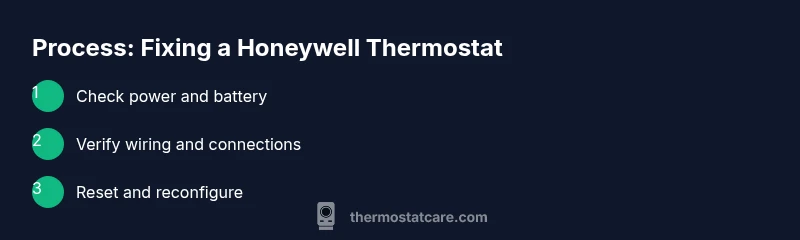
Basic power and battery checks
Power and battery status are the foundation of a working thermostat. Start by turning off power to the circuit at the breaker to avoid shorts or shocks. If your Honeywell model uses replaceable batteries, install a fresh pair of high-quality batteries, observing polarity. For hardwired models, confirm that the 24-volt common (C-wire) and R-wire are securely connected. Some units rely on a stable 24V supply; a tripped breaker, blown fuse, or loose terminal can cause intermittent behavior or a completely unpowered display. After checking power, turn the system back on and observe the screen. If the screen remains dead, recheck the battery installation and perform a gentle reseating of wires at the thermostat base. If you’re unsure about wiring colors, consult the model’s wiring diagram in the manual or Thermostat Care’s troubleshooting guide. This step is essential before moving to more involved checks because power issues are the most frequent culprits behind nonresponsive thermostats.
Verify wiring and connections
Wiring mistakes are a common cause of Honeywell thermostat problems. Remove the thermostat cover only after confirming the power is off. Inspect the terminal strip: ensure each wire is fully seated, not frayed, and matched to the label on the base. Common mistakes include mixing up R and RC, or leaving a jumper wire in the wrong position on compatible models. If you have a C-wire, confirm it is securely connected to the C terminal. For heat-only or cool-only setups, verify that the appropriate wires are landed on the W or Y terminals as required for your system. After adjusting, reattach the cover and restore power. Test the unit by setting a simple temperature change and observing whether the HVAC responds. If there’s still no response, you may need to reset the thermostat to apply correct defaults.
Resetting and reconfiguring the thermostat
A safe reset can resolve lingering configuration issues without affecting your HVAC wiring. First, locate the reset option in the menu according to your Honeywell model. For many units, you can perform a soft reset by holding a button combination for a few seconds; for others, a factory reset may be required. Always document current settings before resetting so you can re-enter them accurately. After reset, reconfigure the thermostat: set date/time, preferred language, and, importantly, the HVAC system type (gas, electric, or heat pump). Re-connect the Wi-Fi if applicable and ensure the thermostat is online. When reconfiguring, rely on model-specific guidelines; avoid improvising settings that control critical functions like cooling stages or furnace lockouts. If the thermostat still won’t respond after a reset, the issue may lie with wiring or the control board.
Check HVAC compatibility and sensors
Even when the thermostat itself powers on, it may not control your system if the HVAC components or sensors are mismatched. Verify that your Honeywell model supports your system type (gas furnace, electric heat, heat pump, or multi-stage setups). Some older thermostats lack compatibility with newer HVAC equipment and require an adapter or a different model. Inspect temperature sensors for proper placement and neutral path obstruction—thermostats rely on accurate indoor temperature readings to function well. If possible, compare readings from the thermostat with a calibrated thermometer placed in the same room. Large discrepancies may indicate a sensor issue or improper installation. In such cases, consulting a professional or updating to a compatible model can prevent further inefficiencies or system strain.
When to call a pro and safety considerations
If you’ve exhausted power, wiring, and configuration checks without success, or you notice buzzing noises, burning smells, or a tripped main breaker, shut down power and contact a licensed technician. Working with high-voltage HVAC wiring can be hazardous; never bypass safety features or force connections. A professional can diagnose circuit issues, relay faults, or control board failures beyond DIY scope. Thermostat Care recommends scheduling a pro if your thermostat interacts with your HVAC system but still fails to regulate temperature accurately. Always prioritize safety and never compromise on electrical standards when performing repairs or replacements.
Preventive maintenance and best practices
To minimize future outages, schedule regular checks of batteries (if applicable), verify power supply stability, and keep the thermostat firmware up to date if your model supports OTA updates. Clean the thermostat’s air vents and ensure dust isn’t causing sensing errors. Label wires when removing the cover to simplify future maintenance. Maintain a clear, unobstructed view of the display and ensure the mounting plate remains secure. A well-maintained thermostat not only works reliably but also helps your HVAC system operate more efficiently, saving energy and reducing wear on components.
Tools & Materials
- Screwdriver set (Philips and flathead)(PH2 or PH1, and flathead as needed)
- Non-contact voltage tester(For verifying live wires safely)
- Fresh batteries(Check model-specific type (AA/AAA))
- Honeywell wiring diagram/manual(Model-specific wiring details)
- Wire labeling tape(Label wires during disassembly)
- Multimeter (optional)(For measuring voltages across terminals)
- Smartphone or computer(To access app or online setup if needed)
Steps
Estimated time: 20-40 minutes
- 1
Power off at the breaker
Shut off the circuit supplying the thermostat to prevent shocks and shorts. This is a safety-first step before you touch any wiring.
Tip: Double-check with the tester on the breaker panel to confirm no voltage is present. - 2
Inspect the thermostat battery or power source
If your unit uses batteries, replace them with fresh ones. For hardwired models, verify the 24V supply from the furnace circuit by testing the R and C wires.
Tip: Handle batteries with clean, dry hands and avoid touching terminals. - 3
Open the thermostat and inspect wires
Carefully remove the front cover and check each wire on its terminal. Ensure wires are fully seated and not loose or corroded. Do not force wires into incorrect terminals.
Tip: Label wires as you remove them to simplify reassembly. - 4
Verify terminals and match to labels
Cross-check that wires on R, C, W, Y, G, and other terminals align with the model’s wiring diagram. Misplaced wires are a common reason for non-response.
Tip: If you’re unsure, take a photo before moving wires. - 5
Reconnect and secure the cover
Gently re-seat wires, replace the cover, and tighten screws. Restore power at the breaker and watch the display for signs of life.
Tip: If the display remains blank, re-check battery installation or C-wire connection. - 6
Run a test and adjust settings
Set a simple temperature change and observe the HVAC response. Reconfigure system type and comfort settings if needed.
Tip: Avoid changing multiple settings at once; test one variable at a time. - 7
Document and monitor
Record any changes you made and monitor performance over 24–48 hours. If behavior is inconsistent, escalate to a professional.
Tip: Keep a log of readings and responses for future reference.
Questions & Answers
Why is my Honeywell thermostat screen blank or not turning on?
A blank screen usually indicates power loss or dead batteries. Start by checking the power at the breaker and replacing batteries if applicable. If the screen remains dark after power restoration, inspect the wiring and, if needed, perform a reset following model-specific instructions.
If your screen is blank, first check the breaker and replace batteries. If it stays dark, inspect the wiring and consider a model-specific reset.
How do I reset my Honeywell thermostat?
Consult your model’s manual for the exact reset steps. In many cases you can perform a soft reset via the menu or a hold-and-release action on specific button combinations. After resetting, re-enter your settings and HVAC type.
Reset via the thermostat menu or the specific button combo per your model, then re-enter settings.
Do Honeywell thermostats require a C-wire?
Many Honeywell models require a C-wire for reliable power, especially smart or Wi-Fi enabled units. If you don’t have a C-wire, you may need a power extender kit or a different model designed for systems without a dedicated common wire.
A C-wire is often needed for reliable power, particularly in smart models; if you lack one, consider a kit or a different model.
Why won’t my thermostat connect to Wi-Fi?
Wi-Fi issues usually stem from weak signal, network settings, or outdated firmware. Ensure the thermostat is in range of your router, update firmware if available, and re-enter Wi-Fi credentials. If problems persist, contact your ISP or Thermostat Care for model-specific guidance.
Wi-Fi problems are typically due to signal or firmware; ensure router range and credentials, then update if possible.
How often should I replace thermostat batteries?
Battery replacement intervals depend on model and usage. Check the manual for recommended intervals and monitor battery voltage indicators. Replace promptly if you notice dim displays or warning indicators.
Check your manual for intervals and replace when the display dims or warning lights appear.
When should I hire a professional for thermostat issues?
If you encounter electrical hazards, consistent non-responsiveness after power and wiring checks, or uncertain about wiring compatibility, a licensed HVAC technician or electrician is the safest option. Thermostat Care recommends professional help for complex repairs.
Call a professional if you’re unsure about wiring or encounter dangerous conditions.
Watch Video
What to Remember
- Verify power and batteries before touching wiring.
- Follow model-specific wiring diagrams to avoid misplacements.
- Reset and reconfigure only after confirming basic power and wiring.
- Know when to call a professional for safety and expertise.