Instructions for Honeywell Thermostat: A DIY Guide
A practical, safety-focused guide covering instructions for honeywell thermostat installation, configuration, and troubleshooting for homeowners and DIY enthusiasts.

These instructions for honeywell thermostat cover installation, setup, and basic troubleshooting. You will learn how to power the unit safely, identify wiring requirements, mount the thermostat, and configure essential settings like schedule and temperature units. The guide also includes common issues and quick fixes for DIY homeowners, with practical tips from Thermostat Care to reduce guesswork and avoid hazards.
Understanding how to follow instructions for honeywell thermostat
When you tackle any thermostat project, clarity matters. The term instructions for honeywell thermostat refers to the entire process—from confirming compatibility to final testing. This section helps you grasp the scope: power requirements, wiring conventions, mounting considerations, and setup options. According to Thermostat Care, sticking to a clear plan reduces errors and improves long-term performance. You’ll learn how to identify which Honeywell model you’re working with and how device features map to your HVAC system. Clear, documented steps save time and minimize risk, especially for DIY homeowners who are learning on their own equipment.
Planning your Honeywell thermostat project with clear instructions for honeywell thermostat
Before you touch any wires, map out the work. Verify your furnace or heat pump type, determine whether you have a C-wire, and decide if you’ll connect to Wi‑Fi or use a basic non-networked model. These decisions affect tool choices, mounting method, and wiring plan. Keep a photo log of the existing connections, label each wire, and note terminal labels on a piece of tape. This preparation aligns with best practices outlined in instructions for honeywell thermostat and helps you avoid miswiring.
Safety and compatibility considerations in the Honeywell setup process
Power safety is non-negotiable. Always shut off the breaker feeding the HVAC equipment and verify absence of voltage before touching any wires. Check that the thermostat’s power requirements match your HVAC system (gas furnace, electric furnace, heat pump). If you’re unsure about compatibility or have a multi-stage system, do not rush—consult the manual or seek professional help. Following these safety guidelines is part of any responsible set of instructions for honeywell thermostat and protects you and your equipment.
Tools, materials, and planning for successful instructions for honeywell thermostat
Having the right tools on hand makes the job smoother. This section reviews essential items and why they matter: a proper screwdriver set, a non-contact voltage tester, wire strippers, electrical tape, a level, mounting screws, and wall anchors. If your system uses a C-wire, consider a compatible adapter or the appropriate 24V wire. Preparing a ready-to-use toolkit is a core part of good instructions for honeywell thermostat and helps you complete steps efficiently.
Wiring basics and terminal definitions for Honeywell thermostats
Most Honeywell thermostats use common terminals like R (power), C (common), W (heat), Y (cool), and G (fan). Some models add O/B for heat pumps or RC/RH bridging. The exact terminal layout depends on the model. Understanding these definitions is essential to execute instructions for honeywell thermostat safely. When in doubt, refer to the thermostat’s wiring diagram and your HVAC equipment documentation. Matching wires to the correct terminals reduces misconnection risk and improves performance.
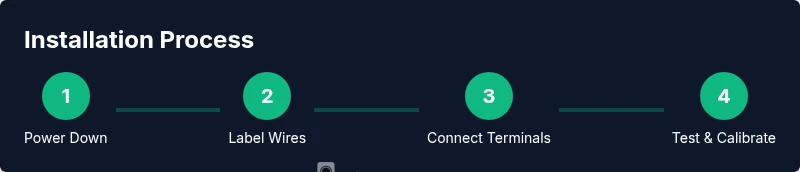
Step-by-step installation overview (high-level) for instructions for honeywell thermostat
A successful installation follows a logical sequence: power down, remove the old device, label wires, mount the new base, connect wires to corresponding terminals, secure the faceplate, power up, and run initial configuration. This overview aligns with the broader instructions for honeywell thermostat and sets the stage for the detailed steps that follow. Always test each function after wiring to confirm proper operation.
Configuring settings, schedules, and preferences for Honeywell thermostats
Configuring the thermostat involves selecting system type (gas, electric, heat pump), setting temperature units (Fahrenheit or Celsius), and programming schedules. If you have a smart Honeywell model, you can pair it with the manufacturer app for remote control. This section mirrors the intent of instructions for honeywell thermostat by guiding you through essential options while clarifying what each choice affects in daily use.
Troubleshooting common issues and quick-fix strategies
If the display is blank, power or wiring issues are the usual culprits. If the system doesn’t respond to changes, re-check wiring connections and ensure the thermostat is properly mounted. For slow or inaccurate readings, verify calibration and sensor placement. Following a structured approach in instructions for honeywell thermostat helps you diagnose problems quickly and avoid unnecessary parts replacement.
Maintenance, safety, and long-term care for Thermostat Care readers
Regular maintenance—like checking for loose wires, updating firmware (if applicable), and cleaning the thermostat exterior—extends device life and performance. Keep documentation of model numbers and wiring configurations for future upgrades. Thermostat Care emphasizes ongoing diligence as part of best practices in instructions for honeywell thermostat to keep your system reliable.
Tools & Materials
- Screwdriver set (Phillips #2 and flathead)(For mounting and terminal screws)
- Non-contact voltage tester(Verify power is off before touching wires)
- Wire stripper and cutter(Strip about 1/4 inch (6 mm) of insulation)
- Electrical tape(Insulate exposed conductors after wiring)
- Needle-nose pliers(Bend wire ends neatly and trim as needed)
- Level and wall anchors(Helps ensure the base is straight and secure)
- Wall mounting screws and anchors(Use appropriate anchors for your wall type)
- C-wire adapter or compatible 24V wire (optional)(Needed if no C-wire is present)
- Thermostat mounting plate and template(Aligns holes and centers the unit)
- Smartphone with Honeywell app (optional)(For Wi‑Fi setup and remote control)
Steps
Estimated time: 60-90 minutes
- 1
Power down and remove the old thermostat
Turn off the breaker feeding the HVAC system and the thermostat circuit. Remove the old thermostat faceplate, take a photo of wiring, and note each wire’s terminal. This ensures you have a reference if wiring needs to be reconnected precisely. Safety first—don’t proceed with power on.
Tip: Take a close-up photo of the back of the old thermostat showing wire connections for later reference. - 2
Label wires and document connections
Label each wire with its terminal letter (R, C, W, Y, G, etc.) and securely tape labels to the wall. This helps you reconnect wires to the same terminals on the Honeywell thermostat base. Accurate labeling reduces the risk of miswiring during setup.
Tip: Double-check heat vs. cool wires; some systems share a single terminal during certain configurations. - 3
Verify compatibility and identify wiring type
Confirm your HVAC system type (gas, electric, heat pump) and number of wires. Check whether a C-wire is present and whether the model supports your system. This prevents inconvenient wiring changes after you begin.
Tip: If you don’t have a C-wire, plan for an adapter or a common-wire solution before continuing. - 4
Mount the new base plate
Position the Honeywell base on the wall, use a level to ensure it sits straight, and mark the screw holes. Drill anchors if needed, then secure the base plate with screws. A straight, secure installation prevents future tilt and poor contact.
Tip: Use the included template to align holes precisely before drilling. - 5
Connect wires to the correct terminals
Insert labeled wires into the corresponding terminals on the new thermostat base (R, C, W, Y, G, etc.). Make sure each wire is fully seated and there are no stray strands. This step mirrors the wiring map from your old setup and follows the instructions for honeywell thermostat.
Tip: Gently tug on each wire after insertion to confirm it’s secured. - 6
Attach the thermostat and restore power
Attach the thermostat faceplate to the base and mount it to the wall. Restore power at the breaker and ensure the device powers on. If the display remains blank, double-check wire seating and power supply before proceeding.
Tip: Keep a watchful eye on the first boot sequence for any error codes. - 7
Initial configuration: system type and units
Follow the on-screen prompts to set your system type (gas, electric, or heat pump) and temperature units (F or C). This aligns the thermostat’s logic with your home HVAC setup. Accurate initial settings reduce future calibration needs.
Tip: Set a conservative schedule initially and adjust after a full test cycle. - 8
Connect to Wi‑Fi and app (for smart models)
If your Honeywell model supports Wi‑Fi, connect to your home network and sign in to the Honeywell Home app. This enables remote control, firmware updates, and occupancy-based features. Ensure your app permissions and location services are configured for best results.
Tip: Use your phone’s QR code from the app for quick pairing if available. - 9
Test operation with a short cycle
Set the thermostat to heat or cool and run a short cycle to verify response. Listen for fan operation, observe temperature changes, and confirm the HVAC responds within a few minutes. This confirms correct wiring and configuration.
Tip: If you don’t hear the compressor or fan, recheck the Y and G wires first. - 10
Final verification and documentation
Review all settings, save a fresh configuration snapshot, and document the wiring arrangement for future upgrades. Keeping a record supports future maintenance and aligns with best practices discussed in instructions for honeywell thermostat.
Tip: Store wiring notes and app credentials in a safe place.
Questions & Answers
Do I need a C-wire for a Honeywell thermostat?
Many Honeywell thermostats require a C-wire for power, especially smart models. If your system lacks a C-wire, use a compatible adapter or consider wiring the C connection. Always verify compatibility with your HVAC equipment before purchasing.
Most Honeywell smart thermostats need a C-wire for power. If you don’t have one, use an adapter or check compatibility before installation.
Can I install a Honeywell thermostat myself?
Yes, many homeowners can install a Honeywell thermostat with careful preparation and following the manufacturer’s wiring diagram. For complex systems (multi-stage, heat pumps, or unusual wiring), consider professional help.
DIY is often feasible if you follow the wiring diagram and safety steps. Seek a pro for complex systems.
What should I do if the thermostat display is blank?
A blank display usually indicates power or wiring issues. Verify the breaker, confirm the C-wire connection, and ensure the base is properly seated. If needed, re-seat connections and re-test power.
If the display is blank, check power and wiring, reseat connections, and test again.
How do I reset a Honeywell thermostat?
Most Honeywell thermostats offer a reset option in the settings menu or via a hardware reset sequence. Follow the model-specific instructions to avoid losing custom configurations. After reset, re-enter basic settings and re-link any apps.
Reset via the settings menu or a model-specific sequence, then reconfigure.
Is connecting to Wi‑Fi safe for my thermostat?
Wi‑Fi connections are generally safe when you use strong passwords, keep firmware updated, and follow the manufacturer’s security recommendations. Avoid exposing the thermostat to insecure networks and enable automatic updates when possible.
Wi‑Fi is safe if you keep firmware updated and use strong credentials.
Will a Honeywell thermostat work with my HVAC system?
Honeywell thermostats support a wide range of systems, including gas, electric, and heat pumps. Check model compatibility with your furnace or AC unit before purchasing, and review wiring requirements in the manual.
Most Honeywell thermostats work with common HVAC setups; verify compatibility first.
Watch Video
What to Remember
- Plan wiring and compatibility before you start.
- Power down and verify status at every step.
- Label wires clearly to prevent miswiring.
- Test operation after installation and calibration.