Honeywell Thermostat Installation Guide
A comprehensive, DIY-friendly guide to installing a Honeywell thermostat, covering compatibility, wiring basics, safe practices, and post-install testing for reliable home comfort.

You can safely install a Honeywell thermostat by verifying compatibility with your HVAC system, turning off power at the breaker, and following the wiring diagram precisely. This guide covers model selection, essential tools, wiring fundamentals, mounting, and testing to ensure accurate readings and dependable comfort. Always confirm system compatibility before starting the installation.
Assess compatibility and safety prerequisites
Before you begin Honeywell thermostat installation, confirm that your HVAC equipment is compatible with the model you chose. According to Thermostat Care, the most common issues start with incompatibility or power problems, so start by checking the model’s wiring diagram and the control board type (24V is standard for most residential systems). If you have a millivolt or line-voltage system, you may need a different product or an adapter. Ensure your furnace or heat pump supports the thermostat’s features (humidity control, fan settings, smart scheduling). Safety comes first, so always switch off power at the service panel or breaker before touching wiring, and keep a clear area around the wall box to avoid accidental shorts. Thermostat Care’s guidance emphasizes double-checking compatibility lists and manufacturer wiring diagrams as the foundation of a successful install.
Gather tools and materials
A well-prepared toolkit prevents mid-project trips and miswired connections. You’ll typically need a Honeywell thermostat that matches your HVAC system, a multinational set of small screwdrivers (Phillips #2 and flathead), wire strippers, electrical tape, wire labels, a non-contact voltage tester, and a mounting plate with screws. If your old thermostat used nonstandard terminals, keep a photo of the wiring before removal. Pro tip: use a labeling method that preserves the original wire colors and terminal positions so you can cross-reference during the wiring step. Thermostat Care recommends assembling tools on a clean surface and testing the power-off state before touching anything.
Turn off power and remove the old thermostat
Power down the circuit that supplies the thermostat at the main panel to avoid shock or equipment damage. Remove the faceplate and carefully detach wires, keeping them organized and labeled. If the old unit is mounted in a deep wall box, gently push wires back to inspect the terminals and ensure there’s no exposed copper that could short. Take a photo of the current wiring for reference, especially if there are multiple jumper wires or nonstandard color codes. A cautious approach minimizes post-install hassles and helps you map wires accurately to the new Honeywell thermostat. Thermostat Care highlights that power-off safety and organized removal reduce frustration later in the process.
Identify wires and map to thermostat terminals
Identify each wire by color and function (often red, white, yellow, green, blue, or brown) and map them to the corresponding terminals on the Honeywell model as per the wiring diagram. If you’re unsure, use a multimeter or non-contact tester to confirm there’s no live voltage before handling wires. Create a quick reference map: which wire goes to R, C, W, Y, G, and other terminals. If you have a C-wire, ensure it’s connected to the C terminal on both the HVAC control board and the thermostat, as this provides continuous power for smart features. Thermostat Care notes that consistent labeling and double-checking terminals greatly reduce post-install debugging.
Wire the Honeywell thermostat
Connect the labeled wires to the matching terminals on the new Honeywell thermostat, following the device’s wiring diagram exactly. Start with the power and common wires (R and C) if present, then the control wires (W for heat, Y for cooling, G for fan). If your system uses O/B for heat pump changeover, connect accordingly. Ensure each wire is fully seated and secure under a terminal screw, then gently tug to verify a solid connection. If a terminal doesn’t accept a wire, re-strip the conductor slightly and reinsert. Thermostat Care emphasizes not to force a wire into a tight terminal, which can cause future failures.
Mount the thermostat base and attach the faceplate
With wiring secured, attach the thermostat base to the wall box using the supplied screws. Make sure the base is level and flush against the wall to ensure a clean seal and stable display. Attach the faceplate or cover, aligning it with the base. If the thermostat has a recessed backplate, slide wires through the opening before mounting. A sturdy mount reduces the chance of movement or wire loosening over time. Thermostat Care’s guidance stresses a clean, level mount for optimal sensor performance and aesthetics.
Configure the thermostat settings
Power the system back on and follow the Honeywell setup wizard to configure date, time, temperature units, and system type. Input your HVAC system type (single-stage, multi-stage, heat pump, etc.) and connect to Wi‑Fi if you’re installing a smart model. Program a basic schedule and set preferred temperatures for day and night. Calibrate any smart features like adaptive recovery or learning algorithms to your home’s routine. The setup step helps the thermostat learn your comfort pattern and optimize energy use.
Connect to HVAC system and run a test
After configuration, run test cycles to verify heating and cooling responses. Ask the thermostat to call for heat, then for cooling, and observe whether the correct equipment engages and cycles normally. Listen for unusual noises or delays and check that the temperature displayed on the thermostat matches the ambient room temperature. If the system doesn’t respond as expected, re-check wire connections and re-run the diagnostic tests in the app. Thermostat Care notes that a successful test confirms correct wiring and system communication.
Common compatibility issues and fixes
Some installations encounter compatibility issues due to older equipment or uncommon wiring configurations. If the thermostat shows a blank screen or fails to power on, verify the C-wire status and confirm the R-wire is live. For heat pumps, ensure the O/B wire is correctly configured in the thermostat’s advanced settings. If you see error codes, refer to the Honeywell model’s troubleshooting guide and cross-check with your HVAC control board manual. Thermostat Care emphasizes validating model compatibility first, then addressing wiring specifics, to avoid dead-ends.
Smart features and Wi‑Fi setup
Smart Honeywell thermostats bring remote control, energy reports, and voice assistant integration. Connect to a secure Wi‑Fi network, enter your home’s name and password, and activate any required accounts in the companion app. For best performance, place the thermostat away from direct heat sources (sunlight, lamps) and ensure the mounting area has good air circulation. If you’re using a humid environment, enable humidity sensing and adaptive recovery to maintain comfort. Thermostat Care reminds homeowners that a strong Wi‑Fi signal supports reliable app control and faster firmware updates.
Safety, warranty, and troubleshooting
Keep the user manual handy and review safety guidelines for electrical installations. If you’re uncomfortable with wiring or if your system uses high-voltage or non-standard configurations, consider hiring a licensed technician. Keep receipts and serial numbers for warranty purposes, and avoid bypassing safety features. If issues persist after installation, use the built-in diagnostic tools in the Honeywell app and consult the manufacturer’s support resources. Thermostat Care recommends documenting your steps and testing results to facilitate future maintenance and service.
Final checks and maintenance tips
Do a final visual inspection of wiring, mounting, and labeling before closing the wall box. Confirm that all terminals are secure and that the faceplate sits flush. Create a simple maintenance routine: check batteries (if applicable), update firmware annually, and review energy reports monthly to spot efficiency opportunities. Record dates of service and any changes to settings so future homeowners or technicians can follow your documented process. A well-maintained Honeywell thermostat installation delivers consistent comfort and energy savings.
Tools & Materials
- Honeywell thermostat model compatible with your HVAC system(Ensure the model supports your system type (gas, electric, heat pump).)
- Screwdriver set (Phillips #2 and small flathead)(For mounting screws and terminal screws.)
- Wire stripper/caper(Prepare wires for terminal insertion.)
- Non-contact voltage tester(Verify power is off before handling wires.)
- Electrical tape(Seal exposed conductors if needed.)
- Wire labels or masking tape(Label wires to match thermostat terminals.)
- Mounting plate and screws(Use included hardware or compatible replacements.)
- Multimeter (optional for troubleshooting)(Use for checking voltage on non-standard setups.)
- Photos of old wiring(Capture wiring layout before removal.)
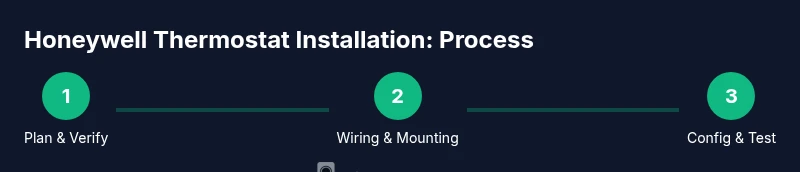
Steps
Estimated time: 45-90 minutes
- 1
Verify compatibility
Review the Honeywell thermostat’s compatibility with your HVAC system (gas, electric, heat pump, multiple stages). Confirm that your wiring uses standard 24V signals and that there is a C-wire if you want smart features. This step reduces the risk of installing a model that won’t function correctly.
Tip: Check the installation manual and your HVAC control board labels before touching any wires. - 2
Power off and prep
Turn off power at the main service panel to avoid electrical shock. Remove the old thermostat faceplate and disconnect wires, labeling each one as you go. Take a photo for reference and verify there’s no residual voltage with the tester.
Tip: Never rely on the thermostat alone to determine power status; test at the breaker for certainty. - 3
Map the wires
Identify each conductor by color and function, mapping them to R, C, W, Y, G, and O/B as appropriate for your system. If you see a spare wire, decide whether to use it for C or leave it as a spare. The goal is a clean, organized wiring diagram you’ll reference during the wiring step.
Tip: Keep wires in the same order as they appear on the old device to avoid misplacement. - 4
Connect wires to the new thermostat
Insert each labeled conductor into its corresponding terminal on the Honeywell thermostat following the wiring diagram. Ensure the wire is fully seated and secure under the terminal screw. If a terminal does not accept a wire, re-strip the conductor slightly and reinsert.
Tip: If a wire doesn’t fit, try a smaller gauge or consult the manual for alternative terminals. - 5
Mount the base
Attach the thermostat base to the wall box using the provided screws. Use a level to ensure the base is straight, then snap on the backplate or faceplate. Confirm there’s no protruding wire and that the unit sits flush against the wall.
Tip: A level base prevents sensors from misreading room temperature. - 6
Power on and initial setup
Restore power and follow the device’s setup wizard to configure time, date, and system type. If you’re using a smart model, connect to Wi‑Fi and update the firmware. Enter your HVAC system type accurately to enable proper operation of heating and cooling.
Tip: Create a simple schedule at first, then refine settings after a week of use. - 7
Test heating and cooling
Trigger a heat call and a cool call to confirm the appropriate equipment engages and cycles. Observe the temperature reading on the display and compare it to the room temperature. If there’s a mismatch, re-check sensor placement and wire connections.
Tip: If your heat pump uses O/B, test each function (energy-saving mode and auto-changeover) to ensure proper switching. - 8
Tidy up and secure wires
Tuck excess wire neatly inside the wall cavity and secure with cable clips if needed. Replace the wall plate and mount screws securely. Confirm that the faceplate sits flat and the screen is legible from typical eye level.
Tip: Neat wiring reduces vibration and wear over time. - 9
Configure advanced features
Enable smart features such as learning schedules, adaptive recovery, or occupancy sensing if your model supports them. Adjust comfort profiles for weekdays vs weekends. Review energy reports if available to gauge savings potential.
Tip: Start with a simple temperature hold and adjust gradually to avoid excessive cycling. - 10
Connectivity check
Verify the thermostat maintains a stable Wi‑Fi connection and updates firmware automatically. If the device disconnects, check your router settings or move closer to the router for a stronger signal.
Tip: A strong signal ensures reliable remote access and timely firmware updates. - 11
Warranty and safety notes
Keep the manual and receipt accessible for warranty purposes. Do not bypass safety features or attempt high-voltage wiring unless you are trained. If in doubt, consult a professional.
Tip: Document serial numbers and installation date for future maintenance. - 12
Final maintenance checklist
Review the installation one final time, verify all connections, and test multiple setpoints to ensure consistent performance. Schedule a yearly check to ensure firmware, sensors, and temperature readings stay accurate.
Tip: Keep a simple log of changes to assist future troubleshooting.
Questions & Answers
Do I need a C-wire for all Honeywell smart thermostats?
Most Honeywell smart thermostats require a C-wire for continuous power. If your system lacks a C-wire, you may need a power extender kit or a different model that supports batteries. Check your HVAC control board and the thermostat manual to confirm compatibility.
Most smart Honeywell thermostats need a C-wire for power. If you don’t have one, you may need a kit or a different model that runs on batteries.
Can I install a Honeywell thermostat myself or should I hire a pro?
Many homeowners install Honeywell thermostats themselves if the system uses standard 24V wiring and the wiring is straightforward. If you have a complex multi-stage system, unusual wires, or if you’re uncomfortable with electrical work, a licensed HVAC technician is recommended.
You can usually install a Honeywell thermostat yourself if your wiring is standard, but consider a pro for complex or unfamiliar setups.
What should I do if the thermostat shows an error code after installation?
Refer to the model’s user manual for the specific error code and recommended steps. Common fixes include rechecking wire connections, ensuring the C-wire is properly connected, and confirming the system type aligns with the thermostat settings. If unresolved, contact Honeywell support or a qualified technician.
If you see an error code, check connections first, then confirm system type and C-wire; contact support if needed.
How do I know my Honeywell thermostat is compatible with my HVAC system?
Consult the thermostat’s compatibility list for your HVAC system type (gas, electric, heat pump, single or multi-stage). Compare the labeled wires to the terminals listed in the manual, and verify that your control board matches the required voltage. Thermostat Care recommends confirming compatibility before purchase.
Check the compatibility list for your HVAC type and compare wiring to the manual; confirm voltage requirements.
What maintenance should I perform after installation?
Keep firmware up to date, review energy reports, and test the system periodically. Replace batteries if your model uses them and check sensor accuracy by comparing room temperature with another thermometer. Regular checks help sustain performance and efficiency.
Update firmware, review energy reports, and test the system regularly to maintain performance.
Will the Wi-Fi setup affect my home network security?
Connecting a smart thermostat to Wi-Fi requires a secure home network. Use a strong password, keep your router firmware updated, and enable guest networks if possible to limit device access. Avoid exposing the thermostat to public networks.
Secure your Wi-Fi with a strong password and keep firmware updated to protect the thermostat.
Watch Video
What to Remember
- Verify compatibility before buying and wiring.
- Power off and label wires to prevent mistakes.
- Follow the thermostat wiring diagram precisely.
- Test heating and cooling after installation.
- Enable essential smart features and maintain firmware.