What Is Wrong with My Thermostat? A Troubleshooting Guide
A practical, step-by-step guide to diagnose and fix common thermostat problems, from power and wiring to batteries and sensors. Safe DIY checks and when to call a professional.

The most likely causes are power issues, a dead or weak battery, loose or damaged wiring, or a faulty sensor. Start by checking the display for error codes, replace the thermostat batteries if present, confirm the HVAC system is powered and the C-wire is securely connected. If the problem persists, follow the diagnostic flow for deeper testing.
Why thermostats fail today
Thermostats fail for a handful of practical reasons. According to Thermostat Care, most problems start at the power source, with battery or wiring issues, or with sensors that misread room conditions. When you notice the display dim, unresponsive touch, or erratic temperature settings, start with the simplest checks: Is the thermostat powered? Are the batteries fresh? Is the wiring intact and firmly connected at both ends? A methodical, low-risk approach saves time and money and reduces the risk of damaging the HVAC system. In this guide, we’ll walk you through a safe, step-by-step process to identify the root cause and implement fixes that last. We’ll also show you how to prevent repeat failures through simple maintenance routines and sensible usage habits.
Common symptoms and quick checks
Thermostats give subtle signs before a full failure, and recognizing them early can prevent bigger problems. Common symptoms include a blank or frozen display, the thermostat ignoring user input, temperatures that drift away from the setpoint, or your HVAC system not turning on when the thermostat prompts it. Quick checks include verifying power to the thermostat and furnace, checking for blown fuses or tripped breakers, ensuring batteries are fresh where applicable, and confirming that the C-wire is securely connected. Also inspect the thermostat location for excessive heat, cold drafts, or direct sunlight, which can skew readings. Document any patterns (time of day, weather, or mode) to help with diagnostics.
The diagnostic flow you should follow
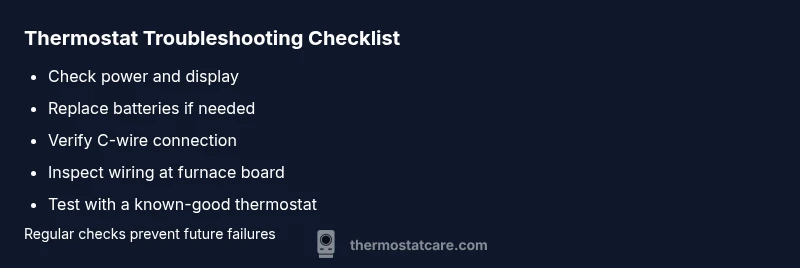
A clear diagnostic flow speeds up troubleshooting and reduces guesswork. Start with the simplest checks and escalate only as needed. First, confirm power to both the thermostat and HVAC system; look for blinking LEDs or error codes. If power is good, inspect the battery and replace if needed. Next, check wiring connections at the thermostat and furnace control board. If wireless, verify the Wi‑Fi connection and the thermostat’s integration with the smart hub. Finally, test the system with a known-good thermostat to isolate whether the issue is the device or the HVAC equipment itself.
Step-by-step fixes for the most likely causes
This section outlines concrete fixes for the most common failures. It begins with the least invasive actions and progresses to more technical steps. 1) Power and fuse check: ensure the circuit breaker is on and the outlet supplying the thermostat has voltage. 2) Battery replacement: use fresh, high-quality batteries if your model uses them, and re-seat fresh cells in correct orientation. 3) Wiring inspection: power off the system, remove the faceplate, and confirm wires are securely fastened to terminals without fraying. 4) C-wire verification: ensure a solid, common connection from the HVAC control board to the thermostat. 5) Recalibration and reset: run the thermostat through its reset procedure and re-enter settings. 6) Sensor testing: verify accurate readings by comparing room temperature with an external thermometer. 7) Firmware/software update: install the latest firmware if your thermostat supports it. 8) Replacement consideration: if none of the above resolve the issue, evaluate replacing the thermostat.
Safety, warnings, and common mistakes
Safety should guide every step. Always power down the system before handling wiring, and never touch live conductors. Common mistakes include mixing up wires on the terminals, forcing connectors, or neglecting to reattach the faceplate after testing. If you notice burning smells, buzzing, or warmth near the thermostat, stop immediately and unplug power to the circuit and contact a professional. Remember that incorrect wiring can damage the thermostat or HVAC equipment and may void warranties. By staying methodical and conservative, you reduce risk while solving the problem.
Prevention tips to avoid future issues
Prevention is cheaper than repair. Keep the thermostat and furnace area clean and dust-free, replace batteries on a regular schedule, and protect the thermostat from direct sunlight or heat sources. Label wires during any service so you can reassemble quickly. Schedule periodic system checks and firmware updates, and monitor your thermostat’s performance after any changes. A little routine maintenance goes a long way toward consistency and energy savings.
How to test after repair and confirm results
After applying fixes, re-test the system across all modes (heat, cool, auto) and verify that setpoints align with actual room temperature. Use a separate thermometer to cross-check readings in several rooms. Confirm that the HVAC responds promptly to changes in setpoint and that there are no intermittent outages. If readings remain inconsistent, revisit the diagnostic flow and consider professional inspection to verify wiring, control board health, and sensor calibration.
Troubleshooting by thermostat type and installation context
Different thermostat types require different checks. Battery-powered models rely heavily on battery health, while line-powered models depend on stable power and proper wiring. Smart thermostats add network considerations and app integrations; ensure the device is connected to power, Wi‑Fi stability is strong, and the companion app is up to date. If your thermostat is part of a multi-zone or humidification system, verify that zone controls and humidifier wiring are not interfering with the thermostat's operation. In all cases, document your steps and test results to narrow down the root cause more efficiently.
Quick actions for emergency situations and when to call a pro
If you detect burning smells, sizzling sounds, or smoke, shut off power at the breaker and contact a licensed HVAC technician immediately. If you lack the tools or confidence to safely handle wiring, or if the system has significant electrical work involved, don’t risk it—call a professional. Proactive maintenance and timely professional assessments are the best defense against recurring thermostat problems and costly HVAC failures.
Steps
Estimated time: 1 hour 15 minutes
- 1
Check power and display
Ensure the thermostat and HVAC equipment have power. Look for illuminated display, check breakers, and reset if necessary. If the display is completely blank, this is your starting point.
Tip: Take a photo of wiring before changing anything. - 2
Test or replace batteries
For battery-powered units, replace with fresh, high-quality batteries in the correct orientation. Recheck the display after replacement to confirm activity.
Tip: Use manufacturer-recommended battery type. - 3
Inspect thermostat wiring
With power off, remove the faceplate and confirm wires are secure in their terminals. Look for loose, corroded, or frayed wires and reseat or replace as needed.
Tip: Avoid tugging on wires; use proper tool for terminals. - 4
Check the C-wire connection
Locate the C-terminal at both thermostat and furnace control board and ensure a solid connection. A loose C-wire can cause intermittent performance.
Tip: If you don’t see a C-wire, consult a pro before adding one. - 5
Reset and recalibrate the thermostat
Perform the reset procedure described in the manual and reconfigure setpoints. This can resolve firmware-related quirks that affect performance.
Tip: Note your preferred settings before resetting. - 6
Test across modes
Switch between heat, cool, and auto to verify proper response. Confirm that the HVAC system engages as commanded.
Tip: Listen for system activation and watch for expected temperature changes. - 7
Update firmware or replace if necessary
Install any available firmware updates for smart thermostats or consider a replacement if hardware failure is suspected.
Tip: Back up settings before updating. - 8
Schedule professional help if unresolved
If power, wiring, and battery checks don’t fix the issue, a licensed HVAC technician should assess wiring, control boards, and sensor health.
Tip: Professional diagnosis can prevent further damage.
Diagnosis: Thermostat display is blank or unresponsive
Possible Causes
- highPower issue (tripped breaker, blown fuse, or no power to thermostat)
- highDead or weak battery (where applicable)
- mediumLoose or damaged wiring at thermostat or furnace control board
- lowFaulty or miscalibrated sensor within thermostat
- mediumC-wire not connected or common to HVAC board
Fixes
- easyCheck breaker or fuse box; restore power to the thermostat circuit
- easyReplace batteries with fresh cells (if model uses them) and reseat terminals
- mediumPower off, inspect and reseat all thermostat wires; look for frayed insulation
- mediumVerify C-wire connection at both thermostat and furnace control board; fix or replace as needed
- easyRun a reset and calibration procedure on the thermostat, then re-enter settings
Questions & Answers
Why is my thermostat not turning on?
Power issues, dead batteries, or loose wiring are the most common culprits. Start with power checks, battery replacement, and wiring verification before exploring deeper diagnostics.
Common causes are power, battery, or wiring problems. Start with power and battery checks, then confirm wiring connections.
How do I know if I need a C-wire?
A C-wire is needed for most modern thermostats to complete the circuit. If your thermostat loses power or behaves erratically even with batteries, check whether a C-wire is present and properly connected.
Check for a C-wire and confirm it’s connected to both thermostat and furnace board if you have a smart or power-h demanding unit.
Can I replace my thermostat myself?
Many homeowners can replace a thermostat using manufacturer instructions and the existing wiring. However, if you run into wiring, C-wire, or control-board issues, consider professional installation to avoid damage.
Yes, many DIYs can replace a thermostat, but if wiring or control board comes up, call a pro.
What should I do if the thermostat is flashing heat or cool?
Flashing indicators often signal a mode mismatch or sensor issue. Recheck the mode settings, calibrate the sensor, and ensure the HVAC responds correctly to the setpoint after tests.
If you see flashing modes, recheck settings and calibrate sensors before calling for help.
How often should I replace thermostat batteries?
Battery lifespan varies by model, but replacing every 1-2 years is common. If battery indicators appear or the display dims, replace immediately.
Check the battery indicator; replace every 1-2 years or when the display dims.
When should I call a professional?
If you’re unsure about electrical wiring, C-wire installation, or the control board, or if there’s burning smell, buzzing, or smoke, contact a licensed HVAC technician.
Call a pro when wiring or control-board issues arise or if there’s any burning smell.
Watch Video
What to Remember
- Understand common causes: power, battery, wiring, and sensors.
- Follow a safe, increasingly thorough diagnostic flow.
- Document steps and test results for accuracy.
- Call a pro if you encounter electrical or control-board issues.