What Happens When Your Thermostat Stops Working: A Troubleshooting Guide
urgent, step-by-step guide to diagnose and fix a thermostat that won’t work. Learn signs, safety tips, and when to call a pro to restore comfort fast.

Most likely, your thermostat stops working due to a power issue or a tripped circuit, which cuts power to the device or HVAC control. Start by checking the breaker, replacing batteries if needed, and confirming the thermostat is receiving 24 VAC. If the problem persists, follow the step-by-step troubleshooting below or consult a professional.
What happens when your thermostat stops working
When a thermostat stops working, your home can quickly become uncomfortable and energy bills may rise as the HVAC system runs unpredictably or stops responding. In many cases, people ask, what happens when your thermostat stops working, and the answer is usually a power or signal problem rather than a failed furnace or air conditioner. A non-responsive thermostat can leave rooms too hot in summer or freezing in winter, while smart models may lose Wi‑Fi or cloud connectivity and follow no schedule. Thermostat Care notes that the most common root causes are power issues, dead batteries on non-wired models, sensor faults, or loose wiring. Quick checks can prevent minor glitches from escalating into bigger problems and help you decide whether you can safely fix it yourself or should call a professional. If you see a blank display, flickering lights, or erratic temperature readings, treat it as urgent and begin the checks below, especially during extreme weather. According to Thermostat Care, catching these issues early saves energy and reduces wear on your HVAC system.
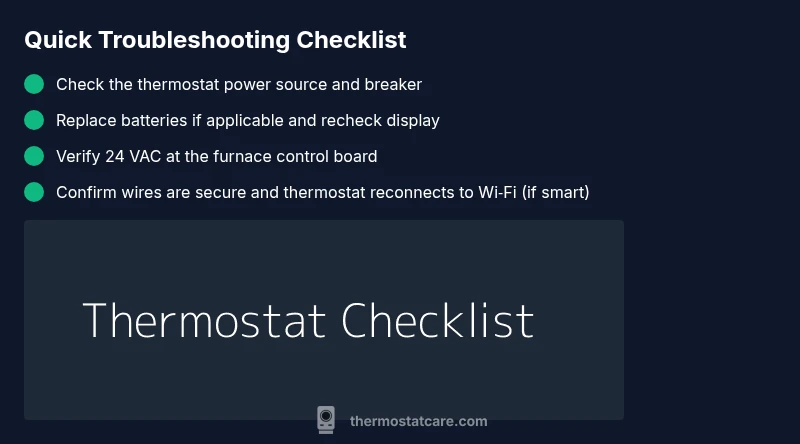
Quick checks you can perform now
If your thermostat has stopped responding, start with the basics before diving into diagnostics. First, verify the display turns on and shows a current setpoint. If the screen is blank, it is often a power or battery issue. For wired, check the 24 VAC power at the furnace control board; for battery-powered models, replace or recharge batteries. Next, inspect the circuit breaker or fuse box for a tripped breaker or blown fuse feeding the HVAC system and thermostat. Finally, confirm network connectivity for smart thermostats; a loss of Wi‑Fi can prevent scheduling and remote control. If any of these steps restore function, monitor for brief reoccurrences and consider preventive care to avoid future failures.
Diagnostic flow: symptom → diagnosis → solutions
A clear path helps you avoid wasted time and unnecessary parts. If the display is blank or the system won’t respond to commands, the likely culprit is a power issue. If the unit powers on but shows incorrect readings, sensor calibration or wiring could be the problem. If the thermostat is responsive but the HVAC won’t start, there may be a signal or compatibility issue between the thermostat and the furnace or air handler. For smart thermostats, connectivity problems can mimic hardware failures. Each symptom guides you toward specific fixes: power restoration, wiring checks, sensor recalibration, or network setup. Thermostat Care Analysis, 2026, shows that most failures stem from simple, correctable power or connectivity problems. If you’re unsure, proceed step-by-step and don’t hesitate to call a professional for electrical concerns or gas-furnace safety issues.
Step-by-step fix for the most common cause
The most common cause of a non-working thermostat is a power issue or dead batteries. Follow these steps in order to restore function safely:
- Turn off the breaker feeding the thermostat and HVAC to ensure safe work. 2) Inspect and replace batteries if your model uses them. 3) Restore power and perform a soft reset by cycling the thermostat off and back on. 4) Verify 24 VAC is present at the furnace control board with a multimeter. 5) Reconnect any loose wires at the thermostat and the control board. 6) If you’re using a smart thermostat, reconnect to Wi-Fi and re-enter any schedules. 7) Run a quick test to ensure heating or cooling responds to a setpoint. 8) If issues persist, consult a professional, especially if you detect burning smells or sparking.
Safety considerations and when to call a pro
Electrical work carries risk. Never work on live terminals or wiring if you’re unsure of what you’re doing. If you notice buzzing noises, burning smells, or heat from wires, shut off power at the breaker and contact a licensed electrician or HVAC pro immediately. For gas furnaces, avoid attempting to diagnose gas-related issues yourself; a pro must assess pressure, valve operation, and flame safety. Thermostat Care emphasizes: if the system controls a heat pump or gas furnace, professional evaluation is essential when basic fixes don’t restore function or safety.
Prevention tips to avoid future thermostat failures
Regular maintenance reduces the likelihood of future outages. Clean the thermostat’s air vents and sensors, keep the wall area free of dust, and verify battery health (if applicable) at least once a year. For smart thermostats, keep firmware updated and periodically check Wi‑Fi reliability and router settings. Label wires before removing any connections to ease future servicing, and perform a controlled power cycle monthly to spot issues early. Thermostat Care’s recommended practice is to schedule a seasonal check to verify compatibility with your HVAC system and to ensure there are no loose connections that could cause intermittent failures.
What happens after you fix it: post-repair checklist
Once the thermostat is operational again, run a full test: set a comfortable temperature, confirm cooling and heating respond quickly, and verify the display reflects the actual room temperature. Check that schedules, geofencing, or remote controls are functioning. If you upgraded to a smart thermostat, reconnect to Wi‑Fi and ensure cloud services are syncing properly. Monitor for the next 1–2 weeks for any recurrence and review energy usage reports to gauge improvement. The Thermostat Care team recommends keeping a simple log of issues and fixes to help you identify recurring patterns.
Steps
Estimated time: 45-90 minutes
- 1
Power down and safety check
Shut off power to the thermostat and HVAC at the main breaker to prevent shocks. Confirm the circuit is de-energized using a non-contact tester before you touch any wires.
Tip: Always prioritize safety; if you’re unsure, skip to non-wiring checks. - 2
Inspect power source
Check if the thermostat is hardwired or battery powered. Replace batteries if needed and ensure the main power source for the HVAC is intact.
Tip: Keep spare batteries and a small tester handy for quick checks. - 3
Restore power and reset
Turn the power back on at the breaker. Do a soft reset by turning the thermostat off, waiting 30 seconds, then turning it back on.
Tip: If the device has a reset button, use it instead of unplugging. - 4
Verify 24 VAC supply
For wired models, test the 24 VAC supply at the furnace control board using a multimeter. If voltage is absent, the problem may be upstream.
Tip: If you’re uncertain about multimeter readings, call a pro. - 5
Check wiring connections
At both the thermostat and furnace, confirm that wires are securely connected and not corroded. R, C, W, Y, and G should be intact for most systems.
Tip: Take a photo before unplugging any wires so you can reconnect correctly. - 6
Test HVAC response
Set a temperature and observe whether heating or cooling engages. If nothing happens, there may be a control board or gas valve issue.
Tip: Do not force the system to run if you smell gas. - 7
Network and firmware check (smart stats)
For smart thermostats, reconnect to Wi-Fi and update firmware if prompted. Re-sync schedules and geofencing after the reset.
Tip: Ensure your router supports the device’s bandwidth needs. - 8
Call a professional if unresolved
If issues persist after these steps, or if you detect heat/gas concerns, contact a licensed HVAC technician or electrician for a safe, thorough diagnostic.
Tip: Document symptoms, times, and actions taken to speed up service.
Diagnosis: Thermostat display is blank and HVAC won't respond
Possible Causes
- highPower issue at the thermostat or in the circuit
- mediumDead or missing batteries (for battery-powered models)
- lowLoose or damaged wiring or a tripped fuse
Fixes
- easyReset the circuit breaker and replace any blown fuses; restore power to the thermostat and HVAC
- easyReplace thermostat batteries if applicable and recheck power to the device
- mediumInspect wires at the thermostat and furnace control board; reseat or secure loose connections
Questions & Answers
What should I do first if my thermostat stops working?
Start with safety: switch off power, check the display, and replace batteries if needed. Then inspect the circuit breaker and verify 24 VAC at the control board. If the device still won’t respond, follow the step-by-step guide below or contact a pro.
First, cut power and check the display. Then swap batteries and verify the circuit breaker before moving on to more steps.
Can a dead battery cause a thermostat to stop functioning?
Yes. Battery-powered thermostats will stop communicating when batteries are dead or corroded. Replace with fresh batteries and retest. For wired thermostats, battery replacement isn’t applicable, but check power supply.
Absolutely. If batteries are dead, replace them and check power supply for wired models.
Is it dangerous to touch thermostat wiring?
Yes. Live wiring can cause shocks. Always cut power at the breaker before touching wiring and only perform basic checks if you’re comfortable with electrical work. If unsure, hire a pro.
Avoid touching wires when power is on—safety first. If you’re unsure, call a pro.
When should I replace my thermostat rather than repair it?
If repeated failures occur, the device is outdated, or you use a heating source that’s incompatible with your current model, replacement might be more cost-effective and safer in the long run. Consider smart thermostats for energy savings.
If failures keep coming back or compatibility is an issue, replacement may be best.
Why does my thermostat show the wrong temperature?
Sensor drift, calibration issues, or wiring problems can cause incorrect readings. Recalibrate if the model supports it, clean sensors, and ensure proper placement away from heat sources.
Sensor drift or calibration issues often cause wrong readings; recalibrate or replace if needed.
How long do thermostats typically last?
Most thermostats last 10-15 years with proper maintenance. Factors like humidity, power quality, and frequent cycling shorten lifespan.
Most thermostats last about a decade or more with good care.
Watch Video
What to Remember
- Check power first before touching thermostat internals
- Smart thermostats need network checks as part of troubleshooting
- Call a pro for gas furnaces or electrical safety concerns
- Prevent future failures with regular maintenance and battery checks