What Causes Thermostat to Go Bad? A Practical Troubleshooting Guide
Learn the common causes of thermostat failures, how to diagnose them, and practical fixes. A clear, urgent guide from Thermostat Care to restore reliable heating and cooling.

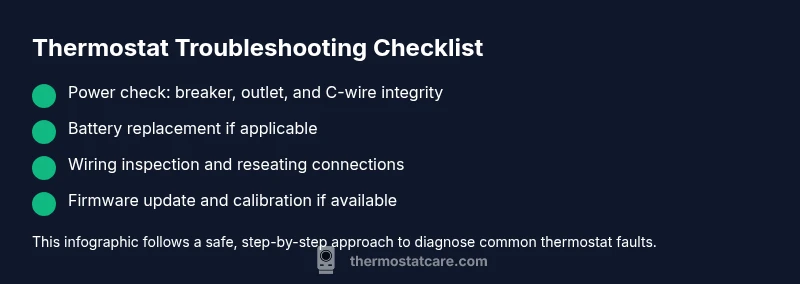
Most thermostats fail mainly due to power issues or aging components. Start with the basics: check the circuit breaker or outlet, replace any low batteries, and reset the thermostat. If the issue persists, inspect wiring connections, verify thermostat compatibility with your HVAC system, and update firmware if available. If still unresolved, seek professional help.
Why thermostats fail: what causes thermostat to go bad
In plain terms, the question what causes thermostat to go bad is often rooted in power and sensor issues, plus aging components. According to Thermostat Care, common culprits include power supply fluctuations, worn-out batteries in non-hardwired units, loose or corroded wiring, and sensor drift leading to incorrect readings. Dirty internal contacts and poor mounting can also degrade performance. When the thermostat can't reliably read room temperature or communicate with the HVAC control board, you end up with short cycling, uneven heating or cooling, or a warning that the device is offline. The good news: most problems start small and are fixable with a methodical approach. Start with the simplest checks and move to more involved diagnostics. Remember, the goal is to restore stable power, accurate readings, and reliable communication with your furnace or air conditioner.
Common symptoms of a failing thermostat
If your thermostat is failing, you’ll notice telltale signs that something isn’t right. Inaccurate readings (the display shows 68° while the room is clearly warmer or cooler) are common. The HVAC system may not turn on or off at the programmed times, or the thermostat may cycle the heat or AC too often. A dim, flickering, or blank display is another red flag, as is frequent rebooting or a thermostat that seems to forget settings. These symptoms often point to the underlying issues described in the diagnostic flow and can guide your next steps without expensive testing. Stay calm, document what you observe, and work through checks in a logical order. The more you observe, the quicker you’ll pinpoint the root cause.
Power and battery checks: the essential first steps
Power issues are among the most common reasons a thermostat goes bad. Start by confirming the circuit breaker is on and the outlet is delivering consistent power if your unit isn’t hardwired. If you rely on batteries, replace them with fresh ones from the same type specified by your model, and note any corrosion on the battery contacts. Some thermostats require a common wire (C-wire) to maintain proper voltage; if the C-wire is loose or damaged, readings will drift and the unit may reset unexpectedly. After power-related checks, perform a quick reset. A full reset often clears minor firmware glitches that masquerade as hardware failures.
Wiring, sensors, and loose connections
Loose or poorly seated wires on the control board or at the thermostat can create intermittent signals that produce erratic temperature control. Power down the HVAC system before inspecting terminals. Look for loose screws, corroded terminals, or damaged insulation. Re-seat and tighten connections as needed. Sensor drift also happens over time; some units allow recalibration, while others must be replaced. If your sensor reads correctly when you touch or move the thermostat, you’ve likely found the culprit. In many cases, replacement of the device is more cost-effective than chasing a stubborn wiring issue.
Firmware, calibration, and compatibility considerations
Firmware glitches can mimic hardware failures, especially after a software update or power surge. Check for available firmware updates through the thermostat’s app or display menu and install them if you’re comfortable. Some older models may not be fully compatible with newer HVAC components; verify compatibility with the current furnace or heat pump. If the unit allows recalibration of temperature sensing, follow the manufacturer’s instructions to recalibrate against a known accurate thermometer. These software-related steps can restore accuracy without replacing hardware.
Diagnostic flow: quick path from symptom to fix
Symptom → diagnosis → solution: this flow keeps you moving while avoiding unnecessary steps. Start with basic power and battery checks; if those fail, test wiring and sensors; if the symptom persists, rule out firmware issues and compatibility. If you’re unsure at any point, consult the troubleshooting flow below or contact a professional. Safety first: always power down before opening any enclosure.
Step-by-step: follow a proven fix (example for the most common power/battery issue)
This section provides a hands-on sequence you can complete safely. It covers power and battery work, plus reseating wires and applying a soft reset. Use the ordered steps to stay organized and minimize risk. If any step feels uncertain, stop and seek help.
Safety reminders and when to call a pro
Working with electrical components can be hazardous. Always shut off power at the breaker or disconnect before inspecting. If you smell burning, see damaged wires, or the thermostat is hot to touch, stop immediately and contact a licensed technician. Do not bypass safety mechanisms.
Maintenance tips to extend thermostat life
Preventive care extends the life of your thermostat and reduces future failures. Regularly replace batteries, keep the device clean and dry, verify mounting is secure, and test temperature readings against a reliable thermometer. Schedule a yearly check-in with Thermostat Care’s guidance to stay ahead of wear and firmware drift.
Thermostat Care’s approach to reliability and conclusion
According to Thermostat Care, most failures stem from power issues, loose connections, and aging components. By following a methodical diagnostic flow and sticking to safe procedures, homeowners can restore reliability without unnecessary parts replacement. The Thermostat Care team recommends documenting symptoms, staying organized, and updating firmware when possible to minimize repeat problems.
Steps
Estimated time: 45-75 minutes
- 1
Power down and verify supply
Turn off power at the breaker or disconnect, then wait 30 seconds before restoring. This helps reset electronics and clears minor glitches. Check that the outlet or circuit is providing stable power before proceeding.
Tip: If you use a power strip, unplug it completely to avoid phantom loads. - 2
Check batteries or C-wire
Replace batteries with fresh ones if your thermostat uses them; ensure correct polarity. For hardwired units, inspect the C-wire for secure contact at both ends and look for any frayed insulation.
Tip: Use the exact battery type specified by the manufacturer. - 3
Reset and test
Perform a soft reset or factory reset as recommended by the manufacturer. Reprogram basic settings and re-test heating and cooling to see if temperature matches.
Tip: Document original settings in case you need to revert. - 4
Inspect wiring connections
With power off, remove the thermostat cover and inspect terminals for loose screws or corrosion. Re-seat wires firmly and verify insulation integrity.
Tip: Only touch wire ends to avoid shorting terminals. - 5
Calibrate or update firmware
If the unit supports calibration, run the calibration procedure with a known thermometer reference. Check for firmware updates and install if available.
Tip: Back up settings before updating. - 6
Test operation and monitor
Restore power and run several cycles to confirm accurate readings and stable control. Observe for erratic behavior over the next 24 hours.
Tip: If anomalies persist, note the exact symptom to share with a pro. - 7
Consider professional evaluation
If the problem recurs after steps above, a pro can check internal sensors, board integrity, and HVAC communication more thoroughly.
Tip: Ask for a written diagnostic report.
Diagnosis: Thermostat shows incorrect temperature or won’t control HVAC reliably
Possible Causes
- highPower issue or tripped circuit/broken outlet
- highWeak or dead battery in non-hardwired units
- highLoose or corroded wiring at thermostat or control board
- mediumSensor drift or failed calibration
- lowFirmware glitch or compatibility problem
Fixes
- easyCheck breaker/outlet; replace batteries; perform a reset
- easyReseat wires and verify proper C-wire connection
- mediumUpdate firmware or recalibrate sensor if available
- hardConfirm thermostat compatibility with HVAC system; replace if needed
Questions & Answers
What is the first thing I should check if my thermostat won’t turn on?
Begin with power and battery checks. Ensure the breaker is on and the thermostat has power. If batteries are used, replace with fresh ones and reseat connections before testing again.
First check power and batteries, then reset and test the thermostat.
Can a faulty thermostat cause higher energy bills?
Yes. If the thermostat cannot read the room accurately or communicate with the HVAC system, it may cause inefficient cycling, leading to higher energy use.
A failing thermostat can cause inefficiency and higher energy bills.
Should I recalibrate my thermostat?
If your model supports calibration, follow the manufacturer’s instructions to compare readings against a trusted thermometer. Recalibration can restore accuracy without replacement.
Calibrate if supported; it can fix drift without buying a new unit.
When is it time to replace rather than repair?
If multiple failures persist after checks and firmware updates, replacement is often more cost-effective than ongoing repairs. Consider age, compatibility, and warranty coverage.
If issues keep returning, replacement may be the smarter option.
Is professional help always necessary?
Not always, but some issues require electrical and HVAC expertise. If you’re unsure at any step, contact a licensed technician to avoid safety risks.
If unsure, don’t hesitate to call a professional.
Watch Video
What to Remember
- Check power and batteries first
- Inspect wiring and sensors for drift
- Update firmware and recalibrate when possible
- Know when to call a pro
- Regular maintenance prevents failures