What Causes Thermostat to Fail: A Troubleshooting Guide
Urgent, actionable troubleshooting guide on what causes thermostat failures and how to fix them quickly. Learn power, wiring, sensors, firmware, and safety steps from Thermostat Care.

Most thermostat failures start from power or sensor issues. First, check the display, batteries, and power supply. If the screen is blank, replace batteries or confirm 24V HVAC power is present. Next, inspect wiring and sensor placement, then update firmware or perform a reset if available. If problems persist, contact a professional to avoid further damage.
Why Thermostats Fail: Common Modes
According to Thermostat Care, most thermostat failures fall into a few broad categories: power supply problems, sensor faults, wiring and terminal issues, and outdated or corrupted firmware. Homeowners often overlook simple checks that can resolve many faults. Acting quickly helps prevent unnecessary wear on your HVAC system and reduces energy waste. In this section we’ll map out each failure mode, explain why it happens, and outline practical checks you can perform safely.
Power and battery issues are the most common culprits. A dead battery (for non‑hardwired models) or an inconsistent 24V supply can cause intermittent responses, blank screens, or total non‑response. Sensor problems arise when the temperature sensor drifts, is covered by dust, or sits in a drafty location. Wiring and terminals can loosen over time, especially after HVAC service or DIY wiring changes. Finally, firmware or app glitches may cause misreads, delayed commands, or loss of connectivity. Understanding these modes helps you triage issues quickly.
Power and Electrical Issues
Faults with power are almost always the first thing to check. A thermostat relies on a stable 24-volt supply from the HVAC’s control transformer. If the breaker has tripped, a fuse is blown, or the transformer is failing, the thermostat may go unresponsive or reset randomly. If you have a battery-powered thermostat, a dead battery will mimic power failures even when the home’s power is fine. Inspect the control transformer, verify that 24V is reaching the thermostat, and check for tripped breakers or blown fuses. If the display is dim, flickering, or intermittently responsive, power supply instability is the likely cause. Safety reminder: always turn off power at the breaker before touching wiring.
Sensor Problems and Calibration
Temperature sensing accuracy is crucial for comfort and energy efficiency. When a sensor drifts or is blocked by dust, direct sunlight, or drafts from a vent, the thermostat may call for heating or cooling at the wrong times. Calibration drift can happen after a firmware update or a mechanical shock. If you notice the room feels consistently hotter or cooler than the thermostat reads, inspect the sensor location, clear dust, and compare readings with a physical thermometer near the thermostat. Recalibrate if your model supports it, or relocate the sensor away from heat sources and air streams for more accurate readings.
Wiring, Terminals, and Compatibility
Loose terminals, corroded contacts, or mismatched wire gauges can cause intermittent loss of communication between the thermostat and HVAC system. Ensure all conductors are fully seated in their terminals, and inspect for damaged insulation or exposed copper. If you recently replaced a thermostat, double‑check the wiring diagram for your model and ensure the C‑wire is correctly connected for power‑hungry smart thermostats. Incompatible HVAC systems (gas vs. electric, single‑stage vs. multi‑stage) or nonstandard wiring can also trigger faults. When in doubt, refer to the installation guide and verify with the manufacturer’s compatibility list.
Firmware, Apps, and Connectivity
Software glitches can render a thermostat unresponsive or misinterpret sensor data. Check for available firmware or app updates, then install them following the manufacturer’s instructions. After updates, perform a safe reset if your model supports it and re‑pair it with the home Wi‑Fi or hub. Connectivity issues may appear as intermittent responses or delayed commands. If your thermostat has cloud features, ensure the account and permissions are correct, and verify that your router supports the device’s requirements. Never overlook a simple restart after updates.
Environmental Factors and Battery Health
Environment plays a big role in thermostat performance. Excessive humidity, dust, or extreme temperatures can affect internal electronics, especially in uninsulated or poorly ventilated spaces. If your thermostat is in a cabinet or covered area, relocate it to an open, draft‑free spot. Battery health matters for battery‑powered units; even lithium or AA/AAA replacements should be fresh and installed correctly. Keep the mounting surface clean and dry, and avoid exposing the device to direct heat sources or strong magnetic fields which can skew readings.
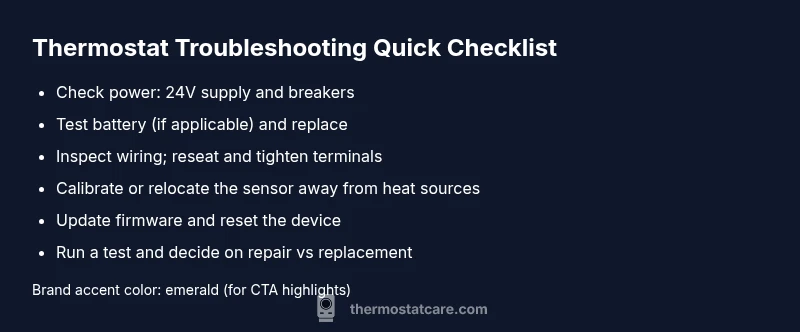
Quick DIY Checks You Can Do Today
- Confirm the thermostat is receiving power and display is active; replace batteries if needed.
- Inspect wire connections: tighten terminals and reseat cables on both the thermostat and furnace/air handler.
- Check for drafts near the sensor; reposition if the device sits near heat lamps or vents.
- Run a firmware/app update and perform a reset if available.
- Test response to setpoint changes and verify HVAC turns on/off accordingly.
If you notice no improvement after these checks, proceed to a diagnostic flow or contact a professional.
When to Replace vs Repair
Some thermostat issues stem from aging hardware or HVAC control boards that are no longer reliable. If your device is several years old, repeatedly failing despite fixes, or if the HVAC system cycles excessively after thermostat interventions, replacement may be the most cost‑effective option. A modern thermostat can improve energy efficiency and comfort, but ensure compatibility with your system and consider professional installation for complex setups.
Safety, Best Practices, and Pro Tips
- Always power down at the breaker before touching wiring.
- Use a memory-safe, non‑conductive tool to adjust terminals when possible.
- Keep firmware up to date to minimize bugs and security risks.
- Document your wiring configuration before changing anything, so you can revert if needed.
- If you smell burning or notice scorch marks, stop and call a pro immediately.
Steps
Estimated time: 60-90 minutes
- 1
Power down and inspect basics
Turn off power at the breaker to the HVAC system. Remove the thermostat cover and visually inspect for burnt components, loose wires, or obvious damage. This preserves safety and prevents further harm while you test basic functions.
Tip: If you smell burning, do not test further—call a pro immediately. - 2
Check power and display
Verify that the thermostat display is on. If battery powered, replace with fresh batteries of the correct type. For wired units, confirm the 24V supply using a multimeter or a non-contact voltage tester.
Tip: Record the baseline voltage reading for reference. - 3
Inspect wiring and terminals
Remove the thermostat’s backplate and inspect all terminals. Tighten loose screws, reseat wires, and look for damaged insulation or corrosion. Ensure the C-wire is properly connected if your unit uses it for power.
Tip: Consult the wiring diagram to match terminals exactly to your model. - 4
Test sensor and setpoints
Place the thermometer near the thermostat and compare readings at several setpoints. If there is a large delta, consider recalibrating or relocating the sensor away from heat sources, direct sunlight, or drafts.
Tip: Document any steady drift and adjust settings gradually. - 5
Update firmware and reset
Check for firmware updates in the app or on the device. Install updates, then perform a factory reset if the model supports it. Reconnect to Wi‑Fi and reconfigure settings.
Tip: Back up any custom schedules before resetting. - 6
Run a controlled test
Set a known temperature and observe if the HVAC system responds within a reasonable time. Check both heating and cooling modes. If responses are delayed or none occur, note the exact behavior for the technician.
Tip: Test during a stable outdoor temperature for consistent results. - 7
Decide on repair vs replacement
If faults persist after these steps, evaluate cost of repair versus replacing with a modern, compatible unit. Consider energy savings and warranty coverage when making the decision.
Tip: Ask about installation fees and compatibility guarantees.
Diagnosis: Thermostat is unresponsive or displays incorrect readings
Possible Causes
- highPower issue (breaker, transformer, battery)
- mediumDead batteries (for battery-powered models)
- mediumLoose or corroded wiring
- lowSensor fault or calibration drift
- lowIncompatible wiring or control board issue
Fixes
- easyCheck home power supply and HVAC transformer for 24V output; reset breakers if needed
- easyReplace batteries or install fresh power source; recheck power after replacement
- easyTighten and reseat all wire connections at the thermostat and furnace/air handler terminals
- mediumRecalibrate the sensor or relocate away from heat/cold drafts; update firmware
- hardConsult a licensed HVAC technician to inspect control board and confirm compatibility
Questions & Answers
What is the most common cause of thermostat failure?
Power issues and sensor faults top the list of thermostat failures. Start by confirming power supply, then replace batteries if needed and verify sensor placement. Addressing these two areas resolves many problems without professional help.
Power issues and sensor faults are the most common causes. Check power, replace batteries if needed, and verify sensor placement to fix most problems.
How can I tell if my thermostat battery is dead?
A blank display or unresponsive buttons usually indicates a dead battery on battery-powered models. Replace with the correct type, then test responsiveness. If the display returns but is dim, the battery may still be low and needs replacement.
A blank display usually means a dead battery. Replace it with the right type and test again.
Can a faulty thermostat cause HVAC damage?
In most cases, a failing thermostat does not permanently damage the HVAC system, but it can cause improper cycling that stresses components. Regular troubleshooting and timely replacement help prevent wear and inefficiency.
A faulty thermostat can lead to improper HVAC cycling and waste energy, but it rarely causes direct harm if checked and corrected promptly.
Should I reset my thermostat after updating firmware?
Yes, a reset after a firmware update helps ensure all new data is loaded correctly and the device functions with the latest software. Reconfigure your preferences afterward.
Yes, reset after updates to ensure new software loads properly.
How long do thermostats typically last?
Most thermostats last many years with proper care, but age, wear, and compatibility changes can lead to failures. If reliability declines, consider replacement for better performance and energy savings.
Thermostats last several years, but age and compatibility can cause issues; replacement can improve performance.
Will updating firmware fix all issues?
Firmware updates fix known bugs and compatibility issues, but some problems stem from hardware faults or wiring. Update first, then reassess. If issues persist, seek professional help.
Updates fix many problems, but not all; if issues continue, you may need a technician.
Is professional help always necessary for thermostat faults?
Not always. Start with power, battery, and wiring checks. If you notice burning smells, wet or corroded wiring, or stubborn faults, call a pro to prevent hazards.
Not always, but if you see signs of danger or complex wiring, a professional is essential.
Can environmental factors affect thermostat readings?
Yes. Direct sunlight, drafts, or nearby heat sources can skew readings. Relocate or shield the thermostat to improve accuracy and comfort.
Environmental factors like drafts or sun can skew readings; shielding or relocation helps.
Watch Video
What to Remember
- Prioritize power issues and sensor health first
- Tighten and re-seat wiring connections regularly
- Update firmware before complex fixes
- Relocate sensors away from heat sources
- Know when to replace for long-term reliability