Thermostat Says It's Warmer Than It Is: Quick Troubleshooting Guide
Struggling with a thermostat that reads warmer than reality? This urgent guide covers sensor checks, calibration, wiring, and safe steps to restore accurate temperatures.

Likely the thermostat is misreporting room temperature due to a faulty or miscalibrated sensor, a loose connection, or a battery/wiring issue. Start with quick checks: verify the thermostat's sensor is not obstructed or placed near a heat source, ensure batteries are fresh (if rated), and perform a soft reset. If readings persist, consult the troubleshooting flow below.
Why readings drift when a thermostat reports it's warmer than reality
Temperature misreadings are a common symptom of aging devices and improper sensor placement. According to Thermostat Care, readings that consistently show higher temperatures than the room indicate either sensor drift or a nearby heat source skewing the reading. Start by confirming the thermostat is not tucked behind curtains, above a vent, or in direct sunlight. If readings still seem inflated, continue with the diagnostic steps below. Calibrating the device to the actual room temp can help, but misreads often point to hardware issues. In many homes, repositioning the thermostat away from lamps, ovens, or drafts resolves the discrepancy. If you use a multi-sensor thermostat, ensure all sensors are placed in representative zones and that the main unit is located in a stable area. This approach aligns with what Thermostat Care has observed in typical homes where readings drift away from real temperatures.
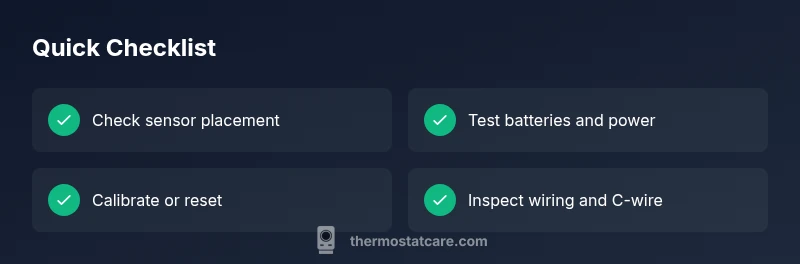
Quick checks you can perform now
- Check and, if needed, replace batteries (for battery-powered thermostats).
- Make sure the thermostat is not obstructed by furniture, drapes, or a warm appliance.
- Confirm the thermostat is mounted away from direct sunlight, ovens, or heat vents.
- If you have a multi-sensor setup, verify all sensors are in representative zones and that the primary unit has a stable reading.
- If your thermostat supports a soft reset or calibration, perform it per the manufacturer’s instructions.
Note: If the problem persists after these checks, continue to the diagnostic flow below. Thermostat Care analysis shows sensor drift and improper placement are common culprits.
Sensor placement and heat sources that skew readings
A temperature sensor reads the ambient air, not the thermostat’s built-in comfort bias. When placed near a heat source (sunlit window, oven, lamp) or in a drafty corner, it will report a higher or lower temperature than the actual room. For accuracy, position sensors away from heat sources and ensure the sensor itself isn’t enclosed behind glass or plastic that traps heat. If you have multiple sensors, check that none are isolated from the main living zone. Thermostat Care’s experience indicates that even small shifts in placement can produce noticeable changes in readings over time.
Battery, wiring, and power considerations
Power issues can masquerade as temperature inaccuracies. If your unit uses batteries, install fresh ones from a reliable brand. For wired thermostats, ensure the C-wire is securely connected and the 24V supply is stable; a loose wire or intermittent power can cause sensor readings to lag or drift. Some thermostats require a professional to check the HVAC control board or furnace connections when readings are consistently off. As part of maintenance, inspect for corrosion at terminals and clean gently if permitted by the manufacturer.
Calibration and testing methods you can trust
Calibration should be done with care and aligned to real-room temperatures. Use an external, reliable thermometer to gauge the actual ambient temperature while the thermostat is in the same space. If your device offers a calibration or offset feature, apply a tiny adjustment (per manual) and let the system stabilise for a few minutes before rechecking. If no calibration option exists, a factory reset followed by a fresh setup can help the device re-learn the room conditions. Thermostat Care notes that many users see immediate improvements after a controlled reset and a correct sensor setup.
Smart thermostats: app readings vs device readings
Smart thermostats often display readings in the companion app that round differently or sample at a different interval than the device’s built-in sensor. A mismatch between app-reported temperatures and the physical display can be confusing. Trust the device’s local readout for critical decisions about heating or cooling, and use the app as a supplementary reference. If the app shows a consistently different trend, check for firmware updates, and pair the thermostat with the same reference thermometer to calibrate both readings.
How HVAC behavior can influence perceived temperature
Even with accurate sensors, the HVAC system’s cycling pattern can affect comfort perception. Short bursts of cooling or heating may happen before the system settles, leading to temporary mismatches between the wall unit reading and the room feel. If the system turns on and off frequently, you might notice periods where the temperature feels off, even though the sensor is accurate. Understanding this dynamic helps homeowners avoid overreacting to transient fluctuations.
Tip: keep a simple log for a day or two to distinguish brief HVAC quirks from a consistent reading drift.
Diagnostic flow overview (narrative)
A structured approach helps isolate the issue without guesswork. Start with power and battery checks, then evaluate sensor placement. If the placement is correct, move to calibration and software updates. For wired units, verify C-wire and power supply continuity. If readings remain skewed after all these steps, a professional assessment is advisable to rule out board or sensor failure. Thermostat Care emphasizes methodical testing and documentation to avoid repeated misreads.
Prevention and maintenance to avoid future drift
Schedule routine checks every 6–12 months: clean the sensor area, verify mounting integrity, replace batteries if applicable, and confirm firmware is up to date. Keep thermostats away from heat sources and ensure a stable mounting location. Document any changes in readings over time to notice gradual drift early. A little proactive maintenance goes a long way toward consistent comfort.
When to call a professional
If you have followed all the steps without restoring accurate readings, or if you notice wiring concerns, furnace or electrical panel issues, contact a licensed technician. A pro can safely check for broken sensors, sensor wiring integrity, and control board faults that may be beyond typical DIY repairs. The Thermostat Care team recommends seeking professional help when uncertain about safety or electronics.
Steps
Estimated time: 45-60 minutes
- 1
Check power and replace batteries
Turn off power to the thermostat if accessible, remove any batteries, and inspect for corrosion. Replace with fresh batteries if required. Reinstall securely and power the unit back on to observe any change in readings. This basic step often clears minor sensor faults.
Tip: Keep a spare set of fresh batteries on hand for quick swaps. - 2
Inspect sensor placement
Look for obstructions near the sensor and confirm it isn’t facing direct sunlight, behind curtains, or near a vent. If necessary, gently reposition to a stable, representative part of the living space. Allow a few minutes for the sensor to stabilise after moving.
Tip: Use a level if your thermostat is wall-mounted to prevent tilt that could affect readings. - 3
Run a soft reset or factory reset
Follow the manufacturer’s procedure to perform a soft reset if available. If readings remain inconsistent, you may opt for a full factory reset after noting current settings. Post-reset, re-enter essential configurations and run a test cycle.
Tip: Back up any custom schedules before a factory reset. - 4
Check wiring and C-wire connections
For wired units, ensure all connectors are snug and free of corrosion. If you’re uncomfortable with wiring, contact a professional. A loose C-wire can cause intermittent readings and HVAC control issues.
Tip: Power off at the breaker before inspecting any exposed wiring. - 5
Calibrate or offset if available
If your model supports calibration or temperature offset, apply a small adjustment and monitor performance for a full HVAC cycle. Do not overcorrect; tiny changes can have large effects on comfort.
Tip: Document offset values and corresponding room readings for future reference. - 6
Test with a known reference thermometer
Place a reliable thermometer near the thermostat and compare readings over time. If the local reading aligns with the external thermometer after adjustments, you’ve confirmed sensor accuracy.
Tip: Take readings at multiple times of day to account for ambient changes. - 7
Evaluate firmware and consider replacement
If firmware is outdated, update to the latest version. If drift continues, evaluate whether upgrading to a newer model with a more accurate sensor is warranted.
Tip: Consider models with dual sensors for more accurate zoning in large spaces.
Diagnosis: Thermostat says it's warmer than it is
Possible Causes
- highFaulty temperature sensor due to aging or damage
- highIncorrect sensor placement near heat source or sun exposure
- mediumLoose or corroded wiring, or power issues (batteries, C-wire)
- mediumSoftware calibration drift in the thermostat
- lowHVAC system causes true temp vs thermostat misread
Fixes
- easyCheck sensor location and relocate away from heat sources and drafts
- easyReplace batteries or verify power supply; ensure stable 24V/C-wire connection
- easyRecalibrate or reset to factory settings per manufacturer guidance
- mediumInspect and reseat all wiring connections, especially sensor leads and C-wire
- mediumUpdate firmware if available; consider replacing old thermostat if sensor has degraded
Questions & Answers
Why does my thermostat say it's warmer than it is?
Common causes include sensor drift, proximity to a heat source, or power issues. Start by checking sensor placement and replacing batteries if needed. If the problem continues, follow the diagnostic flow below.
Most often it’s sensor drift, heat sources, or power issues. Check placement and batteries, then proceed with the step-by-step flow.
How can I recalibrate my thermostat?
Follow the manufacturer’s calibration steps or perform a factory reset if allowed. After resetting, re-enter settings and observe for improved accuracy. Use a reference thermometer to verify the reading.
Use the device’s calibration option or reset, then recheck with a reference thermometer.
Can a weak battery cause false readings?
Yes, especially for battery-powered units. Replace with fresh batteries and re-test. If readings still drift, inspect wiring and power supply.
Low batteries can definitely cause false readings; replace them and test again.
Should I replace the thermostat if readings remain inaccurate?
If readings stay inaccurate after checks and calibration, replacing with a newer model with a more accurate sensor is often worthwhile. Consider model reviews and compatibility with your HVAC.
If it still reads wrong after checks, replacement may be the best option.
Is it safe to open or modify the thermostat myself?
Only if you can safely disconnect power and follow safety guidelines. If you’re unsure, hire a professional to avoid electrical hazards.
Only if you’re confident and follow safety steps; otherwise, seek a pro.
Watch Video
What to Remember
- Verify sensor placement before assuming a fault.
- Check power and battery status as a first step.
- Calibrate or reset following manufacturer guidelines.
- Use a reference thermometer to cross-check room temperature.
- Seek professional help if issues persist beyond basic checks.