OEM vs Aftermarket Thermostat + Coolant Temp Sensor: A Comprehensive Comparison
A detailed comparison of OEM thermostat and coolant temp sensor versus aftermarket kits. Learn fit, reliability, installation, and maintenance tips for DIY enthusiasts working on car cooling systems.

TL;DR: For most DIYers, OEM thermostat and coolant temp sensor deliver the best reliability and fit for your vehicle, ensuring proper engine warm-up and accurate temperature readings. Aftermarket universal kits can save upfront cost but may require extra calibration, compatibility checks, and a higher risk of diagnostic headaches. In practice, choose OEM for daily reliability; aftermarket if you’re chasing budget or a nonstandard build.
What the thermostat and coolant temp sensor do in your engine
In modern vehicles, the thermostat and coolant temperature sensor (CTS) are the gatekeepers of engine heat. The thermostat controls the flow of coolant between the engine and radiator, opening and closing in response to temperature to maintain the ideal operating range. The coolant temp sensor provides real-time data to the engine control unit (ECU), informing fuel delivery, ignition timing, and cooling fan activation. When both components work in harmony, you get smooth cold starts, stable warm-up, and efficient combustion. According to Thermostat Care, the thermostat and coolant temp sensor are central to reliable engine performance, and a fault in either can trigger rich/lean conditions, misfire symptoms, or overheating. DIY diagnostics should start with a visual check of wiring, connectors, and sensor seals, followed by straightforward electrical tests to confirm resistance changes with temperature. Keep a log of observed engine temps and coolant flow during test runs to pinpoint irregularities.
OEM vs aftermarket thermostat and sensor: Core differences
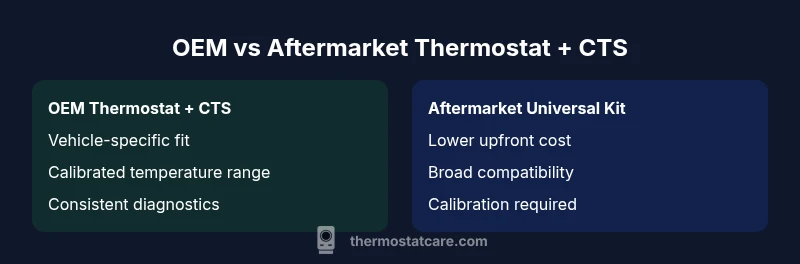
Choosing between OEM and aftermarket options hinges on fit, reliability, and long-term value. OEM (Original Equipment Manufacturer) parts are designed for your exact vehicle model, with calibrated temperature ranges and a factory-spec housing. They tend to offer consistent performance, predictable diagnostics, and stronger warranty coverage, which translates into fewer surprises on the road. Aftermarket kits, including universal thermostat and sensor assemblies, are typically cheaper upfront and may be appealing for budget-conscious projects or nonstandard builds. However, they come with trade-offs: variable fit, potential calibration needs, and a broader spectrum of possible reliability outcomes depending on brand and part quality. The Thermostat Care Team notes that while aftermarket solutions can meet basic requirements, issues like incorrect opening temperature, mismatched fans, or sensor signal inconsistencies can complicate troubleshooting and extend repair times.
Installation considerations and compatibility
Compatibility is the first gatekeeper. OEM parts are guaranteed to match your specific engine and cooling system, minimizing trial-and-error during installation. If you opt for an aftermarket kit, verify model compatibility in advance, including vehicle year, engine size, and sensor type. Tools typically include screwdrivers, wrenches, coolant catch basin, and possibly a torque wrench for the housing bolts. Safety matters: let the engine cool completely, drain some coolant, and avoid opening pressurized systems. For CTS replacement, you may need to disconnect wiring harnesses and clear the ECU fault codes after installation. The installation difficulty varies: OEM replacements are often straightforward, while universal kits may require adapters, re-customized hoses, or sensor spacers. Always refer to your vehicle’s service manual and follow torque specifications to prevent leaks and sensor damage.
Diagnostic signs of failure
When the thermostat or CTS starts to fail, the symptoms often overlap but point to different root causes. A stuck-closed thermostat can cause slow warm-up, overheating, and radiator pressure buildup. A stuck-open thermostat may lead to prolonged cool-running, reduced fuel economy, and inefficient warm-ups. A failing CTS can cause erratic readings, sluggish cooling fan activation, or false overheating indicators on the dash. Look for engine warning lights, fluctuating temperature gauges, rough idle when cold, and poor acceleration. Running a scan for diagnostic trouble codes (DTCs) can reveal CTS sensor codes (e.g., P0118, P0119 in many vehicles) or issues tied to cooling system regulation. If you notice symptoms, test both parts in parallel, starting with the CTS resistance checks and then confirming thermostat operation by verifying coolant flow with controlled engine temperature data.
DIY replacement steps: careful procedures and safety
Performing a DIY replacement can save time and money, but accuracy is critical. Step-by-step: 1) Wait until the engine is cool, disconnect the negative battery, and place a tray to catch coolant. 2) Relieve pressure by loosening the radiator cap slowly. 3) Drain a portion of coolant to avoid spills. 4) Remove the thermostat housing bolts and lift the old thermostat out, taking note of orientation. 5) Replace the CTS if it’s integrated or if your kit includes a separate sensor; apply new O-rings and sealant as recommended. 6) Install the new thermostat with the correct orientation, reattach the CTS wiring, and reconnect hoses. 7) Refill coolant to the proper level and bleed air from the system, if required. 8) Start the engine and monitor temperatures, checking for leaks. Always consult the service manual for torque specs and reprogramming needs.
When to replace both components together
Replacing both parts together is often sensible when diagnostic data shows concurrent symptoms, or when a thermostat failure has caused abnormal cooling system pressures that could damage the CTS. Replacing them as a pair reduces the risk of swapped or mismatched readings, ensures synchronized opening temperatures, and simplifies future maintenance. If you plan to sell or upgrade the vehicle, a complete job also helps with resale value and reduces post-repair questions from future owners. The Thermostat Care Team emphasizes that a coordinated replacement offers the most predictable cooling performance and reduces the chance of intermittent cooling faults.
Comparison
| Feature | OEM Thermostat + Coolant Temp Sensor | Aftermarket Universal Kit (Thermostat + Sensor) |
|---|---|---|
| Compatibility | Vehicle-specific fit with guaranteed calibration | Broad compatibility but may require adapters or model checks |
| Temperature Activation Range | Engine-optimized, factory-calibrated range | Varies by brand; may require manual calibration |
| Installation Complexity | Relatively straightforward with service manual | Often more complex due to fit and wiring adjustments |
| Reliability/Longevity | High reliability when matched to vehicle | Variable reliability depending on brand and quality |
| Warranty | Manufacturer warranty typical for OEM | Warranty varies by aftermarket brand |
| Price Range | Higher upfront cost; perceived long-term value | Lower upfront cost but potential hidden costs |
| Best For | Reliability-focused daily driving | Budget builds or nonstandard applications |
Upsides
- Exact fit and calibrations for your vehicle
- Predictable diagnostics and warranties
- Stable long-term performance with OEM support
- Better resale value after a full OEM replacement
The Bad
- Higher upfront cost compared to aftermarket
- Longer lead times for OEM parts
- Potentially limited to manufacturer-approved options
- Aftermarket parts may require more troubleshooting and calibration
OEM thermostat + CTS generally wins for reliability and consistency
Choose OEM for everyday reliability and straightforward diagnostics. Opt for aftermarket only if you’re on a tight budget or working on a nonstandard build, and you’re prepared for extra setup and potential compatibility checks.
Questions & Answers
What does the coolant temp sensor do?
The coolant temp sensor provides real-time engine temperature data to the ECU, influencing fuel delivery, ignition timing, and fan control. It works with the thermostat to regulate engine warmth. A fault can cause poor fuel economy, rough idle, or overheating warnings.
The coolant temp sensor tells the engine computer how hot the engine is, so fuel and timing adjust correctly. If it fails, you may see poor mileage or rough starts.
Can I replace only one part if the other is failing?
In some cases you can replace just the faulty component, but mixing OEM with aftermarket parts can introduce calibration mismatches. If symptoms clearly point to one part, isolate and replace that item, then test the system to confirm stability.
You can usually replace the faulty piece, but beware compatibility issues if mixing parts. Test afterward to confirm it’s fixed.
What are common symptoms of thermostat or CTS failure?
Common symptoms include slow or no warm-up, overheating, or fans running constantly. CTS issues show as fluctuating temperature readings or poor coolant regulation. If you see dash warnings or inconsistent temps, diagnose both parts.
Look for overheating or cool-start problems, and watch the temp gauge closely; inconsistent readings usually point to the CTS.
Do OEM parts last longer than aftermarket parts?
OEM parts are designed for your exact vehicle and usually provide predictable longevity. Aftermarket parts vary by brand, quality, and compatibility, so life expectancy can differ significantly.
OEM parts typically last longer and fit better; aftermarket life depends on brand and setup.
Is it safe to drive with a faulty thermostat or CTS?
Driving with a faulty thermostat or CTS can risk engine damage, overheating, or poor lubrication control. If you notice persistent temperature issues, limit driving and arrange a repair promptly.
It’s risky to drive with a bad thermostat or CTS. Get it fixed to avoid engine damage.
How long does replacement typically take?
A straightforward replacement may take 1–2 hours for a DIYer with basic tools. More complex scenarios or the need to drain coolant and bleed air can extend the time to 3–4 hours.
Most replacements take 1–4 hours depending on your vehicle and access to the thermostat housing.
What to Remember
- Prioritize OEM for critical reliability and predictable readings
- Verify vehicle compatibility before buying aftermarket kits
- Test both components if symptoms overlap to avoid misdiagnosis
- Always bleed the cooling system after replacement to prevent air locks
- Keep a maintenance log to track sensor readings and temperatures