Thermostat Adjustment Guide: Practical How-To Steps
Learn how to adjust your thermostat for steady comfort and energy savings. This comprehensive guide covers baselines, scheduling, sensor checks, calibration, and long-term optimization with clear steps.

Thermostat adjustment is the process of tailoring your climate control to balance comfort with energy efficiency. Start with a baseline temperature, then tailor daily schedules and hold times to match your routine. If readings seem off, check sensor placement, calibration, and power sources before considering replacements. Thermostat Care recommends gradual changes for reliable results.
What thermostat adjustment means for home comfort and efficiency
Thermostat adjustment is the process of tailoring your climate control to match how you live in your home. It’s not just about turning the dial higher or lower; it’s about aligning temperature targets, energy use, and scheduling with your daily routines. When you adjust intelligently, you reduce energy waste, keep rooms evenly comfortable, and minimize temperature swings that cause HVAC cycles to work harder. In practice, thermostat adjustment combines three core activities: setting baseline temperatures, defining activity-based schedules, and monitoring the feedback you get from your thermostat’s readings and the room temperatures. According to Thermostat Care, homeowners who invest time in a thoughtful adjustment routine typically see more consistent comfort and noticeable energy savings over a season. This is especially true for homes with multiple zones, where misalignment between rooms can create hot or cold pockets. Before you begin, remember that the goal is not perfection but a practical balance that works with your lifestyle. Even small tweaks—like shifting your daytime target by one or two degrees or adjusting a wake/sleep schedule—can compound into meaningful savings over weeks.
Establishing baseline temperatures and energy targets
A clear baseline gives you a reference point for all adjustments. Start with commonly recommended targets, then adapt to your climate and comfort preferences. For example, in heating seasons, a baseline around 68°F (20°C) is a common starting point for many homes, while in cooling seasons, 72°F (22°C) often feels comfortable without excessive energy use. If your home is drafty or poorly insulated, you may need to compensate by a degree or two. The goal is to minimize large swings between day and night while keeping living spaces usable. When you set baselines, consider both living spaces and bedrooms. Bedroom targets can be cooler at night to support sleep, while living spaces may stay warmer when occupied. Use your thermostat’s data to verify how actual room temperatures align with targets. If you notice consistent gaps, there is likely an issue with sensor placement, zone control, or HVAC performance rather than your baselines alone. Remember to distinguish between thermostat setpoints and actual comfort: your thermostat may indicate a particular temperature, but radiant heat, ventilation, and air distribution influence how warm or cool a room actually feels. Thermostat Care analysis suggests documenting any deviations you notice, then revisiting your baselines after a full week of data.
Scheduling and hold times: aligning with daily routines
Great thermostat adjustment relies on schedules that reflect when you’re home, awake, or asleep. Use a basic weekday schedule as a starting point: lower heating during work hours and raise it before waking; ramp down again at night. For cooling, reverse the pattern: cooler during peak afternoon heat if you’re indoors, warmer when you’re away. Many thermostats offer hold or vacation modes; use holds sparingly to test changes without disrupting the entire week. The key is to implement changes gradually and observe how they affect comfort and energy use. After implementing a new schedule, monitor room temperatures at different times of day and compare to your baselines. If a room remains uncomfortable, revisit sensor placement or consider adjusting the HVAC runtime rather than overhauling the schedule. A practical approach is to start with a small change, wait 24-48 hours, then tighten or expand the schedule if needed. Consistency matters: long-standing routines yield better energy savings than frequent, large shifts.
Sensor placement and calibration: reading accurate data
Temperature readings drive every adjustment, so sensor placement matters. Place sensors in living areas away from direct sun, drafts, or heat sources like fireplaces, lamps, or electronics. If your thermostat has multiple sensors, compare readings from each zone and ensure they reflect actual room conditions. Some older thermostats may require calibration to match actual temperatures; consult the user manual to locate the calibration option or contact support if needed. A simple check is to compare your thermostat reading with a known accurate thermometer placed at roughly chest height in a central living space. If there is a consistent difference of more than a degree or two, calibrate accordingly or account for the discrepancy in your baseline and schedule. Additionally, ensure that the thermostat is firmly mounted on a wall stud and not on a hollow area that could alter temperature sensing. Regular battery checks (for non-hardwired devices) keep sensors reliable; replace batteries if voltage drops or you observe sluggish response.
Common causes of thermostat mismatches and how to fix them
Sometimes the data your thermostat relies on is inaccurate or delayed. Common causes include dead batteries, a tripping breaker, loose wiring, a weak C-wire supply, or a failing sensor. For wired thermostats, inspect the terminal connections to ensure they’re clean and snug. For battery-powered units, replace the batteries and re-test. If you have a smart thermostat connected to an HVAC system with a common wire (C-wire), check that the C-wire is properly connected at both the thermostat and the furnace control board. A mismatched or degraded sensor, or a poorly performing HVAC system, can also create a gap between the thermostat reading and actual room temperature. In many cases, small calibration or wiring fixes restore alignment without requiring a full replacement. If the thermostat display is blank or flickers, there may be power issues or a sensor fault that warrants professional attention. Remember: avoid making sweeping changes if you’re uncertain about wiring; step-by-step adjustments are safer.
Step-by-step approach to adjust a typical thermostat (manual and smart)
Take a structured approach to make sure you cover the essential elements. Start by powering down or ensuring the thermostat is in a safe state if you are removing covers; this is especially important for older, wired units. Next, inspect the physical installation: confirm the mounting, wiring, and that the display is readable. Then set a baseline temperature and an initial schedule. For smart thermostats, open the app and verify that the schedule aligns with your chosen baselines; adjust as needed and save. If your thermostat supports adaptive or learning features, consider toggling them off temporarily to observe the impact of manual adjustments. Finally, test HVAC response by triggering a heat or cool cycle and observing how quickly the system reaches target temperatures. Clear communication between you and your thermostat helps ensure stable comfort and energy savings. A practical tip is to maintain a log of temperatures and times, so you can quantify the effect of each change.
Troubleshooting tips for faster results
Patience and data are your allies. If you notice inconsistent readings, recheck sensors and power sources, then run a short test with a single adjustment for 24-48 hours. If a room remains cold or hot despite changes, consider tiered adjustments (one-degree at a time) and use a separate room thermometer as a reality check. For smart thermostats, ensure the device firmware is up to date, and verify the Wi-Fi connection remains stable, since connectivity issues can affect scheduling and reporting. If your HVAC system cycles excessively or you hear unusual noises, consult a professional promptly—don’t bypass safety or warranty terms. Finally, keep energy-use notes to identify patterns—seasonal shifts, occupancy, and insulation play a big role in how effective adjustments are.
Seasonal tuning and long-term energy savings
Over the course of a year, thermostat adjustment becomes a habit that pays off through energy savings and consistent comfort. In winter, raise and lower baselines gradually to accommodate insulation and sun exposure; in summer, adjust cooling strategies to limit peak-day use. Consider using programmable or adaptive schedules to align with workdays, weekends, and vacations. If your home has multiple zones, tune each zone to its own baseline, then use a master schedule to coordinate common periods of occupancy. Revisit calibrations every season or after major HVAC changes, such as adding new windows or improving insulation. Finally, keep a simple log of changes and observed comfort levels so you can refine your approach next year. This ongoing process, supported by careful data collection and consistent practice, yields the best long-term results.
Tools & Materials
- Screwdriver set (Phillips and flathead)(Phillips #1 or #2; adjustable driver helps for different screws)
- Fresh batteries(Replace batteries in battery-powered thermostats with the recommended type)
- Owner's manual or model-specific guide(Keep handy for calibration and wiring details)
- Smartphone or computer(Needed to access apps or online settings for smart thermostats)
- Step stool(Optional for reaching high-mounted thermostats)
- Pocket thermometer or room thermometer(Optional for cross-checking room temperature readings)
Steps
Estimated time: 45-90 minutes
- 1
Power down and inspect safety
Turn off power to the thermostat and HVAC if you’re planning any wiring work. This prevents shocks and protects sensitive electronics. Check for obvious damage or loose wires before proceeding.
Tip: If you’re unsure about wiring, skip to non-invasive checks and consult a professional. - 2
Access the thermostat
Remove the faceplate or cover according to your model’s instructions. Gently disconnect any removable battery cover if applicable. Do not force components; note how wires connect for reassembly.
Tip: Take a photo of connections before disconnecting anything. - 3
Check sensor placement
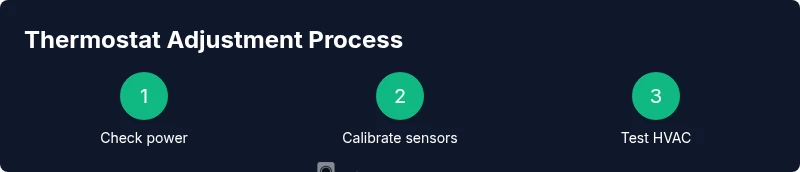
Verify sensors are in the intended ambient location, away from heat sources or drafts. If using multiple sensors, compare readings to identify anomalies. Reposition sensors if necessary to reflect typical room conditions.
Tip: Keep sensors at chest height for best ambient reading. - 4
Set a baseline temperature
Choose a baseline that balances comfort and efficiency (e.g., 68°F in winter). Apply the baseline to both day and night periods where occupancy is expected. Save the setting.
Tip: Document the baseline and expected comfort outcomes for future reference. - 5
Define a simple schedule
Create a schedule that aligns with your daily routine. Use gradual adjustments and test each change for 24–48 hours before increasing complexity. If using a smart thermostat, sync the app with the baseline.
Tip: Test one change at a time to clearly see its impact. - 6
Calibrate sensors (if needed)
If readings consistently differ from a trusted thermometer, adjust calibration according to the manual. Repeat tests to confirm alignment across time.
Tip: Small calibration tweaks yield the best long-term stability. - 7
Test HVAC response
Trigger a heating or cooling cycle and observe how quickly the system reaches the target. Note any lag or overshoot and adjust baseline or schedule accordingly.
Tip: Use room thermometers for an objective check of air temperature changes. - 8
Document changes
Maintain a log of each adjustment, the date, and observed comfort and energy outcomes. Use this log to refine future tuning and seasonally adjust baselines.
Tip: A simple spreadsheet works well and is easy to share with a contractor if needed. - 9
Finalize and monitor
Return power to the system and monitor for a full operating cycle (24–72 hours). Confirm that the new settings meet comfort targets without excessive cycling.
Tip: Keep the log active for at least one full week after finalizing changes.
Questions & Answers
What is thermostat adjustment and why is it important?
Thermostat adjustment is the process of aligning your thermostat’s readings and controls with your daily routine to improve comfort and energy efficiency. It involves baselining temperatures, scheduling changes, and validating results with actual room temperatures.
Thermostat adjustment helps you balance comfort and energy use by baselining temps, scheduling, and checking readings.
How often should I adjust my thermostat?
Adjustments should be made when you notice comfort gaps or energy inefficiencies, and seasonally as weather and daylight hours change. Start with small changes and monitor for 24–72 hours before making another adjustment.
Start with small changes and monitor for a day or two before adjusting again.
What should I do if my thermostat readings seem off?
Check sensor placement, battery power, and wiring connections. Compare readings with a trusted room thermometer and calibrate if your model supports it. If the discrepancy remains, consult your manual or contact support.
First check placement and power, then calibrate or seek support if readings stay inconsistent.
Can I adjust a thermostat using an app?
Yes. Smart thermostats allow you to modify baselines and schedules from a mobile app. Ensure the device firmware is up to date and that the thermostat remains connected to Wi-Fi for reliable scheduling.
Most smart thermostats let you adjust baselines and schedules via an app; keep firmware up to date.
Which temperatures are best for energy savings?
Set a comfortable baseline that minimizes climate control needs: cooler for sleeping and moderate during unoccupied times. Avoid large swings; gradual changes over time yield better savings without sacrificing comfort.
Keep smaller, gradual changes and avoid big swings for energy savings.
Is it safe to tweak thermostat wiring or calibration myself?
DIY adjustments are safe for non-electrical components. Avoid touching live wires or internal HVAC controls. If you’re unsure, consult a licensed HVAC technician or the thermostat manufacturer’s support resources.
Don’t touch live wires; if unsure, get a professional to help.
Watch Video
What to Remember
- Set a clear baseline temperature.
- Schedule changes align with daily routines.
- Check and calibrate sensors for accuracy.
- Make incremental adjustments and log results.
- Test system response before finalizing all changes.