Set Thermostat: A Step-by-Step Home Guide
Learn how to set thermostat effectively with this comprehensive how-to. Program schedules, confirm compatibility, and optimize energy use for comfort and savings.

Set your thermostat to a comfortable, energy-saving schedule by selecting the correct mode and programming daily routines. Start by confirming compatibility with your HVAC system, then configure the schedule and test cooling or heating responses. According to Thermostat Care, a properly set thermostat reduces energy waste while maintaining comfort year-round.
Why setting your thermostat correctly matters
A well-set thermostat is the easiest way to improve comfort and reduce energy bills without sacrificing warmth or cooling. When you set thermostat correctly, you avoid overcooling in winter or overworking the AC in summer, which translates to meaningful savings over a season. According to Thermostat Care, homeowners who implement a tailored schedule see more consistent indoor temperatures and better control over their energy use. Before you begin, confirm that your chosen thermostat is compatible with your HVAC system and that you understand the basics of the model you’re installing. This ensures you won’t waste time on incompatible wiring or feature gaps. In practice, a properly configured thermostat learns your routine and adjusts automatically, so you don’t have to toggle settings manually throughout the day. In addition to comfort, pay attention to your home’s occupancy patterns, solar gains, and weather extremes, which can affect how you want to program heating and cooling. The goal is to establish a baseline temperature range that feels natural while minimizing runtime and unnecessary cycling.
Tools & Materials
- Thermostat (existing or new)(Model compatibility with your HVAC system; ensure it supports the features you need (C-wire, Wi‑Fi, etc.).)
- HVAC system owner manual(For wiring diagrams and compatibility notes.)
- Screwdriver set (Phillips #2, flat-head)(For mounting and terminal screws.)
- Fresh batteries (if required by your thermostat)(Have on hand if the model uses batteries.)
- Smartphone or computer with thermostat app(For setup, remote programming, and firmware updates.)
- Tape or wire labels(Label wires as you disconnect them to avoid miswiring.)
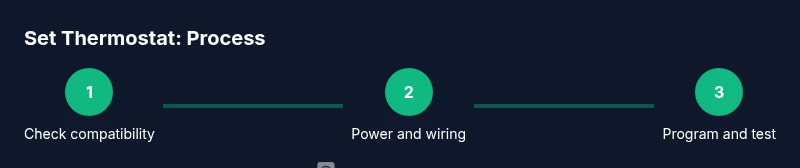
Steps
Estimated time: 30-60 minutes
- 1
Power down and verify compatibility
Turn off the circuit breaker for the HVAC system to prevent shocks. Verify the system type (gas, electric, heat pump) and confirm that the new thermostat is compatible with it. If you’re unsure, consult the manual or Thermostat Care’s compatibility guide before proceeding.
Tip: Take a photo of the current wiring and terminal labels before removal. - 2
Remove the old thermostat and label wires
Carefully remove the front panel and loosen the mounting screws. As you disconnect wires, label each one by its terminal (R, W, Y, G, C, etc.). Take another photo for reference so you can re-create the wiring accurately on the new device.
Tip: Document wiring order to prevent post-install mistakes. - 3
Mount the new thermostat base
Attach the new mounting plate level to the wall using appropriate screws and anchors. Ensure the plate is secure and lies flat against the wall to avoid loose connections or future movement.
Tip: Use a small spirit level to confirm it's perfectly straight. - 4
Connect wires to the correct terminals
Land each wire on the matching labeled terminal (R to R, W to W, Y to Y, G to G, C to C). Tighten screws firmly without accidentally kinking wires. If your system is a heat pump, connect O/B as required by the thermostat’s wiring diagram.
Tip: Double-check each connection against the device’s wiring diagram. - 5
Configure basic settings and mode
Power on the thermostat and set the system type (gas, electric, heat pump). Start with Auto mode and a simple 7-day schedule. Enter initial setpoints and confirm that both heating and cooling respond to changes.
Tip: Begin with a basic schedule to verify operation before adding complex routines. - 6
Test system and finalize
Restore power and run a test cycle for heating and cooling. Check temperature readings against the setpoints and adjust sensor placement if readings seem off. Save the final schedule and ensure the interface is accessible for future tweaks.
Tip: Document the final wiring and settings for future maintenance.
Questions & Answers
How do I know if my thermostat is compatible with my HVAC system?
Check the thermostat’s manual for supported system types (gas, electric, heat pump) and required wiring. Look for labels like R, C, W, Y, and G on the existing wires. If in doubt, contact the manufacturer or Thermostat Care for guidance.
Check the manual for supported system types and wiring labels; if unsure, contact support for guidance.
What is a C-wire and do I need it?
The C-wire provides continuous power to the thermostat. Some older systems don’t have a C-wire, in which case you may need a power extender kit or a non-Wi-Fi model that doesn’t require it.
A C-wire supplies constant power; if your current setup lacks it, you may need a kit or a new thermostat.
Can I program a schedule on a non-smart thermostat?
Yes, many non-smart thermostats offer basic scheduling with manual modes. The options are more limited, but you can still set daily routines using the available features.
Yes, you can schedule on many non-smart thermostats, though there are fewer options than on smart models.
What if the thermostat won’t power on after wiring?
First check the circuit breaker and confirm all wires are correctly landed on their terminals. If the device uses batteries, replace them. If power still fails, disconnect and recheck the wiring or consult a pro.
If it won’t power on, check the breaker and wiring; replace batteries if needed, and recheck connections.
How often should I replace batteries in a battery-powered thermostat?
Check the manufacturer’s guidance, but many models require yearly battery changes or when a low-battery indicator appears.
Usually yearly, or when the display shows a low battery message.
Why is my thermostat display blank or not turning on?
A blank display usually means power is off or a dead battery. Check the power supply and the battery, then inspect wiring for looseness or damage.
A blank display often means power is off or the battery is dead; check power and wiring.
Watch Video
What to Remember
- Verify system compatibility before installing.
- Program a simple, daily schedule first.
- Test heating and cooling after changes.
- Enable energy-saving modes where available.
- Keep wiring photos and manuals for reference.