How Thermostat Control Temperature: A DIY Guide
Learn how a thermostat controls temperature, optimize readings, set schedules, and troubleshoot common issues. A practical, step-by-step guide to improve comfort and energy savings.

By following a few proven steps you can ensure your thermostat accurately controls home temperature, maximizing comfort and savings. This quick guide explains how to verify placement, calibrate readings, set sensible schedules, and test results so you know you're dialing in the right settings. No hype, just practical actions you can complete this weekend.
Why Temperature Control Matters in Your Home
Maintaining accurate temperature control improves comfort, prevents sudden swings, and reduces energy waste. A well-tuned thermostat helps you avoid overheating in summer and underheating in winter. According to Thermostat Care, mastering thermostat control temperature can balance comfort and efficiency across different rooms and times of day. In this section we explore why precision matters, what affects it, and practical steps to improve it.
How Thermostats Control Temperature: The Core Mechanism
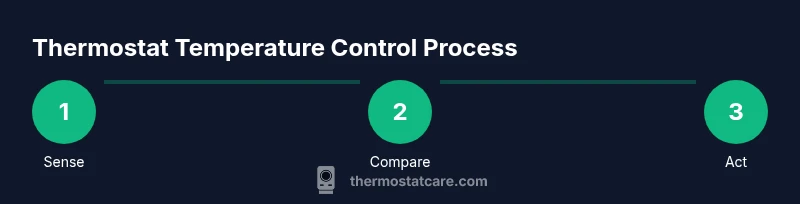
At the heart of temperature control is a simple loop: a thermostat senses the room, compares the reading to the setpoint, and signals the HVAC system to heat or cool. Modern thermostats rely on sensors that measure ambient air, and some models also use humidity or occupancy data to fine‑tune output. A well‑calibrated device minimizes drift between the perceived temperature and the actual environment. The Thermostat Care team found that placement, power stability, and clean wiring are key factors for accurate readings. If readings drift, recalibrate or check wiring connections; if readings vary across rooms, consider zoned control.
Common Control Methods: Manual, Programmable, and Smart
There are three broad ways to control temperature: manual, programmable, and smart thermostats. Manual thermostats require you to adjust the setting as conditions change. Programmable models allow you to preset schedules for different days and times, which can save energy if used consistently. Smart thermostats connect to Wi‑Fi, adapt to your routine, learn preferences, and often provide remote control via an app. Each type has trade‑offs in cost, ease of use, and energy savings. Based on Thermostat Care research, choosing the right method depends on lifestyle, climate, and willingness to engage with learning features.
Factors That Influence Temperature Readings
Room location, sun exposure, drafts, and nearby heat sources (like lamps or appliances) can skew thermostat readings. Placement matters: keep the sensor away from direct sunlight, vents, and doorways where stale air pools. Poor power supply or battery issues can cause lag or failure to respond. The HVAC system itself also affects perceived comfort; a mismatch between heating and cooling capacity and insulation can lead to persistent temperature swings. Ensure your home is well insulated and the thermostat is powered reliably.
Practical Tips to Improve Accuracy and Comfort
To improve accuracy, place the thermostat away from heat sources and large appliances, ideally in a room representative of the home’s average temperature. Calibrate readings if your model supports it, and run frequent quick tests at different times of day. Use correct wiring (C‑wire for power where required) and keep the device firmware up to date. If you install a smart thermostat, pair it with a stable Wi‑Fi network and enable energy‑saving features that align with your schedule. For reference, see guidance from Energy.gov on thermostats and energy savings.
Diagnosing and Fixing Temperature Inconsistencies
If temperatures feel off, start with the basics: confirm the thermostat is powered, check batteries (if applicable), and verify the correct sensor is active. Inspect wiring for loose connections, and ensure the device isn’t placed in a drafty spot. If readings still drift, test with a separate room thermometer to gauge accuracy and consider recalibrating or replacing an old thermostat. When in doubt, consult the manufacturer’s troubleshooting steps and official resources, such as those from Energy.gov.
When to Upgrade Your Thermostat
If you notice frequent inaccuracies, limited scheduling options, or lack remote control, upgrading to a smart thermostat can offer enhanced control, reporting, and energy insights. A newer model may support better sensor technology, more robust connectivity, and compatibility with your HVAC system. Thermostat Care analysis shows upgrading to a modern thermostat often improves comfort and alignment with energy‑saving goals, especially in homes with variable occupancy and climate patterns.
Tools & Materials
- Thermostat (new or existing)(Ensure compatibility with your HVAC system and power needs)
- Screwdriver set (Phillips #2)(For mounting backplate and wiring terminals)
- Non-contact voltage tester(Optional safety check when wiring)
- User manual for thermostat(Useful for wiring diagrams and model-specific steps)
- Smartphone with Wi‑Fi(Needed for setup of smart/connected models)
Steps
Estimated time: 45-60 minutes
- 1
Power down the system
Shut off power at the furnace/air handler and at the thermostat to avoid shocks and prevent short circuits. If you can access the main service panel, switch off the circuit that feeds the HVAC system. This protects you during wiring adjustments and ensures safety.
Tip: Double-check power off by testing the thermostat’s display and any indicators before starting. - 2
Remove the old thermostat and inspect wiring
Carefully remove the faceplate and expose the wall wires. Take a picture of the current wiring for reference, note which wire goes to which terminal, and confirm the C‑wire is present if your new thermostat needs power. Label any wires if needed.
Tip: If wires are frayed, cut cleanly and re-strip to avoid poor connections. - 3
Install the new backplate and wire correctly
Mount the new backplate to the wall, then connect wires to the corresponding terminals on the new thermostat. Use the wiring diagram from the manual and ensure the C‑wire is securely attached if required by the model.
Tip: Avoid cross‑terminal connections by double‑checking color-to-terminal mapping. - 4
Attach the thermostat and restore power
Attach the thermostat unit to the backplate, secure all screws, and restore power at the furnace and circuit breaker. Turn on the thermostat and verify the device powers up correctly.
Tip: If the display is dim or unresponsive, recheck wiring and power supply. - 5
Configure settings, holds, and schedules
Set the current temperature as the control point, enable energy‑saving schedules, and program hold periods if desired. For smart models, connect to Wi‑Fi and install any companion app.
Tip: Start with a simple 5–7 day schedule and adjust after a week based on comfort. - 6
Test the system and fine‑tune
Run the HVAC through heating and cooling cycles, observe how quickly the space responds, and compare with a room thermometer. Tweak the setpoints, hold times, and sensor placement as needed.
Tip: Document your final preferred settings for future reference.
Questions & Answers
What is the best way to verify my thermostat readings?
Compare the thermostat’s displayed temperature with a reliable room thermometer. If they diverge, calibrate the thermostat if supported, or recheck wiring and power. Consistent mismatches may indicate placement issues or sensor faults.
Compare the thermostat reading with a room thermometer, and calibrate or adjust as needed. If readings stay inconsistent, check placement and power.
Can I control temperature remotely?
Yes. A smart thermostat with Wi‑Fi can be controlled via a mobile app, allowing you to adjust settings from anywhere and monitor energy use.
Yes. If you have a smart thermostat, you can control it from your phone or tablet anywhere you have internet access.
Why is my thermostat not responding to changes?
Possible causes include a power issue, dead batteries (for battery‑powered models), loose wiring, or a misconfigured setting. Verify power, check connections, and consult the manual for troubleshooting steps.
Power or wiring problems are common. Check batteries, connections, and the thermostat’s configuration.
What does hold mean on a thermostat?
Hold sets a constant temperature outside of scheduled changes. It’s useful when you’re home unexpectedly or away and don’t want the schedule to run.
Hold freezes the schedule so the temperature stays fixed until you change it again.
Is a C‑wire required for all smart thermostats?
Most smart thermostats need a C‑wire for reliable power; some models use power‑sharing or batteries, which may be less stable. Check your HVAC compatibility before buying.
Most smart thermostats require a C‑wire, though some work without one. Check your system before purchasing.
How often should I calibrate my thermostat?
Calibrate if you notice a persistent temperature mismatch or after relocating the thermostat. Routine checks during seasonal changes help maintain accuracy.
Calibrate whenever you notice a mismatch or after moving the thermostat; check it seasonally.
What should I do if my home has uneven temperatures across rooms?
Consider zoning or multiple thermostats to better manage different areas. Check insulation, air leaks, and vent placement to reduce drafts.
If some rooms stay warmer or cooler, think about zoning or extra thermostats, and seal leaks.
Watch Video
What to Remember
- Understand how readings and setpoints drive HVAC output
- Choose a control method that fits your lifestyle
- Proper installation is essential for accuracy
- Smart upgrades can improve comfort and savings