What to Set Thermostat To: A Practical Home Guide
Learn how to choose energy-efficient thermostat settings for comfort and savings. This Thermostat Care guide covers baselines, seasonal tweaks, holds, and smart scheduling.

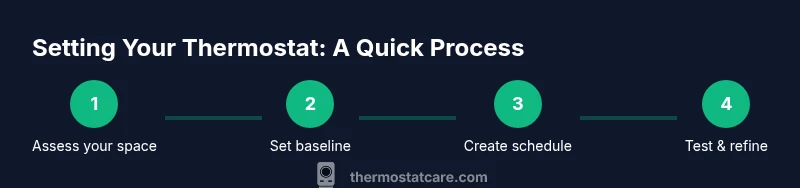
In this guide you’ll learn what to set thermostat to for comfortable indoor temperatures and steady energy use. We break down seasonal baselines, how occupancy and climate affect your settings, and how to use hold and smart scheduling to keep your home efficient without sacrificing comfort. By the end you’ll know exactly what to set thermostat to in common situations.
Why getting the thermostat setting right matters
For homeowners, choosing the right thermostat setting directly affects comfort, energy bills, and HVAC longevity. According to Thermostat Care, even small adjustments to setpoints can yield meaningful savings without sacrificing comfort. The question of what to set thermostat to isn’t one-size-fits-all; it depends on climate, home insulation, occupancy, and the type of heating and cooling equipment you have. When you tune your thermostat, you reduce unnecessary runtime, minimize temperature swings, and extend the life of your system. This section lays the foundation for practical, repeatable settings you can trust across seasons and schedules.
- Comfort matters: people sleep better and function more effectively when the home stays within a predictable range.
- Efficiency matters: reducing overshoot and excessive cycling saves energy and reduces wear on equipment.
- Personalization matters: different households may prefer slightly different baselines based on activity, health, and pets. Reading your energy bills and comfort levels helps you refine the exact target.
If you’re wondering what to set thermostat to for a typical day, start with a reasonable baseline and adjust gradually. The goal is consistency and avoidance of drastic swings that trigger the HVAC to work harder than needed.
How to determine baseline temperatures
Determining a reliable baseline starts with assessing how your home behaves. Factors like insulation quality, window efficiency, and HVAC duct performance influence how quickly a space heats or cools. Begin by choosing a comfortable starting point for your climate; this baseline becomes the reference you adjust up or down depending on season and occupancy. Thermostat Care recommends documenting your baseline so you can track changes and measure impact on comfort and energy use.
To establish a baseline:
- Note your nighttime and daytime comfort levels for a week or two.
- Record the outdoor temperatures and typical indoor readings you experience.
- Use a consistent protocol for measuring: check the indoor temperature when the house is quiet, with no appliances running.
Once you have a baseline, you’ll know whether to nudge the settings up or down in response to weather and occupancy. A well-kept baseline makes seasonal adjustments precise and repeatable.
Seasonal adjustments: heating vs cooling
Seasons dictate how you balance comfort with efficiency. In heating-dominated climates, you’ll typically want a warmer baseline during the day and a cooler baseline at night to save energy, while keeping the home comfortable. In cooling-dominant seasons, a slightly cooler daytime setting can prevent heat buildup while still avoiding excess runtime at night.
How to tailor seasonally:
- Winter: aim for a baseline that reduces heat loss without creating drafty rooms. Night time adjustments can significantly improve efficiency.
- Summer: focus on maintaining a comfortable living space while limiting daytime cooling when rooms are unoccupied.
A practical rule is to adjust during transition weeks (early fall and late spring) and then lock in a schedule once you confirm comfort and savings in those conditions.
How to set up holds and schedules
Holds and schedules are the easiest way to maintain consistent temperatures without constant manual changes. A hold sets a fixed temperature, while a schedule varies setpoints throughout the day. Start with a simple two-rate schedule: a higher temperature during the times you’re away or asleep, and a lower (or higher for cooling) temperature when you’re active at home.
Implementation steps:
- Create a weekday/weekend schedule aligned with your routine.
- Set a sensible nighttime hold to prevent overnight temperature drift.
- Review and adjust after a week of use to balance comfort with savings.
Holds are useful when you want to override a schedule temporarily, such as during guests or special events. Smart thermostats often simplify this with geofencing and adaptive scheduling.
Understanding different thermostat types
There are several thermostat types, and choosing the right one affects how you set what to set thermostat to. Manual thermostats require you to adjust the dial, while programmable thermostats let you set a schedule for different times of day. Smart thermostats add learning capabilities, occupancy sensing, and remote control via an app. Each type has pros and cons:
- Manual: simplest, cheapest, least flexibility.
- Programmable: good for fixed routines but can be clunky to program.
- Smart: highest potential for energy savings with adaptive features and remote access.
If you’re starting fresh or upgrading, a smart thermostat with a reliable app often provides the most consistent results with less manual tweaking over time.
Occupancy-aware strategies
Modern thermostats with occupancy sensing can adjust temperatures based on whether anyone is home. This is a powerful way to optimize energy use without sacrificing comfort. If your home has stable routines, a schedule-plus-occupancy approach is typically effective. For irregular patterns, geofencing (tracking your smartphone) can ensure heating and cooling are active only when you’re in or near the home.
Key tips:
- Enable occupancy detection for rooms that are frequently unused.
- Pair occupancy data with schedule changes for a smoother experience.
- Review energy usage after a few weeks to decide whether to tweak occupancy sensitivity.
Thermostats with zoning or multi-zone support can further refine comfort by controlling different areas independently.
Troubleshooting common misreads and sensor issues
Sometimes the thermostat reads temperatures that don’t align with what you feel. Common causes include sensor location, drafts near the wall unit, or a miscalibrated sensor. Start by ensuring the sensor is away from direct sunlight, drafts from vents, or heat sources like lamps and electronics. If readings remain inconsistent, recalibrate following your model’s instructions. If the system reads one temperature while you feel another, consider relocating the thermostat or using a separate room thermometer to compare readings.
If your thermostat is difficult to program, consult the user manual or contact support. Persistent discrepancies may indicate a sensor fault or HVAC calibration issue that warrants a professional check.
Practical examples: family scenarios
To illustrate how to apply the concepts, consider these common scenarios. A family with kids and pets may prefer a stable baseline with a slight increase during the morning rush and a gentle drop during school hours. A single occupant can use a tighter schedule with longer holds to maximize savings. A two-zone home might assign different baselines to living spaces versus bedrooms to optimize both comfort and energy use. Use these templates as starting points and adjust based on your actual comfort and energy bills. Thermostat Care’s guidance emphasizes testing and refining to fit real-life patterns.
Maintenance and calibration for accuracy
Regular maintenance helps your thermostat deliver predictable results. Replace batteries (if applicable), clean dust from the sensor, and verify mounting remains level to avoid sensor drift. Check the thermostat’s firmware or app for updates, as new features can improve scheduling and energy savings. If you use a zoned or multi-stage system, periodically verify that each zone responds accurately to its designated setpoints. The goal is to keep readings aligned with how space actually feels and to prevent ghost-cycling that wastes energy.
Quick reference: safe starting points
If you’re just starting out, a practical approach is to establish a baseline that favors comfort first, then adjust for energy savings. Start with a schedule that aligns with your regular occupancy, then add a hold for overnight periods. Use occupancy-aware features if available, and keep a simple log of any adjustments to monitor impact on comfort and bills. The main takeaway: consistency and gradual adjustments beat drastic changes that disrupt comfort and waste energy. Thermostat Care recommends starting with moderate baselines and iterating based on observed results.
Tools & Materials
- Thermostat manual(Keep handy for model-specific steps)
- Smartphone with thermostat app(For remote scheduling and monitoring)
- Screwdriver set (Phillips #2)(For panel adjustments or wall mount screws)
- Ladder or stable step stool(Access to wall unit if mounted high)
- Notebook or digital device(Record baseline settings and changes)
Steps
Estimated time: 45-60 minutes
- 1
Access the thermostat controls
Locate your thermostat on the wall and access the main menu. If your model requires you to press a specific button to unlock settings, do so. Take a minute to observe the current setpoints and note any active schedules.
Tip: If you’re replacing an old unit, disconnect power briefly only if you’re comfortable with wiring changes; otherwise skip to safety and consult a professional. - 2
Set a seasonal baseline
Choose a comfortable baseline appropriate for the current season. Record the target indoor temperature in your notes and ensure it aligns with your occupants’ comfort needs.
Tip: Use the original comfort level as your anchor, then adjust in small increments over several days to gauge impact. - 3
Create a simple hold or schedule
Program a daily schedule or a temporary hold when you’re away or sleeping. Keep changes modest and check that the HVAC responds to each change within a reasonable time.
Tip: Always test a new schedule for at least 24 hours to observe comfort and energy use before making further tweaks. - 4
Enable occupancy-aware settings
If available, turn on occupancy detection or geofencing. This allows the system to adjust temperatures when the house is empty or when you’re nearing home.
Tip: Test the sensor behavior after enabling it to ensure it reacts promptly to presence and absence. - 5
Run a quick test cycle
Run a full cycle for both heating and cooling modes to observe system response, delays, and any odd behavior. Note any rooms that heat or cool faster than others.
Tip: If a room consistently deviates, consider separate zoning or sensor relocation. - 6
Document and finalize your routine
Record your baseline, schedule, and holds in a central place. Keep the log for ongoing adjustments and future seasonal changes.
Tip: Review your log every season and adjust to maintain comfort and savings goals.
Questions & Answers
What is the best starting temperature to set my thermostat to?
A comfortable starting point balances climate and occupancy. Begin with a baseline that feels right most of the day, then adjust gradually based on your energy bills and comfort. Use holds or schedules to maintain consistency while you test new settings.
A good starting point is a comfortable baseline that feels right most of the day. Then tweak gradually, using holds or schedules to keep consistency as you test.
How do I create a schedule that saves energy?
Use a simple daily schedule that lowers cooling during the day or raises heating at night when the space is unused. Start with a two-zone pattern and refine after a week based on comfort and bills.
Create a simple day schedule that nudges temperatures when the space is unused, then refine after a week based on comfort and energy bills.
Should I use a hold vs a schedule?
Holds are ideal for short-term changes or overnight adjustments, while schedules are best for establishing routine. Use holds sparingly to preserve energy savings while keeping comfort intact.
Holds are great for quick, one-off changes; schedules work best for daily routines. Use holds when you need a temporary tweak.
Can a smart thermostat automatically optimize temperatures?
Yes. A smart thermostat can learn patterns, adjust for occupancy, and optimize schedules to balance comfort and energy use. Review its recommendations and adjust as needed to reflect your preferences.
Yes. A smart thermostat learns your patterns and helps balance comfort with energy use. Review its suggestions and tweak as needed.
What should I do if my thermostat readings are wrong?
First, check sensor placement for drafts or heat sources. Calibrate if your model supports it and compare against a room thermometer. If discrepancies persist, consider relocating the thermostat or contacting support.
If readings seem off, check sensor placement, calibrate if possible, and compare with a room thermometer. If it stays off, consider relocation or support.
Is it safe to override the thermostat on hot days?
Overriding is acceptable for short-term comfort, but avoid long-term extremes. Return to your scheduled or baseline setting once the day cools to avoid excessive cooling.
It's okay for a short override on hot days, but bring it back to your schedule when the day cools to avoid waste and discomfort.
Watch Video
What to Remember
- Set a season-appropriate baseline first.
- Use holds and schedules to maintain consistency.
- Smart features simplify ongoing optimization.
- Document changes to track impact over time.