Thermostat 4 Wire to 5 Wire: A Step-by-Step Guide
Learn how to safely upgrade a 4-wire thermostat to a 5-wire setup by adding a C-wire, mapping terminals, and testing for reliable power. Thermostat Care guide explains best practices for DIYers and homeowners.

You can upgrade a 4-wire thermostat to a 5-wire system by adding a dedicated C-wire for power and ensuring your furnace/air handler provides a spare conductor. This process requires turning off power, confirming wire color conventions, and safely routing the new wire through the wall. Follow local code and use a common-termination approach. If you’re unsure, consult a licensed professional.
Why Upgrading to 5-Wire Matters
Upgrading from a 4-wire to a 5-wire thermostat setup primarily introduces a dedicated C-wire, which provides a stable common power path for modern smart thermostats. Without a C-wire, smart features like Wi‑Fi, remote sensors, and power-hungry displays can cause voltage drops or intermittent shutdowns. According to Thermostat Care, a properly wired 5-wire system improves reliability and reduces power-related glitches that can plague older 4-wire configurations. This upgrade is especially valuable in homes with newer or higher-demand thermostats, where a consistent 24-volt supply is essential for accurate sensing and reliable control. In practice, the fifth conductor is usually the C-wire (common), which completes the circuit and powers the thermostat without stealing power from critical signals. As you plan, consider the length of the run, the wall cavities, and the comfort level you have with DIY electrical work. A careful, methodical approach minimizes risk and maximizes performance.
Understanding 4-Wire vs 5-Wire Wiring
A traditional 4-wire thermostat typically uses R (power), W (heat), Y (cool), and G (fan) conductors. Modern 5-wire setups add a C (common) conductor to supply a steady 24V power, enabling smart features without relying on “power stealing” from control signals. The extra wire reduces the chance of dim displays, reboot cycles, and thermostat lockouts caused by insufficient current. In practical terms, you map R, W, Y, G to their corresponding terminals on both the thermostat and furnace control board, and you install the new C-wire to the C terminal at both ends. Properly identifying and labeling wires at both ends is critical to avoid miswiring that could damage components or void warranties. This wiring scheme remains compatible with most standard HVAC systems, though some manufacturers require specific adapters or isolation components for certain configurations.
Safety and Compatibility: What to Check Before You Start
Electrical work on HVAC systems carries real risk if misperformed. Before touching any wires, turn off power at both the thermostat and the furnace/air handler. Use a voltage tester to confirm there is no 24V present on any terminal. Verify that your thermostat supports a C-wire and that your furnace has a spare conductor or an accessible C terminal. Check the equipment manual or the control board labels to confirm terminal designations and color conventions. If your wiring uses unusual colors, label each conductor with tape so you can correlate colors to terminals at both ends. Avoid routing a new conductor through active ducts or plumbing cavities where heat or moisture could degrade insulation. Thermostat Care emphasizes planning the route carefully and never forcing cables through tight spaces.
Route Planning: Do You Have a Spare Conductor?
The simplest path to a 5-wire setup is to use an existing bundle that includes five conductors. If you already have a spare conductor, you can repurpose it as the C-wire after confirming it is truly unused on both ends. If there is no spare, you have two main options: pull a new 5-conductor cable from the thermostat to the furnace or use a C-wire adapter kit that piggybacks on the existing wiring. When planning routes, consider wall studs, attic spaces, crawl spaces, and any firestop membranes. Use fish tape or a cable-pulling tool to safeguard the wire from nicks. Always avoid kinking cables and maintain proper strain relief at wall plates.
Terminal Mapping and Color Codes: What Goes Where
On the thermostat, typical terminals are R (24V hot), W (heat call), Y (cool call), G (fan), and C (common). At the furnace or air handler, you should find corresponding terminals on the control board. Commonly, red is R, white is W, yellow is Y, green is G, and blue or brown is C. If you encounter nonstandard colors, label them clearly on both ends and keep a reference map. Do not assume color equivalence without checking the control board labeling. After running or installing the C-wire, land the conductors on the proper terminals, tighten screws securely, and recheck that each wire is firmly seated. This ensures reliable operation and reduces the chance of intermittent faults.
Adapter vs Running New Cable: Pros and Cons
If you can’t run a new conductor, a C-wire adapter kit can simulate a common wire by using existing lines to provide power. Adapters are convenient for retrofit work but may introduce potential compatibility issues with some HVAC brands or modes. Running a new five-conductor cable provides the most robust and future-proof solution, especially for smart thermostats that require consistent power for features like Wi‑Fi and advanced scheduling. Weigh factors such as wall access, insulation, and building code compliance when choosing your path. Thermostat Care recommends evaluating your system’s specific requirements and opting for the method that minimizes risk while maximizing reliability."
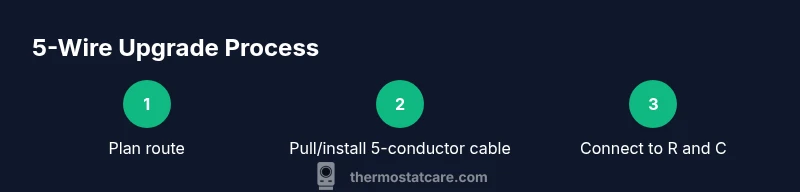
Step-by-Step Overview: High-Level Plan for a 5-Wire Upgrade
Plan your upgrade by confirming there is a clear route from the thermostat to the furnace, securing power shutoff at both ends, and choosing your wiring method (new cable versus adapter). Label every conductor at both ends, identify the R and C terminals, and confirm the thermostat’s compatibility with a 5-wire setup. After wiring, restore power and run basic tests to verify that heat, cool, and fan operations respond correctly. A careful pre-plan minimizes surprises and makes the actual steps straightforward.
Common Pitfalls and How to Avoid Them
Common mistakes include not turning off power, confusing R and C terminals, or assuming color codes without verifying board markings. Never pull a wire through a hot or humid space without protection. Avoid using a conductor that’s already in use for another purpose. Double-check the control board labeling and the thermostat labeling before closing the wall plates. If in doubt, pause and consult the equipment manual or contact a qualified technician. Taking time to verify signals and connections pays off in long-term reliability.
Post-Install Testing: Verifying Power and Function
After completing the wiring and reassembling components, power on the system and test each function: heating, cooling, fan operation, and power stability on the thermostat display. Use a multimeter to verify 24V between R and C. Confirm that the thermostat remains powered during idle periods and that no “no power” or reset messages appear. If a fault occurs, recheck terminal connections and ensure the C-wire is properly landed on the C terminal. Document any anomalies for future reference and seasonal testing. Regular checks help catch loose connections or insulation wear early.
Maintenance and Longevity of a 5-Wire Setup
To maintain reliability, periodically inspect thermostat wiring during routine HVAC maintenance, ensuring no corrosion or loose connections at the terminals. Replace damaged cables promptly and avoid bending cables sharply behind wall plates. Keep a clean, organized wire map for future changes, especially if you upgrade to a smart thermostat with additional features. Thermostat Care recommends retracing connections if replacement components are installed and updating firmware to ensure compatibility with your wiring configuration.
When to Call a Professional
If you encounter stubborn resistance pulling a new cable, uncertain control-board labeling, or if the system emits burning odors, seek professional assistance. A licensed HVAC technician can verify compatibility, pull conductors safely, and ensure that all safety codes are met. DIY upgrades can save money, but miswiring can damage the thermostat, furnace control board, or electrical system. In complex setups or multi-zone systems, professional review is especially valuable.
Tools & Materials
- 5-conductor thermostat cable (14/5 or 18/5, rated for wall use)(Ensure gauge matches current cable and length is sufficient for the route)
- Wire strippers(For clean copper ends and proper crimping)
- Screwdriver set (Phillips and flat-head)(Used to remove plate covers and terminal screws)
- Wire nuts (insulated, assorted sizes)(For splicing conductors safely if needed)
- Electrical tape(Helpful for insulation and labeling wires)
- Multimeter or voltage tester (optional but recommended)(Verify 24V supply and common connections)
- Fish tape or wire pulling tool(Use if routing a new cable through walls)
- Cable staples or clamps(Secure cabling along joists or studs)
Steps
Estimated time: 60-90 minutes
- 1
Power down the system
Turn off power at the furnace/air handler and at the thermostat. Confirm with a voltage tester that no 24V is present on the terminals. This prevents shock and equipment damage during wiring.
Tip: Label power-off locations and lock them out if possible to prevent accidental re-energizing. - 2
Remove thermostat cover and document wiring
Carefully remove the thermostat faceplate and take a photo or make a map of current connections (R, W, Y, G). This reference helps avoid miswiring when you add the C-wire.
Tip: Create a simple diagram with terminal names and wire color codes for future reference. - 3
Check for a spare conductor or plan routing
Inspect the existing cable for five conductors. If only four exist, decide whether to pull a new 5-conductor cable or use a C-wire adapter kit. Plan the safest route, avoiding sharp bends and hidden spaces.
Tip: If planning to pull a new cable, practice with a fish tape to minimize wall damage. - 4
Connect the C-wire at the furnace control board
Land the new C-wire on the C terminal at the furnace. Tighten securely and ensure the wire is not loose. If using an adapter, follow its wiring diagram exactly.
Tip: Double-check that the C-terminal is indeed the commons; incorrect landings can cause damage. - 5
Connect thermostat wires to corresponding terminals
At the thermostat, attach R to R, W to W, Y to Y, G to G, and the new C to C. Make sure all connections are firm and color-coded. Reinsert the thermostat housing.
Tip: Keep a 1-2 inch bare conductor length for a clean terminal grip. - 6
Restore power and test basic functions
Power the system back on and confirm the thermostat powers up. Run a test heat and cooling cycle to verify responses and listen for unusual noises or smells.
Tip: Use a flashlight to inspect terminal screws if you suspect a loose connection. - 7
Verify 24V between R and C with a meter
Use a multimeter to measure voltage between R and C at the thermostat or control board and confirm ~24V supply. If voltage is outside this range, re-check wiring and connections.
Tip: Document the reading for future maintenance. - 8
Finalize and observe for a full cycle
Observe at least one full heating and cooling cycle to ensure consistent operation. Reinstall the faceplate and label wires for future reference.
Tip: If issues persist, reconsider the route or seek professional help.
Questions & Answers
What is a C-wire and why do I need it for a 5-wire setup?
The C-wire provides a continuous common 24V power return for smart thermostats. It stabilizes power delivery so the thermostat can run features like Wi-Fi and advanced sensors without interrupting cooling or heating cycles.
A C-wire is the common power return for your thermostat, keeping smart features powered without interrupting the HVAC system.
Can I upgrade without pulling new cable?
Yes, in some cases you can use a C-wire adapter kit that piggybacks on existing wires. However, this may not work with all models or systems. A true 5-wire run from the furnace to the thermostat is the most reliable solution.
If you can't run a new cable, a C-wire adapter might work, but it's not universal. A proper 5-wire run is most reliable.
Is it safe to DIY thermostat wiring upgrades?
DIY wiring can be safe if you follow proper shutdown procedures and verify terminal labeling. Always turn off power, test for voltage, and avoid disturbing high-voltage components. If you're unsure, seek professional help.
It's generally safe if you shut off power and verify everything, but don’t hesitate to get a professional if it feels risky.
Will a C-wire adapter affect thermostat features?
Adapters are designed to provide power when a C-wire isn't available, but some advanced features may behave differently or be limited depending on the system. Check compatibility with your specific thermostat model.
Adapters can power your thermostat, but features may vary by model and system compatibility.
What tools do I need for this upgrade?
Essential tools include a 5-conductor thermostat cable, wire strippers, a screwdriver set, wire nuts, and electrical tape. Optional items are a multimeter and fish tape for pulling new cable.
You’ll need cables, strippers, screwdrivers, wire nuts, and tape; a multimeter helps for testing.
How do I know if my furnace has a spare conductor?
Inspect the control board for a C terminal and count the conductors going to the thermostat. If you have an unused conductor in the existing cable, you can repurpose it as the C-wire after verifying both ends.
Check the control board for C and look for any unused conductor in the wall cable.
Watch Video
What to Remember
- Plan route and confirm C-terminal availability before wiring.
- Power off and verify connections to prevent damage.
- Use proper 5-conductor cable or adapter for reliable C-wire power.
- Label wires consistently and test across heating/cooling cycles.
- When in doubt, consult a professional for safety and compatibility.