Smart Thermostat Wiring: Step-by-Step Tutorial
Learn how to safely wire a smart thermostat with our comprehensive, DIY-friendly guide. Verify compatibility, locate the C-wire, and follow a clear step-by-step process for reliable, energy-saving control of your HVAC system. Thermostat Care

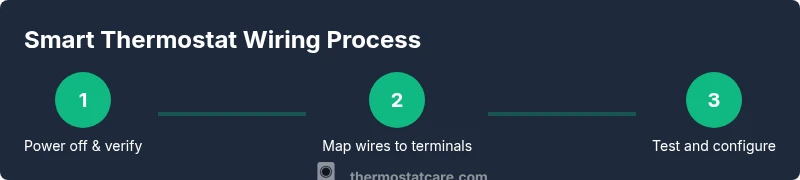
By following this wiring guide, you’ll safely install a smart thermostat with reliable power delivery and minimal risk. Before you start, confirm your HVAC system supports a C-wire and select a compatible thermostat. According to Thermostat Care, the key is to verify wire compatibility, turn off power at the breaker, securely map each conductor to the correct terminal, and test the setup after installation.
Why smart thermostat wiring matters
Smart thermostat wiring isn't just about plugging in a new device. It determines whether the thermostat can draw enough power, communicate with HVAC equipment, and provide reliable schedules. A poorly wired unit can flicker, drop connection, or fail to charge internally, leading to thermostat resets or false readings. Proper wiring ensures the thermostat can operate the fan, compressor, and heat stages efficiently, saving energy and preventing unnecessary wear on your system. According to Thermostat Care, most modern systems rely on a continuous 24-volt supply (the R wire) and a common wire (C) to power the thermostat during longer calls or screen usage. If your setup lacks a C-wire, you’ll either need to add one or use a power-sharing kit recommended by the thermostat manufacturer. In this section we’ll outline the core wiring concepts, typical terminal labels, and how to assess compatibility before you touch a single screw.
Assessing your current wiring and system compatibility
Thermostat Care analysis shows that many homes have nonstandard wiring or no C-wire at all, which can complicate installation. This section helps you identify what’s already present in your wall, what each conductor does, and whether you’ll need an adapter or a dedicated common wire. Start by turning off the power at the breaker, then remove the old thermostat to gently expose the wiring. If you see wires labeled with typical colors (R, W, Y, G, C), note their positions and compare them against your new thermostat’s wiring diagram. If you encounter two R wires (R and Rc) or an O/B wire for heat pumps, plan how your new thermostat will handle those configurations. This stage reduces mistakes and gives you a clear map for the upgrade.
Understanding thermostat terminals and wire colors
Most thermostats use standard terminal designations: R (24 VAC power), C (common), W (heat), Y (cool), G (fan), and O/B (heat pump changeover). Wire colors are a guide, not a guarantee; always verify the function with the thermostat’s documentation and, if available, the furnace control board. Red usually supplies power, white calls for heat, yellow for cooling, green runs the fan, and blue/black is frequently used for C. Some systems split power between Rc and Rh; check whether your thermostat can bridge them automatically. Keeping a labeled diagram helps prevent miswiring during installation and makes future repairs easier.
Tools and safety you need before you start
Before you touch any wires, gather essential safety equipment and tools. A digital multimeter or a non-contact voltage tester helps verify power, while a screwdriver set and wire cutters ensure you can access terminals and trim conductors neatly. Have electrical tape, wire nuts, and a means to label wires ready. Always work in a dry area and wear eye protection when crimping or cutting. If you’re unsure about any step, consult the thermostat manufacturer’s instructions or a licensed HVAC professional. This approach minimizes the risk of damaging equipment or causing electrical shocks.
Wiring mapping and planning for your specific system
Your wiring map should align with the new thermostat’s terminal layout. Create a small schematic that labels each wire by color and function, then match it to the thermostat’s labeled terminals. If you discover a missing C-wire, consider a common wire adapter or a power-sharing module approved by the manufacturer. For heat-pump setups with O/B, verify whether your new thermostat supports automatic reversal without jumper adjustments. A thoughtful plan speeds installation and reduces the chance of accidental cross-wiring.
Common issues during installation and how to avoid them
Common problems include missing C-wire, misidentified wires, or a thermostat that shows a "low power" warning. To avoid these issues, double-check every connection against the thermostat’s wiring diagram, ensure terminal screws are snug, and avoid forcing wires into tight slots. If the system uses two R wires, confirm whether the thermostat can bridge Rc and Rh automatically or if a jumper is required. Never power the system with exposed conductors or if a wire is loose; re-seat all connections before powering up.
Testing, configuring, and troubleshooting after install
Power the HVAC system back on and watch the thermostat display for a stable boot. Confirm that the thermostat can control heating and cooling modes, fan operation, and any microdemand features. Use the thermostat’s app or display to run a simple test: set a day and time, adjust temperature, and observe response. If the display flickers or the system doesn’t respond, re-check wire placement and consult the wiring diagram. Keep handy the manual and a quick reference of wire colors you labeled earlier.
Maintenance and future-proofing for smart thermostats
Once wired, note the environment and label for future service. Store any spare conductors safely and consider upgrading to a C-wire adapter if you don’t have a dedicated common. Regularly check for firmware updates on the thermostat and ensure your Wi-Fi connection remains stable for remote control. A clean, labeled installation makes future swaps or upgrades faster and reduces the risk of miswiring during maintenance.
Common myths and misperceptions you can ignore
Some homeowners believe smart thermostats are universal; however, compatibility depends on your HVAC setup and wiring. Others assume C-wires are always present, which isn’t true for older homes or natural gas systems. Always verify with the manufacturer’s guidance and avoid substituting conductors or inventing your own wiring scheme. Rely on clear labeling, manufacturer manuals, and professional advice when in doubt.
Tools & Materials
- Digital multimeter(to verify 24 VAC between R and C wires)
- Non-contact voltage tester(to verify power at the wiring terminals)
- Flat-head screwdriver(for low-voltage terminal screws)
- Phillips screwdriver(for mounting screws)
- Wire strippers/cutters(to trim insulation cleanly)
- Electrical tape(insulate and secure splices)
- Wire nuts/wire caps(secure wire joins safely)
- C-wire adapter or spare conductor(needed if C-wire is missing)
- Thermostat mounting plate and base(for secure installation and labeling)
- Labeling materials (labels, pen)(help track wire functions for future service)
- Thermostat wiring kit (provided with unit)(includes terminals and connectors per model)
Steps
Estimated time: 60-120 minutes
- 1
Power down the system
Turn off power at the main breaker and confirm no voltage is present at the thermostat location. This prevents shocks and equipment damage during wiring.
Tip: Always verify power with a tester before touching any wires. - 2
Identify and label wires
Carefully record each wire’s function and color. Label each conductor with a short note to prevent mix-ups during terminal mapping.
Tip: Take a photo of the current wiring as a reference. - 3
Check for a C-wire and plan alternatives
Look for a dedicated C-wire or an available spare conductor. If C-wire is absent, plan to use a manufacturer-approved power extender or C-wire adapter.
Tip: Do not assume a C-wire exists based solely on color. - 4
Remove the old thermostat and cover
Gently disconnect and remove the old unit, preserving wires and noting which terminal each wire belonged to. Keep screws and the mounting plate secure for reassembly.
Tip: Do not yank wires; loosen screws one by one. - 5
Connect wires to the new thermostat
Attach each wire to the corresponding terminal on the new unit according to the wiring diagram. Use a screwdriver to snug screws without overtightening.
Tip: Double-check that each wire is fully inserted before tightening. - 6
Mount the thermostat base
Secure the base to the wall with the provided screws. Ensure the mounting hole aligns with the wall box and wires are neatly tucked.
Tip: Use a level to keep the unit straight. - 7
Restore power and perform a boot test
Turn the breaker back on and watch the thermostat power up. If it doesn’t boot, re-check wire placement and fuses on the control board.
Tip: If the screen stays dark, power down again and inspect connections. - 8
Configure HVAC settings in the app
Enter system type (gas, electric, heat pump), and map wires to W, Y, G, C, R as appropriate. Complete the on-screen prompts for Wi-Fi setup.
Tip: Record the final terminal assignments for future reference. - 9
Run a basic test and verify operation
Test heating and cooling, fan operation, and any auxiliary features. Confirm readings match your expectations or adjust as needed.
Tip: Document any deviations and consult manuals if needed.
Questions & Answers
Do I need a C-wire for a smart thermostat?
Many smart thermostats require a constant 24 VAC supply. If you lack a C-wire, you may need a common wire adapter or a dedicated C-wire run. Always check the thermostat’s installation guide.
Most smart thermostats need a constant power source; a C-wire is often required or an adapter may be used.
What if there is no C-wire in my wall?
Consider using a C-wire adapter or a power-extender kit approved by the thermostat manufacturer. In some cases, professional wiring is needed to add a dedicated C-wire.
If you don’t have a C-wire, adapters are an option, but check compatibility first.
Can I install a smart thermostat myself?
Yes, if you’re comfortable with basic electrical work and follow the manufacturer’s instructions. If you encounter unfamiliar wiring or fear electric shock, hire a licensed HVAC technician.
You can DIY if you’re confident with wiring, but know your limits.
How do I identify wires at the furnace?
Use the furnace control board diagram and the thermostat wiring diagram to map each conductor. Label colors and confirm with voltage tester before touching any wires.
Identify each wire on the control board to ensure correct terminal mapping.
Is it safe to turn off power from the breaker?
Yes. Turn off the main breaker feeding the HVAC circuit and verify no voltage is present at the thermostat before starting.
Power off at the breaker and verify no voltage.
Why does my thermostat flicker after installation?
A flicker usually signals an incomplete power connection, an incompatible C-wire, or a loose terminal. Re-check wiring and power supply, and consult the manual if needed.
If the screen flickers, check connections and power again.
Watch Video
What to Remember
- Verify system compatibility and C-wire presence before starting.
- Power down at the breaker to ensure safety.
- Label wires clearly and map to terminals accurately.
- Test, configure, and monitor thermostat operation after install.
- Consider a C-wire adapter or future-proofing for easier upgrades.