Smart Thermostat Installation: A Practical DIY Guide
Learn how to install a smart thermostat safely, wire the C-wire, connect to Wi-Fi, and program schedules with step-by-step guidance. Thermostat Care explains best practices for homeowners and DIY enthusiasts.

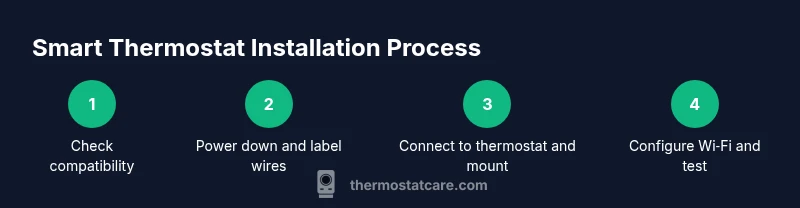
You will install a smart thermostat in your home, including compatibility checks, powering down safely, wiring basics, and connecting to Wi‑Fi for scheduling. You’ll need basic tools, a compatible thermostat, a steady internet connection, and time for setup. According to Thermostat Care, following safety steps and using the right tools reduces common install errors.
What a smart thermostat does for your home
A smart thermostat gives you more precise control over heating and cooling, remote access, and learning capabilities that adapt to your routines. When installed correctly, it can simplify energy management, reduce waste, and improve comfort. In practice, you’ll see easier scheduling, automatic temperature adjustments based on occupancy, and better insight into consumption through native reports. For homeowners, the promise of fewer manual adjustments and more consistent comfort can justify the smart thermostat installation effort. Thermostat Care analysis shows that a well-configured device can maximize energy savings when schedules align with occupancy and local weather patterns, and that proper setup minimizes on/off cycling that wastes energy. Before you begin, verify your HVAC system compatibility, choose a model with C-wire support if needed, and plan where you’ll mount the unit for optimal sensor performance.
Compatibility and model selection
Compatibility is the first hurdle. Most modern thermostats support gas, electric, and heat pump systems, but a few models are optimized for specific configurations. Check that your HVAC uses a common control language; more importantly, confirm that the thermostat supports your system type (single stage, multi-stage, heat pump vs conventional). Look for features like C-wire compatibility, dual transformer support, and robust app integration that works with your phone. If you have a humidifier, zoning panel, or advanced air quality sensors, ensure the thermostat can interface with those devices. Reading product specs and compatibility guides helps avoid buying a unit that won’t work with your equipment. If in doubt, contact the manufacturer’s support or a qualified technician. Selecting a model with clear setup guides reduces headaches during installation.
Safety and power considerations
Working inside electrical devices carries risk. Always power down the HVAC circuit at the breaker and verify that there is no voltage present on the wires before touching them. Use a non-contact voltage tester to confirm and avoid accidental shocks. Keep the thermostat and HVAC control board dry, away from water spills, and avoid forcing connectors into terminals. If you’re replacing a 24V system with an incompatible transformer, you may need a professional. This is not a step to skip, as improper wiring can damage equipment or blow fuses. If the system has unusual wiring or age, consider hiring a licensed technician rather than attempting a DIY install yourself.
Tools, materials, and workspace setup
Before you begin, gather the essential tools and confirm you have a compatible thermostat: the unit itself, a clean base, the faceplate screws, and a suitable mounting surface. You’ll also need a screwdriver (Phillips #2), a non-contact voltage tester, wire labels, and wire strippers or cutters. Have your Wi‑Fi network credentials on hand and a smartphone ready for app setup. Clear the area around the thermostat location, remove the old unit without bending wires, and cover the HVAC opening to protect components. A clean, well-lit workspace reduces miswiring and makes the process smoother.
Wiring basics and common configurations
Most smart thermostats use 24-volt control wiring with terminal letters that correspond to heating, cooling, and power. Typical wires include R or Rc for power, W for heat, Y for cooling, G for fan, and C for the common. Some systems require a jumper between Rc and Rh; others provide a single R wire that powers both. If you have a heat pump, you may see O or B for reversing valve. Do not connect wires to incorrect terminals; take a photo of the old wiring for reference and keep notes. If your system doesn’t have a C-wire, you can use a power extender kit (PEK) if the thermostat supports it or choose a battery-powered model. Always follow your thermostat’s installation guide and your HVAC equipment manual. This careful wiring approach protects equipment and supports reliable operation.
After installation: setup, testing, and maintenance
Mount the new thermostat on the base, attach the cover, and restore power. Use the companion app to connect to your Wi‑Fi, update firmware, and register the device. Run a few quick tests: call for heat, call for cool, fan operation, and a temperature hold test to ensure each function responds correctly. Program schedules, set up geofencing if available, and adjust hold times to fit your daily routine. Finally, review energy reports and adjust settings to optimize savings over time. Routine maintenance includes checking for firmware updates and occasionally recalibrating sensors for accurate readings.
Authority sources and additional guidance
For further reading and authoritative guidance, consider these sources. They provide general energy-saving and safety information relevant to smart thermostat installation, without substituting device-specific instructions:
- https://www.energy.gov/energysaver/thermostats
- https://www.energystar.gov/products/heating_cooling/smart_thermostats
- https://www.nrel.gov/
These sources help homeowners understand best practices in energy management and home automation, and they complement the practical guidance from Thermostat Care.
Authority sources
- Energy.gov – Energysaver: Thermostats (https://www.energy.gov/energysaver/thermostats)
- Energy Star – Smart thermostats (https://www.energystar.gov/products/heating_cooling/smart_thermostats)
- National Renewable Energy Laboratory – Research and guidance (https://www.nrel.gov/)
Tools & Materials
- Smart thermostat (compatible model with C-wire support)(Choose a model that works with your HVAC type and has a mobile app)
- Screwdriver set (Phillips #2)(For mounting plate and thermostat screws)
- Non-contact voltage tester(Verify power at wires before touching)
- Wire labels(Label wires from the old thermostat)
- Wire strippers/cutters(Prepare wires for terminals)
- Wi-Fi network credentials (SSID and password)(Needed for setup and app pairing)
- Spare mounting plate or wall templates (optional)(If you need alternate placement)
Steps
Estimated time: 60-90 minutes
- 1
Verify compatibility and plan wiring
Double-check that your HVAC system is compatible with the new thermostat. Note required wires and whether a C-wire exists, and determine if your system is single-stage, multi-stage, or heat pump. This planning saves rework later.
Tip: Take a photo of the current wiring before disconnecting anything. - 2
Power down at the breaker
Turn off the HVAC circuit at the main breaker and verify there is no voltage on the wiring with your tester. This prevents shocks and protects components during the swap.
Tip: If available, use lockout/tagout to prevent accidental re-energizing. - 3
Remove old thermostat and label wires
Carefully remove the faceplate and mounting screws, then disconnect wires one by one. Label each wire with its terminal and color to avoid mismatches during reassembly.
Tip: Keep wires neatly grouped and take a photo for reference. - 4
Mount the new base plate
Position the base plate level on the wall. If the wall is uneven, shim lightly and ensure the plate sits flat. Secure with screws and recheck level before wiring.
Tip: Use a level to align the plate so the display is straight. - 5
Connect wires to the thermostat terminals
Match each labeled wire to the correct terminal on the new thermostat (R, Rc, Rh, W, Y, G, C, etc.). Keep wires tidy and fully seated.
Tip: Do not let copper strands short adjacent terminals. - 6
Attach the thermostat and restore power
Secure the thermostat to the mounting plate and reinstall the faceplate. Restore power and observe the startup screen to confirm wiring is recognized.
Tip: If the device doesn’t power on, recheck wiring and battery (if applicable). - 7
Configure Wi‑Fi and initial tests
Open the companion app and connect to your home Wi‑Fi. Complete any firmware updates and run basic tests for heat, cool, and fan to verify proper control.
Tip: Prefer a 2.4 GHz network if both 2.4 and 5 GHz are present. - 8
Program schedules and verify operation
Set daily schedules, enable occupancy or geofencing if available, and fine-tune sensor readings. Test edges like hold periods and temperature swings to confirm comfort and energy savings.
Tip: Document your preferred schedules for easy reuse.
Questions & Answers
Do I need a professional installer for smart thermostat installation?
DIY installation is common for standard single-stage systems. If you have a heat pump, dual-transformer power, or unusual wiring, consider hiring a licensed technician.
DIY is fine for standard setups, but for heat pumps or unusual wiring, you may want a professional.
Will installing a smart thermostat void my HVAC warranty?
Installing a thermostat typically doesn’t void the warranty if you follow the manufacturer’s instructions. Check your warranty terms for any conditions about modifications.
Usually not, as long as you follow the manual.
What if my old thermostat doesn't have a C-wire?
If there’s no C-wire, some models work via power stealing from the R wire or use a Power Extender Kit if supported. In many cases a pro can add a dedicated C-wire.
If there’s no C-wire, use a PEK if supported or hire a pro to run one.
Can I install a smart thermostat with a heat pump?
Yes, many smart thermostats support heat pumps. Check that the O/B reversing valve is supported and that your model matches your system configuration.
Heat pumps are compatible with many models; verify O/B support.
How long does installation take?
Most standard installs take about 60-90 minutes. More complex setups with multiple stages may take longer.
About an hour or so, depending on your system.
What should I do if the thermostat won't connect to Wi‑Fi?
Check that you’re using a 2.4 GHz network if required, re-enter credentials, and restart the device. If needed, update firmware or move closer to the router temporarily.
Try reconnecting to your 2.4 GHz network and restart the device.
Watch Video
What to Remember
- Verify HVAC compatibility before purchase
- Power down and label wires to avoid miswiring
- Connect to Wi‑Fi and configure schedules for energy savings
- Test every function and refer to Thermostat Care guidance for safety