Wiring on Thermostat: A Safe DIY Guide for Homeowners
Learn how to correctly wire on thermostat with a focus on safety, compatibility, and best practices. This step-by-step guide covers terminals, C-wire considerations, and common mistakes to avoid for a reliable, efficient HVAC setup. Includes tools list, a step-by-step plan, and expert tips.

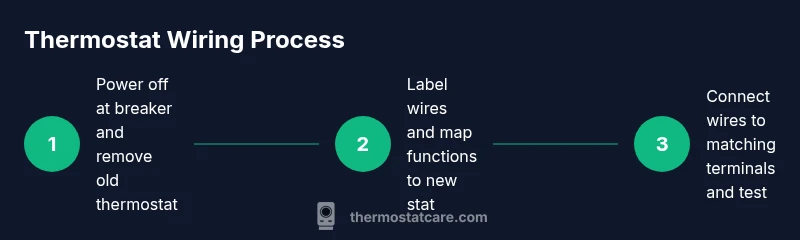
To wire on a thermostat safely, start by turning off power at the breaker panel, then remove the old thermostat cover and label each wire. Check the new thermostat’s wiring diagram, match wires to the corresponding terminals (R, C, W, Y, G, etc.), secure connections, reattach the plate, and restore power to test the system.
Wiring on Thermostat: Understanding the basics
Wiring on thermostat is the bridge between your home's heating and cooling system and its control panel. For homeowners, understanding wire colors, terminals, and power flow helps prevent miswired units, tripped breakers, or unreliable temperatures. According to Thermostat Care, starting with a clean, labeled setup reduces confusion and speeds up future upgrades. Most residential thermostats use common terminals like R, Rc, Rh, W, Y, G, and C. The goal is to map each function to the corresponding terminal on the new device, following the manufacturer's wiring diagram. If your system uses heat pumps, there may be O/B or AUX terminals in play. Always verify compatibility with your new thermostat model before connecting wires. By knowing the roles of the wires, you can avoid common pitfalls and ensure safe operation.
Tools, safety, and required setup
Before touching wiring, assemble a basic toolkit and review safety steps. Turn off power at the main breaker to avoid shock while you work. Use a non contact tester to confirm no voltage on the wires before touching terminals. Gather the essentials: a Phillips and flat head screwdriver, wire strippers, masking tape or labels, a multimeter if available, electrical tape, and your new thermostat. Keep a clean, dry work area and wear eye protection if you have loose dust or screws. Having the manual for your thermostat on hand helps you follow the correct terminal mapping. If you are replacing an older mechanical thermostat, plan for a potential difference in terminal labeling and adapt accordingly. Thermostat wiring tasks should be slow and deliberate to prevent mistakes that could affect heating or cooling performance.
Wiring configurations you’ll encounter
Most homes use a standard set of wires and terminals. R provides 24 volt power; W triggers heat; Y activates cooling; G controls the fan; C supplies a common return path. Some systems split R into Rc and Rh for separate heat and cooling circuits. If you see jumpers between Rc and Rh, leave them only if the new thermostat requires it. For heat pumps, you may encounter O or B for reversing valve and AUX for auxiliary heat. Some installers also use the C terminal for a common wire, which powers Wi Fi and smart features. Always reference the new thermostat manual to map each color to the correct terminal. If a wire is not present on your old stat but your new one expects it, do not force it. In that case, you may need an alternate wiring method or a compatibility check.
Handling the C-wire and alternatives
A working C-wire is the most reliable power source for many smart thermostats, but not every system has one. If your current setup lacks a C-wire, consider options such as a power extender kit or a C-wire universal adapter, following the manufacturer instructions. Do not improvise a ground reference or cross wires to fake a C connection. Some thermostats run on batteries or piggyback power from the G wire, but this can reduce fan performance or cause reset issues during power outages. If your new thermostat requires a C-wire and you do not have one, plan a safe retrofit with a qualified electrician or a trusted professional. By assessing your wiring ahead of time, you can decide the best approach without risking your HVAC system.
Step-by-step wiring overview
Wiring a thermostat is a precise activity that benefits from a clear plan. Start by turning off power at the breaker, then remove the old thermostat and take a photo of the wire connections. Next, label each wire and confirm its function with the old terminal mapping. Then, install the new thermostat base and attach wires one by one to matching terminals as shown in the product manual. Tighten screws firmly but avoid overtightening, which can damage strands. Finally, reattach the faceplate, restore power, and test each function, including heat, cool, fan, and any auxiliary features. If you see nothing on the display, recheck wire connections and wait a minute for the unit to initialize. A final test with a simple command such as set to heat or cool validates wiring accuracy.
Common mistakes and how to avoid them
Rushing the wiring or skipping the labeling step invites errors. Misplacing a wire on an incorrect terminal can cause short cycling or non functional modes. Avoid using unsupported wire gauges or mixing high voltage wires near low voltage thermostat wiring. Do not remove or alter the HVAC wiring harness without turning off the power. Always reference the thermostat manual for the correct terminal layout and confirm compatibility with your system type. Taking pictures during removal helps if you need to backtrack and verify previous connections. If something seems off, stop and recheck rather than forcing a connection.
Testing, safety checks, and reassembly
After wiring, replace the thermostat faceplate and power up the system. Start in a safe mode like heating on low or cooling on a basic setting and observe response. Listen for unusual buzzing or motor delays. Use the thermostat display to confirm temperatures rise and fall as requested, and verify that the fan operates independently. Reattachment to the wall should be flush with the plate aligned to avoid gaps. If you notice erratic behavior, switch off power and re-inspect connections. Always keep your manual handy to recheck wiring if something does not behave as expected. This step confirms a successful wiring installation and reduces post-install problems.
Safety and local codes for thermostat wiring
Electrical work within a home is subject to local electrical codes and safety guidelines. In many areas, thermostat wiring is considered low voltage and is allowed as a DIY task, but a professional should be consulted for complex systems or high voltage modifications. Ensure you use the correct conductor gauge for your wires and avoid splicing or using under-rated connectors. Keep the work area dry and presents a stable surface. If you are unsure, contact a licensed electrician or a heating contractor to assess your setup. Adhering to safety standards minimizes risks and keeps your heating and cooling system reliable.
Troubleshooting quick references
If the thermostat does not power on, verify the power supply and check for a tripped breaker. If the display is dim, confirm the C-wire is connected and the wires are seated correctly. If the unit cycles too often, verify Y and C connections and ensure the thermostat is compatible with your HVAC system. For temperature accuracy issues, check the sensor position and calibrate if available. Finally, if issues persist after wiring, consult your thermostat manual or contact Thermostat Care for guidance and professional support.
Tools & Materials
- Screwdriver set (Phillips #2 and flat-head)(Use for thermostat plate screws and terminal screws)
- Non-contact voltage tester(Verify no voltage before touching wires)
- Wire strippers/cutter(Prepare insulation and trim excess wire)
- Labeling materials (masking tape or wire labels)(Label wires as you disconnect them)
- Electrical tape(Secure wire labels and connections)
- Multimeter (optional)(Check continuity or voltage if needed for troubleshooting)
- New thermostat(Ensure model supports your system's terminals)
- User manual for new thermostat(Follow model-specific wiring instructions)
Steps
Estimated time: 45-60 minutes
- 1
Power down at the breaker
Locate the HVAC circuit and switch it to off. Confirm no voltage with your tester before beginning. This step minimizes the risk of shock or equipment damage while you work.
Tip: Always assume wires are live until proven safe. - 2
Remove old thermostat and photograph connections
Take a photo of the wiring from multiple angles. This visual reference will guide you when wiring the new unit and help you recover if you misplace a wire.
Tip: A high-quality photo saves time and reduces guesswork. - 3
Label each wire and note its function
As you disconnect, label wires with the terminal name from the old stat (R, C, W, Y, G, etc.). This reduces mistakes when mapping to the new thermostat.
Tip: Color is not a reliable cue; rely on terminal labels. - 4
Check compatibility and write a wiring map
Review the new thermostat manual for compatible terminals. Create a simple map that pairs each wire with the corresponding terminal on the new device.
Tip: If a wire lacks a home on the new stat, stop and consult the manual. - 5
Connect wires to matching terminals on the new stat
Attach each labeled wire to the terminal that matches its function. Ensure the screws are snug but not over-tightened to avoid wire breakage.
Tip: Double-check both the wire and terminal label before tightening. - 6
Reattach the mounting plate and faceplate
Secure the base to the wall, then snap on the faceplate. Make sure the unit sits flush against the wall with no gaps.
Tip: Misalignment can cause sensors to misread temperatures. - 7
Restore power and run an initial test
Turn the breaker back on and set the thermostat to call for heat and then for cool. Observe response on the HVAC system.
Tip: If there’s no response, recheck wire seating and terminals. - 8
Final verification and documentation
Test all functions, including fan and any auxiliary stages. Save the wiring photo and note any quirks for future maintenance.
Tip: Keep the manual and notes in an easy-to-find place.
Questions & Answers
Do I need a C-wire for every thermostat?
Not all thermostats require a C-wire, but many smart or WiFi-enabled models do for reliable power. If your unit supports battery operation, it may work without C-wire in some setups, but performance can vary. Check the manufacturer’s wiring diagram.
Some models work without a C-wire, but many smart thermostats need one for reliable power. Check your model’s manual.
Can I reuse old wires if they look faded or damaged?
Wires should be intact and capable of soldering cleanly to terminals. If insulation is cracked or wires are hair-thin, replace or trim to healthy copper and secure properly. Damaged wires can cause short circuits or poor connections.
If insulation is damaged, don’t reuse the wire. Replace or trim back to solid copper.
What if there is an extra wire labeled Not Used?
Extra wires labeled Not Used may be unused during installation. You can connect them only if the thermostat manual specifies a function for that conductor. Do not force an unused wire into a terminal.
If you have an extra wire, only use it if your thermostat manual says it’s a functional wire.
Is it safe to work on thermostat wiring while the HVAC is running?
No. Always power down at the breaker before touching thermostat wiring to prevent shocks and interference with HVAC controls.
Never touch wires while the system is running; switch off power first.
What tools do I need for thermostat wiring?
Common tools include a screwdriver set, wire strippers, a labeling system, a non-contact tester, and the new thermostat manual. Having these ready helps keep the project organized.
Grab a screwdriver, labels, wire cutters, and the thermostat manual before you start.
Watch Video
What to Remember
- Label wires and map functions before connecting new stat
- Always shut off power to avoid shocks
- Follow the thermostat manual for terminal mapping
- Test heat, cool, and fan after wiring to confirm operation
- If C-wire is missing, use an approved adapter rather than forcing a connection