Thermostat to Furnace Wiring: A Homeowner Guide
Learn how to safely wire a thermostat to your furnace, covering wire identification, essential tools, a clear step-by-step process, and practical troubleshooting tips for reliable HVAC control.

Wiring a thermostat to furnace involves connecting the thermostat wires to the furnace control board by function (R, W, Y, G, C) with power off. Start by confirming compatibility, then label and secure each conductor. This quick guide outlines a safe, code-compliant wiring process and highlights common pitfalls to avoid.
Understanding thermostat wiring basics
Wiring a thermostat to a furnace is a fundamental HVAC task that gives you direct control over heating. The thermostat acts as the front-end switchboard that tells your furnace when to heat, based on the room temperature. The most common control wires are R (power), W (heat call), Y (cooling call if you have a heat pump), G (fan), and C (common). If your system uses a heat pump or has additional functions, you may see O/B, AUX, or two-stage terminals. For homeowners, the key is to understand each wire's role, not every fancy feature. According to Thermostat Care analysis, most residential upgrades fail when wires are misidentified or left unsecured. Take time to map wires before you touch anything, label them, and verify compatibility with both the thermostat and furnace control board. This knowledge helps prevent nuisance resets, short cycles, and thermostat lockouts. Throughout this guide, you’ll see practical steps and cautions designed for DIY enthusiasts with basic tools who want a safe, code-compliant result. Remember: 2026 is the year to follow current electrical safety norms and standards.
Assessing compatibility and prerequisites
Not every furnace or thermostat is plug-and-play. First, confirm that your thermostat controls a conventional heating system compatible with standard terminals (R, W, Y, G, C). If you have a two-stage furnace, a heat pump, or an older mechanical stat, you may need add-ons or a different wiring scheme. Check the furnace's terminal strip inside the blower compartment and inspect the control board label for terminal designations. Verify that the thermostat's power requirements match the furnace's voltage (most residential are 24 VAC). If you lack a C-wire, you’ll need to decide between using a power extender (C-wire kit) or upgrading to a thermostat that can operate on battery power or power stealing. In this step, label existing wires and take a photo for reference. This stage reduces rework and helps you stay aligned with the Thermostat Care recommendation to plan before you connect.
Safety and code considerations
Safety comes first. Always switch off power at the breaker and, if possible, at the furnace disconnect, to eliminate the risk of shock while handling low-voltage conductors. Verify with a non-contact tester that no voltage is present on each wire before touching terminals. Follow local electrical codes and the furnace manufacturer’s guidelines—many units require 24 VAC control circuits, proper wire gauge, and secure, heat-resistant splices. If you travel into unfamiliar territory (two-stage systems, heat pumps, or international configurations), pause and consult a qualified HVAC technician. Thermostat Care emphasizes that safety and compliance trump speed, especially for DIY projects that interact with your home's heating system.
Common wiring configurations you may encounter
Most single-stage, gas furnaces use a standard five-wire setup: R, W, Y, G, and C. Some older systems omit C and rely on the battery in the thermostat; newer smart thermostats almost always benefit from a dedicated C-wire. Heat pump setups add O/B for reversing valve and AUX for backup heat. If you see unlabeled wires, do not guess—trace them to the control board or refer to the furnace wiring diagram. Labeling wires with clean, permanent markers helps you stay organized during reassembly and reduces the risk of miswiring.
Step-by-step wiring overview (high level)
The wiring process translates into two synchronized tasks: connect the furnace control board terminals to the corresponding thermostat wires, and then secure those wires in the thermostat wall plate. Start by powering down both ends, then methodically map each conductor to its terminal. Double-check that the thermostat's terminals match the furnace board labels (R to R, W to W, etc.). If a C-wire is absent, decide whether to install a C-wire kit or upgrade to a thermostat that can operate without one. This section lays the groundwork for the formal step-by-step instructions that follow in the dedicated STEP-BY-STEP block.
Testing and verification after wiring
With power restored, set the thermostat to heat, and verify that the furnace ignites. Listen for the burner and observe the thermostat display for status indicators. If your system has cooling, check that the A/C engages when Y is called. Confirm fan operation via the G terminal. If anything fails to respond, recheck wire-to-terminal connections, ensure the wires are fully inserted, and look for loose or frayed insulation. Keep a log of what you tested and the outcomes, so you can spot trends if a problem recurs.
Troubleshooting common issues after wiring
If the furnace doesn’t respond, re-verify the R and C connections and verify 24 VAC on the R terminal with a multimeter. A blank thermostat screen usually indicates power or ground issues on the C wire or a tripped breaker. If the thermostat powers but does not call for heat, inspect W terminal contact, confirm proper order of wires, and ensure the gas valve or ignition is functional. In cases of erratic cycling, verify that your thermostat is rated for your furnace type and that there is no short in the wiring bundle. When in doubt, contact a professional; safety and reliability matter more than a quick fix.
Final safety check and ongoing maintenance
Before closing the wall, ensure wires are neatly seated, the wall plate sits flat, and there is no pinched insulation. Restore the furnace panel and secure all screws. Schedule periodic checks—especially after seasons of use or if the system shows unusual behavior. Keeping a simple wiring diagram posted near the furnace helps future maintenance and troubleshooting. By following these steps and adhering to Thermostat Care guidelines, you’ll have a reliable thermostat-to-furnace wiring setup for 2026 and beyond.
Tools & Materials
- 24-volt non-contact voltage tester(Verify no voltage present before handling wires)
- Flathead and Phillips screwdriver set(For terminal screws and wall plate)
- Wire stripper and cutter(Prepare conductors cleanly)
- Electrical tape or wire nuts(Secure splices; insulate exposed conductors)
- Labeling tape or markers(Label wires at both ends)
- Multimeter (optional)(Check voltage if needed)
- Ruler or small voltage tester(Measure conductor length if trimming)
- Spare thermostat wires (14-2 or 18-3)(For C-wire addition if needed)
- User manual or furnace diagram(Reference for terminal labels)
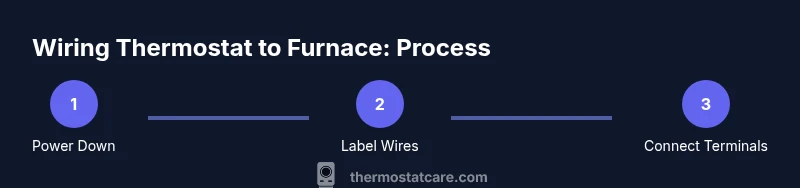
Steps
Estimated time: 60-90 minutes
- 1
Power down and verify
Turn off the main power at the breaker and the furnace disconnect. Use a non-contact tester to confirm no voltage on the old wires before touching any terminals.
Tip: Double-check both ends to avoid partial power presence. - 2
Label and photo the wires
Remove the thermostat cover and label each wire by terminal name (R, W, Y, G, C). Take a clear photo of the wiring at both the thermostat and furnace ends.
Tip: A photo saves you from guessing later if wires are mixed up. - 3
Access the furnace control board
Open the furnace blower access panel and locate the terminal strip. Note each terminal designation and ensure the system is still set to 24 VAC control.
Tip: If you see O/B or AUX, plan for heat pump or auxiliary heat wiring accordingly. - 4
Attach wires to the furnace terminals
One by one, connect each labeled thermostat wire to its matching terminal on the furnace board (R to R, W to W, Y to Y, G to G, C to C).
Tip: Keep wire ends clean and fully seated to prevent loose connections. - 5
Secure wires and tidy the bundle
Bundle wires neatly with zip ties and ensure no insulation is damaged. Push wires back through the wall grommet securely.
Tip: Avoid sharp bends near terminal screws to prevent wire fatigue. - 6
Connect wires at the thermostat side
Reattach the thermostat harness and land each conductor on its corresponding terminal (R, W, Y, G, C). Double-check color-to-terminal mapping against your labels.
Tip: If you add a C-wire, ensure it reaches the thermostat terminal labeled C. - 7
Restore power and test
Power on the breaker and furnace disconnect. Set the thermostat to heat and verify the furnace ignites; test cooling if present and check fan operation.
Tip: Test multiple modes (heat, cool, fan) to confirm all calls are working. - 8
Troubleshoot and finalize
If something doesn’t respond, recheck connections and look for loose wires. If issues persist, compare against the wiring diagram and consider professional help.
Tip: Document findings for future maintenance.
Questions & Answers
Can I wire a thermostat to a furnace myself, or should I hire a pro?
A confident homeowner can wire a standard 24 VAC system by following safety steps and manufacturer diagrams. Complex setups (two-stage units, heat pumps, or nonstandard wiring) may require a licensed HVAC technician.
A confident homeowner can handle standard wiring, but complex systems may need a pro.
What if there is no C-wire available?
Without a C-wire, you can use a C-wire adapter kit or choose a thermostat that works on power stealing or battery power. Ensure the alternative provides a reliable common path for the thermostat.
Without a C-wire, use a kit or a compatible battery-powered thermostat.
What do R, W, Y, G, and C stand for?
R supplies 24 VAC power, W calls for heat, Y calls for cooling, G controls the fan, and C provides the common return path. Some systems add O/B for heat pump reversing.
R is power, W is heat, Y is cooling, G is fan, C is common.
How can I tell if wires are mixed up after wiring?
Revisit your labels, compare against the furnace diagram, and test each function one by one. If a call doesn’t respond correctly, recheck the terminal mapping at both ends.
Check labels and test each function; recheck if something is off.
Is it safe to operate the furnace without a thermostat connected?
No. The furnace could run uncontrollably or fail to respond to temperature changes. Always reattach the thermostat after wiring is complete.
No, don’t run the system without a thermostat connected.
What should I do if the thermostat display is blank after wiring?
Double-check power at the breaker, verify the C-wire connection, and confirm the thermostat is receiving 24 VAC from R. Replace batteries only if the thermostat supports a battery option and power is present.
Check power and C-wire; ensure 24 VAC is present.
Watch Video
What to Remember
- Power down before touching wires.
- Match wires by terminal function (R, W, Y, G, C).
- Label and photograph the existing wiring for reference.
- Test all thermostat functions after wiring.
- If unsure, seek professional help for safety and reliability.