How to Wire a Thermostat for a Furnace: A Step-by-Step Guide
Step-by-step instructions to wire a thermostat for a furnace safely. Learn wiring basics, compatibility checks, correct terminal mapping, and testing with guidance from Thermostat Care.

By the end of this guide, you will know how to wire a thermostat for a furnace safely and accurately. You'll identify furnace control terminals, map the wires to R, W, Y, G, and C as needed, and verify power and temperature signals before testing. Gather essential tools and consult the furnace diagram for a smooth connection.
Why wiring a thermostat correctly matters
Wiring a thermostat for a furnace correctly is essential for safe operation, reliable heating, and energy efficiency. A mis wired thermostat can cause the furnace to short-cycle, fail to ignite, or run continuously, wasting energy and increasing wear. The Thermostat Care team notes that proper wiring forms the bridge between your thermostat's commands and the furnace's response. By following a careful, label-first approach, homeowners can avoid common mistakes and get stable comfort. This guide covers typical single-stage systems, basic wire colors, and how to differentiate power wires from control wires. You will learn to identify R, C, W, Y, and G terminals, map the wires accurately, and test the system safely before a full load is applied. Safety-first practices, including powering down at the breaker and using a non-contact tester, are emphasized throughout.
Understanding thermostat wiring basics
Most standard thermostats use a 24-volt AC circuit to control gas furnaces. The R terminal is the power supply from the furnace transformer; C is the common return; W triggers heat; Y controls cooling; G controls the blower fan. In a simple single-stage furnace, you typically connect wires to R, W, and possibly G and Y if a heat pump or AC is present. Some systems use extra terminals like O/B for heat pumps; ignore if not applicable. Wires are often 18- to 22-gauge; ensure you have a consistent color scheme, though colors vary by installer. If you lack a C-wire, some thermostats can operate on power stealing or with a battery; others require a dedicated C-wire or a power extender kit. Always consult the furnace's wiring diagram and the thermostat's compatibility list before connections. According to Thermostat Care, verifying compatibility before wiring saves troubleshooting time.
Planning your wiring layout and choosing wires
Before you touch any wires, plan your layout. Use 18- to 22-gauge thermostat wire that's rated for low-voltage HVAC use. If you don't have a C-wire, consider a common-wire adapter or a thermostat that supports power stealing, but prefer a dedicated C-wire when possible. Label each conductor on both ends with painter's tape to avoid misrouting. Keep wire lengths neat to reduce strain and ensure a clean wall finish. Always check that your wires are not damaged or frayed and replace them if necessary. Finally, verify that your thermostat is compatible with your furnace's control board and that the fan and compressor wires match your system's setup. A careful plan reduces post-installation troubleshooting.
Safety, power, and potential pitfalls
Power down completely before touching any low-voltage wiring. Turn off the furnace at the service panel and switch off the thermostat at the wall to prevent backfeed. Use a non-contact voltage tester to confirm there is no live voltage on the wires you plan to handle. Do not rely on color alone to identify wires; verify each conductor against the furnace diagram. Excessively long conductors can cause signal delay; trim excess length and cap conductors properly. If you encounter a buzzing relay or a furnace that won't light after wiring, stop and recheck connections. When in doubt, consult a licensed technician to avoid damage to components or risk of shock.
Verification steps after wiring
With power restored, set the thermostat to heat and observe the furnace response. If the display shows, the thermostat is powered and communicating; the furnace should ignite and heat within a few cycles. Use a multimeter to confirm approximately 24 volts between R and C with the system powered. If you see no voltage, recheck the connections and ensure the C-wire is firmly connected. Test the fan (G) and the heat call (W) to ensure the blower runs and the burner or heat exchanger responds. Finally, replace the wall plate securely and label the wires for future reference. Document any deviations and plan a follow-up check if temperatures do not reach setpoints.
Tools & Materials
- Voltage tester (non-contact preferred)(To verify power is off and check signals safely)
- Screwdriver set (Phillips #2 and flat-head)(Used for wall plate and furnace screws)
- Wire stripper/culler (18-22 AWG)(Prepare conductor ends for terminal screws)
- Multimeter(Test voltage (R-C) and continuity if needed)
- Low-voltage thermostat wire (18-22 AWG)(Ensure color consistency and length adequacy)
- Labeling supplies (tape or markers)(Label wires at both ends to prevent mix-ups)
- Thermostat with compatible terminals (R, C, W, Y, G)(Make sure the new stat matches your system)
- Wire nuts and electrical tape(Seal splices and secure connections)
- Printed furnace wiring diagram or manual(Reference for terminal mapping and safety)
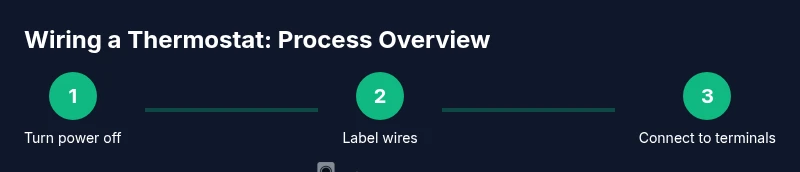
Steps
Estimated time: 45-75 minutes
- 1
Power down the system
Turn off power at the furnace service panel and at the wall thermostat. Confirm no voltage with a tester before touching wires.
Tip: Verification first prevents shocks and damage. - 2
Remove the old thermostat and label wires
Carefully remove the cover and take note of which wire goes to which terminal. Label each conductor on both ends so you can map them to the new thermostat.
Tip: Take a photo of the wiring before disconnecting anything. - 3
Check compatibility and available wires
Ensure the new thermostat supports your current wires (R, W, G, Y, C). If you have fewer conductors than the thermostat requires, plan alternatives or adapters.
Tip: If you lack a C-wire, consider a kit or add-a-wire solution. - 4
Identify furnace terminals on the control board
Open the furnace access panel and locate the low-voltage terminal strip labeled R, C, W, Y, G. Photograph for reference.
Tip: Label the terminals to avoid confusion during mapping. - 5
Map wires from old thermostat to new
Match each current conductor to its function on both ends (R to R, C to C, W to W, etc.). Keep a clean mapping so you don’t accidentally cross wires.
Tip: Double-check wire-to-terminal mapping before connecting. - 6
Connect wires to the new thermostat
Insert wires into the corresponding terminals on the new unit and secure with screws. Ensure wires are fully seated and not loose.
Tip: Tug lightly on each wire to confirm a solid connection. - 7
Reattach the thermostat to the wall and restore power
Mount the thermostat faceplate, rejoin any wires, and turn the power back on at the furnace and wall.
Tip: Keep the plate loose momentarily while testing for proper function. - 8
Test heating, cooling, and fan operation
Set the thermostat to heat, observe ignition or burner operation, then test cooling (if applicable) and the blower.
Tip: If any function fails, pause and recheck wiring against the diagram.
Questions & Answers
Do I always need a C-wire for a thermostat?
Not always. Some thermostats run on batteries or use power-stealing methods, but many require a C-wire for consistent power. If you lack a C-wire, consider adapters or upgrading to a model that supports no-C operation while monitoring compatibility with your furnace.
A C-wire isn’t always required, but many smart and stable thermostats need it. If you don’t have one, you may need an adapter or a different model.
What if my thermostat has more wires than the furnace terminals?
Do not force extra wires into unused terminals. Refer to the furnace and thermostat manuals to determine if those conductors serve accessory features. Cap any unused conductors safely and document their purpose if possible.
If there are extra wires, don’t force them into terminals. Check manuals to see if they’re for features you don’t use.
Can I wire a thermostat without turning off power?
No. Working with live low-voltage circuits can cause shocks or damage. Always shut off power at both the furnace panel and the wall thermostat, and verify zero voltage before touching wires.
No. Always power down first to avoid shocks or equipment damage.
How do I identify the furnace control board terminals?
Open the furnace panel and locate the low-voltage terminal strip labeled R, C, W, Y, and G. Use the manual or wiring diagram as your guide, and photograph the setup for reference.
Open the furnace, find the low-voltage terminal strip labeled R, C, W, Y, and G, and use the manual if you’re unsure.
What should I do if the thermostat display remains blank after wiring?
Check power to the thermostat and confirm the R wire is providing 24 VAC relative to C. Recheck all connections, reseat wires, and consult the diagram if the issue persists.
If the display is blank, verify power and wiring, then reseat connections and check again with the diagram.
Is it safe to upgrade to a smart thermostat during wiring?
Yes, provided your system has a compatible furnace and there is a readily available C-wire. Review the smart thermostat’s requirements and your furnace manual before buying to ensure a smooth install.
You can upgrade to a smart thermostat if your furnace is compatible and you have a C-wire.
Watch Video
What to Remember
- Plan wiring layout before starting.
- Verify thermostat compatibility with your furnace.
- Label wires clearly on both ends.
- Test all functions thoroughly after wiring.
- Document any changes for future maintenance.