How to Wire a Thermostat for AC: A DIY Guide
Learn how to wire thermostat for ac safely with a clear, step-by-step guide. Identify wires, map R, C, Y, G, W terminals, verify power, and test the cooling system for reliable AC operation.

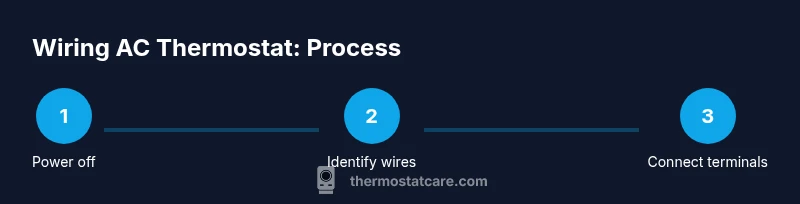
Learn how to wire thermostat for ac safely, map the control wires, verify power and common (C) wiring, and connect the thermostat's R, C, Y, G, and W terminals according to your HVAC configuration. This quick guide emphasizes safety, label matching, and testing the system after wiring. Remember to switch off the power and consult the diagram before making any connections.
Why wiring correctly matters
In this guide on how to wire thermostat for ac, you’ll learn how proper wiring affects cooling performance and safety. A correctly wired thermostat ensures you get accurate temperature readings, proper call signals to the AC compressor (Y), fan (G), and heat/cool toggles. Miswiring can lead to the unit not turning on, short cycling, or damaging components. Label wires, verify power, and test signals to reduce calls to service technicians. According to Thermostat Care, safe wiring combined with correct labeling is the backbone of a dependable HVAC setup. Following the right steps protects you, your equipment, and your energy bills. If you have an older or unusual system, this guide will help you navigate non-standard wiring without risking damage.
What you need before you start
Before you touch any wires, gather essential tools and materials, and make sure you understand your HVAC system’s wiring diagram. Having the right items at hand saves time and reduces mistakes. Thermostat Care recommends planning your wiring layout on paper first, labeling every conductor, and confirming compatibility with your thermostat model. Expect to work with 5 main wires for standard AC: R, C, Y, G, and W, plus any optional O/B or AUX wires if you have a heat pump. Always set expectations for potential contingencies, such as a missing C wire or a non-standard color scheme, and plan alternatives in advance.
Understanding thermostat terminals used for AC
Most residential AC setups use a standard set of terminals on the thermostat: R (power), C (common), Y (compressor), G (fan), and W (heat). The R wire provides 24 volts from the furnace control board, while C completes the circuit. Y energizes the outdoor condenser; G controls the blower; W is the heat call in heating systems. If you have a heat pump, you might see O or B for reversing valve control and AUX for auxiliary heat. Always double-check your HVAC control board’s labeling and your thermostat’s wiring diagram. Color codes can vary between manufacturers, so rely on labels rather than color alone.
Step-by-step wiring overview (high-level)
Wiring is typically a 5-wire process: power (R), common (C), cooling (Y), fan (G), and heat (W). Start by turning off power at the breaker, remove the thermostat cover, and inspect the existing wires. Label each wire, verify it corresponds to a terminal on your thermostat, and then connect each conductor to the matching terminal on the thermostat base. Finally, reassemble, restore power, and test every mode (cool, fan, heat) to ensure the system responds correctly. If you encounter a non-standard wire, consult the system's diagram or call a professional.
Testing and troubleshooting after wiring
With power restored, test the thermostat by cycling through cooling and fan modes. Check that the outdoor condenser engages when Y is energized and that the fan runs with G. If the unit doesn’t respond, recheck each connection for visual corrosion or loose contacts, verify you connected the correct wire to each terminal, and confirm the C wire is continuous back to the furnace. A quick voltage check between R and C should read around 24 VAC. If you see a stall or short cycle, power down and reexamine wiring and the HVAC control board compatibility.
Safety, warnings, and pro advice
Electrical work around HVAC equipment carries risk if misused. Always shut off power at the breaker before touching wires, and use a non-contact tester to confirm no voltage before handling conductors. If your system uses a non-standard wire, or you lack a C wire, consider using a thermostat with power-stealing capabilities or consulting a licensed HVAC technician. When in doubt, pause and verify against the manufacturer’s wiring diagram to avoid costly mistakes.
Tools & Materials
- Screwdriver set (Phillips and flathead)(Phillips #2 preferred; include stubby for tight panels)
- Wire stripper/cutter(12-22 AWG wires; clean, straight cuts)
- Non-contact voltage tester(Check for live voltage before touching wires)
- Digital multimeter(For verifying 24 VAC between R and C)
- Electrical tape(Seal exposed conductors after connections)
- Wire labels or tape(Label wires by terminal letter (R, C, Y, G, W))
- Extra thermostat wire (18-22 AWG)(Spare for C wire if needed)
- Screws for thermostat mounting(Keep originals or replace with same size)
- Safety goggles(Eye protection while working near panel)
Steps
Estimated time: 45-60 minutes
- 1
Power down and verify
Shut off the main power at the breaker panel and use a non-contact tester to confirm there is no voltage at the thermostat wires. This step prevents electric shock and equipment damage.
Tip: Always double-check both the furnace and thermostat locations for power isolation. - 2
Remove cover and inspect wires
Take off the thermostat faceplate carefully and note how many wires are present. Inspect insulation and sheath integrity; discard damaged conductors before proceeding.
Tip: Avoid pulling on wires; loosen screws or terminals gradually to prevent pulled connections. - 3
Label and map wires to terminals
Label each conductor with its expected terminal (R, C, Y, G, W). Cross-check with the furnace control board diagram to ensure accurate mapping.
Tip: If a wire isn’t labeled, trace it to the control board and label it at both ends. - 4
Connect wires to thermostat terminals
Attach R to R, C to C, Y to Y, G to G, and W to W on the thermostat base. If you encounter an extra wire for heat pumps (O/B), place it on the correct O/B terminal.
Tip: Tighten screws firmly but avoid over-tightening that could strip the terminal. - 5
Reassemble and power up
Reattach the thermostat faceplate, restore power, and set the thermostat to cooling mode to observe Y energize the outdoor unit.
Tip: Start with a basic test: set to cool, fan on, then adjust temperature to trigger responses. - 6
Test all functions and finalize
Cycle through heat, cool, and fan, verifying indicators on both thermostat and air handler. Confirm 24 VAC between R and C using a multimeter if available.
Tip: Document wire labels and terminal assignments for future service or replacement.
Questions & Answers
What wires do I need for AC thermostat wiring?
Most AC thermostat setups use R, C, Y, G, and W. If you have a heat pump, you may also see O/B and AUX. Always verify with your system's wiring diagram.
Most setups use R, C, Y, G, and W. Heat pumps may add O/B and AUX. Check your system diagram.
Can I wire a thermostat for AC without a C wire?
Some thermostats can operate without a dedicated C wire by drawing power through other circuits, but a labeled C wire provides the most reliable performance.
Some units can work without a C wire, but having a dedicated C wire is best for reliable power.
Is it safe to wire a thermostat myself?
If you follow safe practices, turn off power, and use proper labeling, wiring a thermostat can be a doable DIY task. If you’re unsure, consult a licensed HVAC technician.
It can be DIY-safe if you shut off power and follow labels; otherwise, call a pro.
What should I do if my system has non-standard colors?
Don’t rely on color alone. Use wire labels and refer to the furnace/control board diagram to map connections correctly.
If colors don’t match, follow the labels and diagrams to connect properly.
What if I still have issues after wiring?
Double-check each wire’s terminal, verify 24 VAC between R and C, and ensure the outdoor unit receives a Y signal when cooling is commanded. If unresolved, contact a pro.
Recheck wiring, check R-C voltage, and verify Y activates the outdoor unit; call a pro if needed.
Should I use a professional for heat pump setups?
Heat pump wiring adds reversing valve controls (O/B). If you’re not experienced, a pro is recommended to avoid damage.
Heat pumps add O/B wiring; if unsure, hire a professional.
Watch Video
What to Remember
- Power off before touching any wires.
- Label every conductor to avoid confusion.
- Map R, C, Y, G, W accurately on both ends.
- Test cooling and heating functions after wiring.