How to Add a C Wire to Your Thermostat: A DIY Guide
Learn step-by-step how to safely add a C wire to your thermostat. This guide covers compatibility checks, tools, detailed steps, safety tips, and troubleshooting for reliable, Wi-Fi-powered cooling and heating controls.

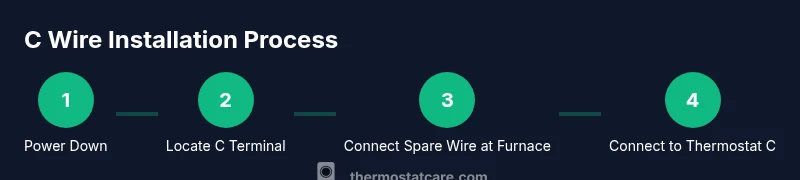
Adding a C wire gives your thermostat a continuous 24-volt power return, enabling reliable Wi‑Fi and smart features. Start by powering down at both the furnace and thermostat, locate a spare conductor or run one, connect it to the C terminal on the furnace control board, then attach the same conductor to the thermostat’s C terminal. Power up and test for proper 24V across R and C.
What is a C Wire and Why It Matters
According to Thermostat Care, the C wire (common) provides a continuous 24-volt return path for thermostat power. Modern smart thermostats rely on this steady supply to operate Wi-Fi, sensors, and displays without draining batteries. If your system lacks a C wire or uses only an R wire, you may experience power drops, dim screens, or reboot cycles. In many homes a spare conductor can serve as C, but you must confirm the furnace control board has a C terminal and that the conductor reaches both ends securely. Always power down at the furnace before touching any wiring to prevent shock or control faults.
The C wire is not a luxury feature—it's a practical necessity for reliable operation, especially with smart thermostats that add features like remote access, energy reports, and advanced scheduling. By understanding where C lives and how it connects, you set the foundation for stable performance, improved energy efficiency, and smoother maintenance checks. Thermostat Care Analysis, 2026
Checking Compatibility: Does Your System Have a C Wire?
Begin by inspecting the thermostat wiring at the back of the thermostat for a C terminal. If you see a C label or a terminal marked C, you likely have a common wire. For systems without a C terminal on the thermostat side, verify at the furnace control board. Power down, remove the furnace panel, and locate the 24V thermostat board. Look for a C terminal and confirm there is a conductor that can be repurposed as C. If you discover a spare wire, you may repurpose it as C after ensuring it reaches the furnace end. If no spare exists, you’ll need options like a Power Extender Kit (PEK) or a dedicated C wire run. Thermostat Care suggests documenting your findings before making changes.
In some homes, the common wire is already connected but not labeled clearly. In other cases, the wiring might be on a separate sub-board in the furnace. The key is to verify continuity and accessibility on both ends before proceeding.
Tools and Materials You’ll Need
Before you begin, gather the following items. Essential (required): spare conductor in the thermostat cable, a small screwdriver set, wire stripper/culler, and a multimeter or non-contact voltage tester to confirm power is off. Optional but helpful: PEK (Power Extender Kit) if no spare wire exists, electrical tape for securing connections, zip ties or cable clamps to tidy the run, and a careful labeling marker to tag wires at both ends. Having these ready saves time and reduces mistakes. Thermostat Care emphasizes planning and safety first.
Having the right tools on hand minimizes surprises and helps you work more cleanly. If you don’t find a spare conductor, plan for a short cable run or PEK as a fallback. The prep work pays off in a smoother, safer installation.
Safety First: Power, Live Circuits, and Permissions
Safety is non-negotiable when working with HVAC wiring. Always power down at the thermostat and the furnace, then confirm the circuits are dead with a tester. If you’re uncomfortable with electrical work or dealing with a gas furnace, consider hiring a licensed technician. Never bypass safety steps to save time. Thermostat Care’s guidance emphasizes caution and proper isolation of the control area to prevent shocks, short circuits, or accidental fan or compressor operation during the process.
When in doubt, pause and verify all power sources are off. The risk of electric shock or furnace damage is real, especially on older systems with brittle insulation or unfamiliar terminals.
Understanding Wires, Terminals, and Common
Wires in thermostat cables are color-coded in many homes, but color isn’t a guarantee of function. The C wire is the common return from the transformer. On the furnace control board, you’ll see R (24V hot) and C (common). The goal is to create a continuous loop: R to thermostat power input -> thermostat back to C on the furnace. If your cable has an unused conductor, you can repurpose it as C after confirming it’s long enough and properly connected. If every conductor is in use, you may need to reorder wires or install a PEK or a new cable run. Thermostat Care highlights that compatibility is system-specific, so take time to map your actual wiring diagram.
Also check for any jumpers or non-standard wiring that could affect power flow. Document the existing setup so future maintenance doesn’t disrupt the new C connection.
Troubleshooting Common Scenarios
If the thermostat powers up but shows weak power or resets frequently, the C wire may not be correctly connected or the conductor might be damaged. Recheck both ends for a secure screw connection and clean, intact insulation. If you have a spare but it’s not returning 24V, test continuity with a multimeter and inspect the cluster of wires at the furnace board for corrosion or loose terminals. In some cases, the C wire may be on a different terminal labeled B or COM; verify with the furnace diagram. Thermostat Care recommends verifying the entire path from R to C and ensuring no breakers are tripped that could affect the 24V supply.
If you suspect the thermostat itself or the control board is at fault, substitute with a known-good thermostat or test the board’s C with a known resistor to confirm stability.
Alternatives: When a C Wire Isn’t Feasible
Not all homes have a spare conductor or a simple path to the furnace. In that case, consider alternatives such as a Power Extender Kit (PEK) or a C-wire adapter that uses existing wires to simulate a C connection. Another option is upgrading to a thermostat that supports power sharing or battery operation. Each method has trade-offs in reliability, cost, and compatibility with your HVAC system. Thermostat Care recommends evaluating your home’s wiring and long-term needs before choosing an approach.
If you’re uncomfortable with wiring changes, a licensed HVAC technician can often install a dedicated C wire run or configure a PEK safely. The goal is a stable, code-compliant connection that won’t create a thermal or electrical hazard.
Final Checks and Maintenance
After installation, power the system back on and re-check the R–C voltage with the thermostat in place. Confirm that the thermostat powers consistently and remains connected to Wi‑Fi if applicable. Keep the wiring neat and secured away from moving parts and heat sources. Periodic checks—every couple of years or after major system work—help prevent future power issues. Thermostat Care suggests labeling both ends of the C wire for easy future identification and documenting your system’s wiring map for quick reference.
Tools & Materials
- spare conductor in thermostat cable(Prefer blue, black, or gray; ensure it reaches both ends without damage)
- screwdriver set(Phillips and flat-head as needed for thermostat and furnace boards)
- wire stripper/culler(For cleanly stripping insulation without nicking conductors)
- multimeter or non-contact voltage tester(To verify power is off and to test voltage when complete)
- Power Extender Kit (PEK)(Use if no spare conductor is available on older systems)
- electrical tape(Secures and insulates connections)
- cable clamps or zip ties(Organizes and routes wires neatly)
Steps
Estimated time: 60-90 minutes
- 1
Power down and verify safety
Turn off power at both the thermostat and the furnace. Use a multimeter or non-contact tester to confirm there is no voltage on the circuit before touching any wires. This prevents shocks and equipment damage.
Tip: Double-check that the thermostat is displaying “off” and the furnace panel is not energized. - 2
Locate C terminal on furnace control board
Open the furnace access panel and locate the 24V thermostat circuit board. Identify the C terminal and R terminal; you’ll be connecting to C. If you’re unsure, consult the equipment manual or take a photo before touching terminals.
Tip: If you see a label like COM or B, verify with the board diagram—terminology varies by manufacturer. - 3
Check for a spare conductor in the thermostat cable
Trace the thermostat cable from the wall to the furnace. If there is an unused conductor, confirm it’s long enough to reach the furnace board without being stretched. Do not repurpose conductors that are already in use for other functions.
Tip: Label the spare wire at both ends with tape to avoid confusion later. - 4
Connect spare wire to C on furnace board
Loosen the C terminal screw, insert the spare wire, and tighten securely. Ensure the connection is clean and the wire strand is fully under the screw to prevent arcing or loose contact.
Tip: Take a photo of the terminal in place for your wiring map. - 5
Connect same wire to thermostat C terminal
At the thermostat, remove the cover, locate the C terminal on the backplate, and insert the spare conductor. Tighten the terminal screw and reassemble the faceplate.
Tip: Avoid pinching the wire behind the thermostat; leave a little slack for future service. - 6
Power up and test the 24V circuit
Restore power at both ends and verify that the thermostat powers up consistently. Use the multimeter to confirm about 24V between R and C when the system is running.
Tip: If voltage is off, recheck terminal connections and conductor integrity. - 7
If no spare wire, use PEK or alternative
If you lack a spare conductor, install a Power Extender Kit or an equivalent adapter following the manufacturer’s instructions. These devices simulate a C connection using existing wires.
Tip: Follow the kit’s wiring diagram precisely to avoid incorrect power sharing. - 8
Secure, label, and test again
Tidy up the wiring with clamps or zip ties. Re-check all connections and test the thermostat’s operation, including power-on behavior and any smart features.
Tip: Keep a simple wiring map for future maintenance.
Questions & Answers
Do I really need a C wire for my thermostat?
Most smart thermostats require a C wire for reliable power, especially if they have Wi‑Fi or advanced sensors. If your thermostat powers on reliably and runs without rebooting, you may already have adequate power. If power issues occur, adding C wire is a common solution.
Yes, for most smart thermostats. If you experience power drops or rebooting, a C wire helps stabilize operation.
How can I tell if my thermostat needs a C wire?
If your thermostat shows low power, reboots, or batteries drain quickly, it may benefit from a C wire. Check for a C terminal and verify continuity with the furnace board. If the thermostat works on battery alone, you may still gain reliability by adding C.
If you’re seeing power problems or rebooting, a C wire can help.
What if my HVAC system doesn’t have a C terminal?
If there’s no C terminal on the furnace board, use a Power Extender Kit (PEK) or run a dedicated C wire if feasible. Some systems require professional wiring changes to add a C path safely.
If there’s no C terminal, PEK or a professional run may be required.
Can I install a C wire myself, or should I hire a pro?
If you’re comfortable with basic electrical work and follow safety steps, you can install a C wire. On complex systems or gas furnaces, consider hiring a licensed technician to ensure code compliance and safety.
DIY is possible for simple setups, but don’t hesitate to call a pro if unsure.
Will adding a C wire affect my cooling or heating performance?
Correctly adding a C wire should not change HVAC performance. It only provides a stable power path for the thermostat. Incorrect wiring can cause faults, so double-check connections.
No, when done correctly it won’t change how your HVAC runs.
How do I test that the C wire is working after installation?
Power the system and measure the voltage between R and C; you should see approximately 24V. If the reading is off, recheck terminal connections or the wire path.
Check for 24V between R and C to confirm proper operation.
Watch Video
What to Remember
- Identify the C terminal on both furnace and thermostat.
- Use a spare conductor or PEK when needed.
- Always power down before wiring.
- Test R–C voltage to confirm a working C connection.
- Label wires and document the wiring map for future maintenance.