Replacing the Thermostat on a Gas Water Heater: A Step-by-Step Guide
Learn how to safely replace the thermostat on a gas water heater with step-by-step instructions, safety tips, and tested techniques from Thermostat Care. This guide covers tools, compatibility, and testing to ensure reliable hot water.

You're about to learn how to replace the thermostat on a gas water heater safely and effectively. This quick guide covers the steps, safety checks, common pitfalls, and the essential tools you’ll need to complete the job without leaks or scalding risks. According to Thermostat Care, proper replacement improves efficiency, reduces energy waste, and helps prevent dangerous gas-valve malfunctions.
Why replacing the thermostat on a gas water heater matters
A gas water heater relies on a thermostat to regulate water temperature by controlling the gas valve. When the thermostat fails or becomes inaccurate, you may experience scalding risks from water that’s too hot, wasted energy from overheating, or cold water during peak demand. Replacing the thermostat on a gas water heater restores accurate temperature control, improves energy efficiency, and helps prevent uneven heating. The Thermostat Care team emphasizes that a correctly matched thermostat can also extend the life of your gas control system by reducing wear on internal components. By understanding how the thermostat interacts with the gas valve and burner assembly, homeowners can plan a safer, more reliable repair and reduce the risk of unexpected outages due to faulty controls.
Safety foundations before you begin
Safety is non-negotiable whenever you work on gas and electrical systems. Start by turning off power at the circuit breaker to the water heater, then shut off the gas supply at the valve. Ventilate the area and ensure there are no gas odors before you begin. Keep a CO detector installed nearby and have a bucket and towels ready in case of spills. If you smell gas at any point, evacuate and call your gas supplier or emergency services immediately. Always work in a clean, dry area and wear eye protection and gloves. If you’re unsure at any step, pause and seek professional help. This approach aligns with best practices outlined by energy and safety resources and is endorsed by Thermostat Care as part of a cautious, methodical DIY process.
Understanding thermostat options and compatibility
Thermostats for gas water heaters range from simple mechanical dial units to digital, programmable models. When choosing a replacement, you must match the thermostat to your heater’s gas control valve and pilot assembly. Some units are designed specifically for certain brands or series; using an incompatible thermostat can lead to misfiring, overheating, or failed relays. Consult your water heater’s model number and wiring diagram before purchasing. Thermostat compatibility also affects warranty considerations, so keep receipts and document the model you installed. Thermostat Care’s guidance emphasizes choosing a part with the same terminal layout and the same operating range to ensure predictable performance.
Tools, materials, and setup you’ll need
Before you start, gather essential tools and the replacement thermostat that matches your gas water heater model. You’ll likely need screwdrivers (Phillips and flat-head), a small flat pry tool, a multimeter or non-contact voltage tester, a digital thermometer, electrical tape, wire connectors, and safety gloves. Have a heat- and gas-rated sealant or gasket if your unit requires resealing the thermostat housing. Labeled zip ties and a notebook or photos are handy for documenting wire positions. The exact parts and tools can vary by model, so confirm the wiring diagram and part numbers from the manufacturer or an authorized retailer. A clean workspace helps prevent dropped screws or lost parts.
Step-by-step overview: planning and prep
Plan your replacement around a calm, dry time of day when you can monitor the unit for at least 30 minutes after restoration. Read the manufacturer wiring diagram and take clear photos of wires before disconnecting anything. Label each wire with tape or use color codes to avoid mix-ups. Verify you have the correct replacement thermostat and that it matches the terminal configuration of your water heater. Finally, budget time for post-install testing to confirm the thermostat is regulating temperature accurately. This upfront planning reduces rework and the risk of leaks or malfunctions.
AUTHORITY SOURCES
For additional guidance, you can consult these sources:
- U.S. Department of Energy: energy.gov
- Environmental Protection Agency (EPA): epa.gov
- National Institute of Standards and Technology (NIST): nist.gov
Testing, troubleshooting, and safety checks after replacement
After installation, restore power and gas, then set the thermostat to a moderate temperature and observe the burner ignition and water temperature. Check for gas smells or hissing sounds, and inspect connections for loose wires or signs of overheating. If the water doesn’t reach the set temperature after a reasonable warm-up period, re-check wiring and terminal orientation. A miswired thermostat can keep the system from firing or cause fluctuating temperatures. If anything seems off, re-power down, re-check connections, and consult the wiring diagram again. This careful testing helps ensure a safe, effective replacement.
Maintenance tips to extend thermostat life and efficiency
Keep the thermostat housing clean and free of dust, which can affect sensor readings. Periodically verify the temperature setting against hot water usage and adjust gradually if you notice drastic changes in water delivery. If your unit uses batteries or backup power, replace batteries as recommended by the manufacturer. Consider enrolling in a maintenance routine that includes annual checks of gas connections, venting, and CO detectors to sustain safe operation. The Thermostat Care team recommends recording model numbers, warranty details, and replacement intervals to simplify future maintenance.
Tools & Materials
- Replacement thermostat compatible with gas water heater model(Ensure terminal layout matches existing wiring)
- Phillips screwdriver(Medium size)
- Flat-head screwdriver or small pry tool(For removing covers)
- Non-contact voltage tester(Verify power is off)
- Multimeter (optional)(For confirming continuity)
- Electrical tape(Seal and label connections)
- Wire labels or tape(Tag wires before disconnecting)
- Camera or notebook(Document wire positions)
- Safety gloves and eye protection(Protection during work)
- Rags or towels and a small bucket(Contain minor spills)
Steps
Estimated time: 60-90 minutes
- 1
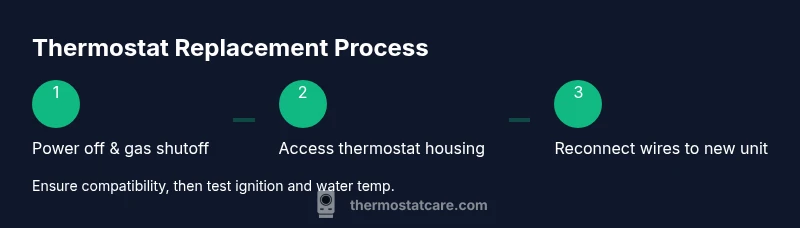
Power off and gas shutoff
Flip the circuit breaker to the OFF position for the water heater and close the dedicated gas shutoff valve. This eliminates electrical and gas hazards during the replacement. Use your voltage tester to confirm no live current near the control panel.
Tip: Always verify power with a tester before touching any wires. - 2
Access the thermostat housing
Remove the exterior access panel and any insulation or shields to expose the thermostat and gas control valve. Keep track of removed screws and ensure you don’t drop parts into the heater cabinet.
Tip: Take care not to bend fragile components formed by the burner assembly. - 3
Label and document wires
Photograph or label each wire connection before disconnecting. This helps you reconnect the new thermostat to the same terminals in the correct order.
Tip: Label wire color and terminal letter so reattachment is precise. - 4
Disconnect old thermostat
Loosen terminals and carefully detach wires from the old thermostat. If a mounting plate is present, remove it without bending or stressing the gas control valve.
Tip: Avoid pulling on wires directly; instead, remove terminals first. - 5
Install the new thermostat
Mount the new thermostat in the same orientation as the old one and connect wires to the corresponding terminals. Double-check terminal labels and ensure secure, clean connections.
Tip: Use the same torque and tighten evenly to prevent loose contacts. - 6
Reassemble and seal
Reattach the thermostat cover and any shielding. Seal any gaskets if the original thermostat used a replacement gasket to prevent air leaks. Return insulation and access panel to their original position.
Tip: Avoid overtightening screws that could crack plastic housings. - 7
Restore power and gas, then test
Open the gas valve, return power to the breaker, and set the thermostat to a safe baseline temperature. Listen for ignition, verify burner operation, and measure water temperature after a warm-up period.
Tip: Keep a close watch for abnormal odors or noises during the first test run. - 8
Verify proper operation
Run hot water from a tap and check if the temperature stabilizes at the set point. If temps fluctuate, recheck wiring and settings. Confirm there are no leaks around the thermostat housing.
Tip: If the temperature overshoots or undershoots repeatedly, recalibrate gradually or revert to the previous setting until stability is achieved. - 9
Document results and safety checks
Record the installed thermostat model, temperature setting, and any observations. Keep CO detector functioning and note the next maintenance date.
Tip: Documentation helps with warranty claims and future servicing. - 10
Know when to call a professional
If you smell gas, notice trouble lighting, or see active gas leaks after replacement, shut everything down and contact your gas provider or a licensed technician immediately.
Tip: When in doubt, schedule a professional inspection to ensure safety.
Questions & Answers
Is it safe to replace a thermostat on a gas water heater myself?
With proper safety precautions, a homeowner can replace a thermostat. Always shut off power and gas, use a tester, and follow the manufacturer’s wiring diagram. If you smell gas or feel unsure, contact a licensed technician.
Yes, with safety steps and guidance. If you smell gas or feel unsure, call a pro.
What tools do I need for replacing the thermostat on a gas water heater?
You’ll typically need screwdrivers, a non-contact voltage tester, wire labels, and the correct replacement thermostat. A multimeter can help verify continuity, and gloves protect your hands.
Tools: screwdrivers, tester, labels, and the right thermostat.
How do I know if the thermostat is compatible with my water heater?
Check your water heater’s model number and wiring diagram; ensure the thermostat matches the terminal layout and operating range of your gas control valve.
Check the model number and wiring diagram to confirm compatibility.
What signs indicate the thermostat needs replacement?
Inconsistent water temperature, overly hot water, longer heating times, or failure of ignition can indicate a faulty thermostat.
Inconsistent temps or ignition issues suggest thermostat problems.
Will replacing the thermostat void my water heater warranty?
Warranty terms vary by manufacturer. Check your warranty documentation; using an approved replacement part is important for coverage.
Warranty depends on the maker; use an approved part to stay covered.
How long does a thermostat last on a gas water heater?
Thermostats last for many years, but life depends on usage, water quality, and maintenance. If you notice symptoms, inspect and replace as needed.
They last years, but maintenance and usage affect longevity.
Watch Video
What to Remember
- Verify thermostat compatibility before replacement
- Shut off power and gas to ensure safety
- Label wires or photograph connections for accurate reassembly
- Test operation and adjust temperature gradually
- The Thermostat Care team recommends seeking professional help if unsure