Replace Thermostat with Nest: A DIY Guide
Learn how to replace thermostat with Nest safely, wire it correctly, configure the app, and optimize energy savings without professional help.

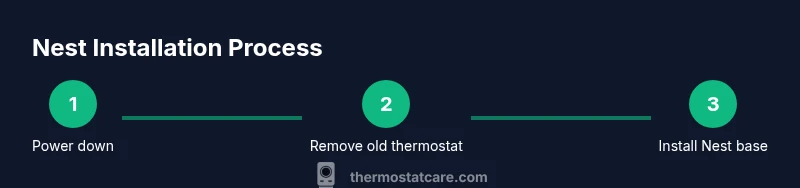
By the end of this guide you will replace thermostat with Nest, verify wiring compatibility, and complete a safe DIY installation. You’ll power down, remove the old unit, mount the Nest base, connect the standard terminals, and set up the Nest app. The guide also covers safety checks and common troubleshooting steps.
Compatibility and planning
Nest thermostats fit most 24-volt home heating and cooling systems, including gas, electric, and heat pumps. However, older or proprietary systems can present compatibility challenges. According to Thermostat Care, the most reliable outcomes come from confirming compatibility before purchase and installation. Start by locating the furnace or air handler control board and tracing the wires to the current thermostat. Take a clear photo for reference, and label any unusual wires. If you see jumpers or duplicate R wires, note them for later. Nest commonly requires a 24V common (C) wire for consistent power, though power stealing or adapters exist in some setups. Thorough pre-checks reduce later troubleshooting and ensure a smoother transition.
Understanding your system type (single-stage vs. multi-stage, heat pump vs. conventional) helps you anticipate which Nest model will work best and whether a C-wire is essential for reliable power. Thermostat Care analysis highlights that aligned wiring diagrams and documented wire colors lead to fewer installation hiccups.
If your system isn’t clearly compatible, stop and consult the Nest compatibility guide or Thermostat Care’s troubleshooting resources before proceeding.
Safety basics: power, environment, and precautions
Safety first is non-negotiable when replacing a thermostat. You will be working near the electrical components inside the wall, at the furnace control area, and on the wiring that powers your HVAC. Before touching any wires, switch off the circuit breaker or remove the fuse that powers the HVAC equipment. Use a non-contact voltage tester to verify there is no live current where you will be working. Keep the workspace dry, well lit, and free of clutter. If you smell burning plastic or observe scorched wiring, power down immediately and consult a professional. Nest installations are designed to be safe for DIYers, but improper wiring can damage equipment or create safety risks.
Thermostat Care emphasizes taking your time on the first attempt and verifying every connection twice before powering up.
Tools, materials, and compatibility checklists
Before you disconnect anything, assemble the necessary tools and confirm wiring compatibility. A clean setup minimizes mistakes and speeds up the process. Common tools include a small Phillips screwdriver, a flathead screwdriver, a labels or tape for wire tags, and a smartphone or tablet for the Nest app. You’ll also want a digital multimeter or a non-contact tester to verify voltage if you’re uncertain. A notebook or photo of the current wiring is helpful for reference. If your HVAC uses a C-wire adapter or a power connector, have those ready. Finally, check that your WiFi network is stable for the Nest setup. This pre-work helps ensure a smooth, error-free replacement.
Tools vs. optional gear: what you actually need
Essential tools: Phillips screwdriver, wire labels, tape, and a smartphone for the Nest app. Optional but helpful: a small voltage tester, wire cutters/strippers, and a notebook for recording wire colors. If your system lacks a C-wire, you may consider using Nest’s Power Connector or wiring a dedicated C-wire from the control board, if available. Do not improvise with damaged wires or non-standard terminals. A tidy work area reduces the risk of mismatched connections and misreads.
Tools & Materials
- Phillips screwdriver (#2 head)(Small screws in thermostat faceplate and base)
- Flathead screwdriver(For prying or terminal access if needed)
- Wire labels or masking tape(Label each wire by color and terminal (R, C, W, Y, G, etc.))
- Smartphone or tablet with Nest app(Needed for setup and WiFi configuration)
- Wire cutters/strippers(If wires are too long or thick)
- Non-contact voltage tester(Optional safety check for live circuits)
- Notebook and camera/phone(Document current wiring and take photos)
Steps
Estimated time: 60-90 minutes
- 1
Power down and remove the old thermostat
Turn off the HVAC circuit breaker to eliminate any risk of electric shock. Remove the thermostat faceplate and carefully pull the unit away from the wall to expose the wiring. Take a photo of the wiring from multiple angles before disconnecting anything. This photo becomes your reference for wire colors and terminal labels.
Tip: Label wires as you disconnect and verify each color matches the photo before detaching. - 2
Identify wires and label terminals
Note which wires connect to R, Rc, Rh, W, Y, G, and C. If your thermostat uses jumpers between R and Rc/Rh, document that arrangement. If a C-wire is present, confirm its color and where it lands on the furnace control board. Label each wire with its terminal designation to avoid mix-ups during reassembly.
Tip: A clear photo and labeled wires dramatically reduce installation errors. - 3
Mount the Nest base and prepare wiring
Attach the Nest base plate to the wall, ensuring the mounting holes align with the wall anchors. If you need to adjust the wall plate, do so before wiring. Run existing wires through the Nest base opening and prepare them for insertion into the Nest terminals. Do not force a wire into a terminal that doesn’t match its label.
Tip: If you lack a C-wire, review Nest’s recommendations for power options before forcing a connection. - 4
Connect wires to the Nest terminals
Insert wires into the Nest connector slots according to their labels: R (or Rc/Rh if separate), W, Y, G, and C as applicable. Double-check that each wire is fully seated and that no stripped copper is exposed outside the terminals. Re-check the photo you took earlier to ensure accuracy.
Tip: Only insert wires into the corresponding Nest terminals; mixing colors can cause confusion later. - 5
Attach the display and power up
Snap the Nest display onto the base and restore power at the breaker. The Nest will begin initial power-up and prompts. If the Nest cannot power on, re-check wire seating and ensure the C-wire is providing stable power. Follow the on-screen setup steps when the screen lights up.
Tip: If power is unstable, verify C-wire continuity and check for any loose connections. - 6
Configure the Nest app and connect to WiFi
Open the Nest app, create or sign in to your account, and follow the guided setup. Connect the thermostat to your home WiFi network and select your home’s HVAC system type. The app will guide you through test cooling/heating functions and confirm successful installation.
Tip: Make a secure mesh password and update the app after installation for ongoing updates.
Questions & Answers
Can I replace any thermostat with a Nest, or are there compatibility limits?
Nest works with many common 24V systems, but some older or proprietary setups may require professional evaluation. Check Nest’s compatibility guide before purchasing.
Nest works with many standard systems, but it’s best to check compatibility first.
Is a C-wire required for Nest, and what if I don’t have one?
A C-wire provides stable power for Nest in most setups, but Nest can operate with power-saving options or adapters if a C-wire is unavailable. Review Nest guidelines for your model.
Usually a C-wire is recommended, but there are power options if you don’t have one.
How long does the installation typically take?
Most homeowners complete the install in 60-90 minutes, depending on wiring complexity and comfort with tools.
About an hour to an hour and a half for most DIY installers.
Will Nest work with a heat pump or multi-stage system?
Nest supports many heat pump configurations with appropriate wiring; check model capabilities and ensure proper Y and O/B wiring if present.
Yes, many Nest models work with heat pumps if wired correctly.
What if my old thermostat had an unusual wire or spare jumper?
Note and photograph any unusual wires or jumpers. Some jumpers aren’t needed with Nest; others require attention or a professional assessment.
Document unusual wires and consult the guide to avoid mistakes.
Watch Video
What to Remember
- Verify system compatibility before starting
- Label wires and document your wiring with photos
- Mount Nest base securely and insert wires per terminal labels
- Configure the Nest app and connect to WiFi
- Test HVAC functions and adjust settings for efficiency