Nest Thermostat Installation Guide: Step-by-Step
Step-by-step Nest thermostat installation guide for homeowners. Verify compatibility, wire connections, mounting, app setup, and testing for reliable comfort and energy savings.

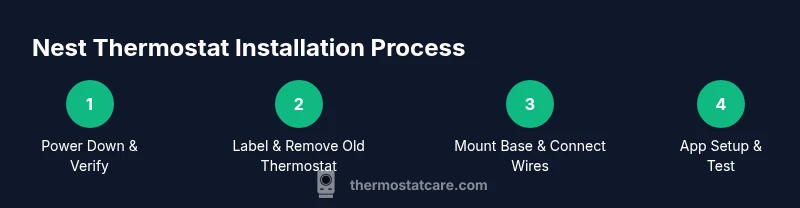
You will install a Nest thermostat by confirming system compatibility (25-240V HVAC is common in households), powering down the HVAC, wiring the Nest base to the labeled terminals, mounting the display, and finishing with Wi‑Fi setup in the Nest app. This guide covers compatibility checks, wiring basics, mounting steps, and post-install testing. Follow safety rules and consult the Thermostat Care guidance if you encounter unusual wire configurations.
Overview: Understanding Nest thermostat installation
Installing a Nest thermostat is designed to be a homeowner-friendly project, but success hinges on understanding your HVAC system and ensuring the wiring matches Nest expectations. The Thermostat Care team notes that most residential systems are 24-volt (low voltage) and compatible with Nest when a common wire (C) is available or when the system can be powered reliably through the thermostat's power-stealing design. This section outlines what you’ll accomplish and what you’ll need to verify before you begin.
Before you start, gather the tools listed in the Tools & Materials block and review the wiring labels on your old thermostat. If you discover a nonstandard control (high-voltage system, multiple stages, or proprietary backplates), stop and consult a licensed HVAC technician. The goal is a safe, working connection that provides reliable heating and cooling control while preserving system efficiency. Thermostat Care’s analysis emphasizes compatibility checks and proper labeling to prevent miswiring.
In many homes, the Nest will replace a traditional 4-wire or 5-wire setup and use the same R, W, Y, G, and C terminals. If your equipment uses uncommon wires or heat pump configurations (O/B, AUX), follow Nest’s wiring guidance closely and verify with your home’s HVAC schematic.
Compatibility and safety prerequisites
Compatibility hinges on having a low-voltage (24V) HVAC system with properly labeled wires. If you’re unsure, pause and identify whether your furnace, air handler, or outdoor condenser uses 24VAC control. Nest does not support high-voltage systems without special adapters or separate wiring strategies. Ensure your electrical panel and furnace power are accessible and that you are prepared to cut power to the HVAC equipment during installation. Safety is paramount; never work on live wires. Thermostat Care recommends turning off the circuit breaker or removing the fuse feeding the HVAC control board before touching any wires.
In addition to voltage considerations, check that a C-wire (common) is available or that your system supports Nest’s power requirements without a dedicated C-wire. If you don’t have a C-wire, you can sometimes power Nest via the G-wire or use the Nest Power Connector (per Nest’s official guidance). If your system has a heat pump, confirm the presence of O/B (changeover) and AUX/E wires and how they’re controlled by your existing thermostat.
Consult your HVAC schematic or the furnace control board labels to confirm the wire colors and functions. If you see unusual colors or multiple wire bundles, photograph them before disconnecting anything so you can reattach correctly. If in doubt, contact a licensed technician. Thermostat Care emphasizes safety and accuracy over speed in this step.
Yes, this phase involves working near electrical components, so gloves and eye protection are prudent. Have a flashlight handy, and use a non-contact voltage tester to confirm there is no live voltage before touching conductors.
Tools and materials you’ll need (before you start)
Having the right tools on hand helps keep the job clean and safe. Use the list below to prepare your workspace.
- Small Phillips screwdriver and flathead screwdriver (precision bits recommended)
- Non-contact voltage tester
- Wire strippers/cliers and a small pair of pliers
- Drill with appropriate bit set (if you need to mount a new faceplate)
- Level or smartphone level app (optional, for straight mounting)
- A clean cloth or painter’s tape to protect surfaces
- The Nest thermostat kit (thermostat, backplate, screws) and a compatible mounting plate
- Wire labels or tape to mark wires as you detach them
- A camera or smartphone to document existing wiring for reference
Notes: Keep wires organized and labeled as you remove the old thermostat. This prevents miswiring and speeds up the process. If you don’t have one of these tools, stop and acquire it before proceeding. Thermostat Care recommends having an assistant available to hold wires or help with mounting.
Wiring configurations: common labels and what they do
Most Nest-friendly configurations use standard low-voltage labels: R (power), C (common), W (heat), Y (cool), G (fan), and O/B (heat pump changeover). In a conventional cooling-only setup, you may see R, C, W, and Y. In a heat-pump system, O/B and AUX/E may appear alongside R, C, Y, and G. The exact color code can vary, so rely on the labels rather than color alone. Always verify the functions on your existing thermostat or control board diagram.
If your old thermostat uses unfamiliar wires or additional terminals, take clear photos before disconnecting, and order the Nest base with the correct wiring mapping. For systems with multiple stages, you may use additional wires (e.g., W2/Aux) that Nest supports with compatible wiring. Avoid assuming a wire’s function by color alone; miswiring can damage equipment or cause erratic operation.
Mounting the Nest base and connecting wires
Begin by removing the old thermostat and cleaning the wall surface. Mount the Nest backplate to the wall using the provided screws and anchors, ensuring it’s level. Then insert the labeled wires into their corresponding Nest terminals: R to R, C to C, W to W, Y to Y, G to G, and, if applicable, O/B to O/B and AUX to Aux. Push each wire fully to ensure a solid contact, then snap the Nest display onto the base.
If a C-wire is not present, Nest’s power options may still work in many cases, but performance can vary. If you must, use the Nest Power Connector as an alternative, following Nest’s installation guide. After wiring, double-check the connections, replace the thermostat’s faceplate, and tidy the wires with cable clips or tape to keep the wall neat.
App setup, Wi‑Fi, and system testing
Power the HVAC system back on and use the Nest app to begin the setup. The app will guide you through connecting to your home’s Wi‑Fi network, selecting your HVAC type, and naming zones if your system supports multiple areas. Check that the app shows back-to-back communication with the thermostat and that you can control heating and cooling from the app. If you have a heat pump, ensure the Nest is configured to use O/B for changeover and AUX for auxiliary heat.
During testing, verify that turning on heat or cooling produces the expected response from the system and that the fan operates correctly. Check the schedule and any eco settings to confirm they’re active. Keep the system’s original thermostat in a safe place in case you need to revert temporarily.
Troubleshooting during installation: common issues and fixes
If the thermostat powers up but cannot connect to Wi‑Fi, confirm your 2.4 GHz network is active and within range. If you experience slow or inconsistent operation, verify clean wire contacts and ensure there’s no loose connection at the Nest terminal block. If the Nest display shows a “no power” message, re-check the R and C wires and protect against a miswired R-to-R on the harness. For heat-pump configurations, verify O/B and AUX/E wiring matches Nest’s setup prompts. If in doubt, reset the Nest to the factory defaults and start again with careful wiring.
Always consult the official Nest wiring guide for model-specific steps and refer to your HVAC schematic when needed. If issues persist after careful troubleshooting, contact a qualified HVAC technician to prevent damage or warranty concerns. Thermostat Care emphasizes methodical checking and patience over forceful fixes.
Authority sources and further reading (2-3 credible URLs)
- https://www.energy.gov/eere/buildings/articles/thermostats
- https://www.osha.gov/electrical-safety
- https://www.nist.gov/topics/thermostats
Notes: These sources provide foundational guidance on energy-saving thermostat use, electrical safety, and general standards for household climate control. For Nest-specific wiring and app setup, refer to official Nest support resources and your HVAC manufacturer’s documentation. Thermostat Care recommends validating each source against your particular system configuration.
Authority sources—safety and standards (extra reference)
- Official safety best practices and electrical safety guidelines help prevent shocks and fire risks when working near HVAC equipment.
- General thermostat standards guide wiring compatibility to minimize the chances of equipment damage.
- Home energy guidelines support using a programmable thermostat to optimize energy savings.
What to do after installation: final checks and optimization
Once installed, review the Nest app’s energy reports and set a comfortable schedule that aligns with your daily routine. If your home has more than one zone, configure each zone individually to maximize efficiency. Keep the Nest app updated to receive the latest features and security patches. Periodically check doorways, vents, and the HVAC filter to sustain performance gains. Thermostat Care recommends documenting any changes to system behavior for future maintenance.
4- to 6-sentence quick recap for readers
In short, a successful Nest thermostat installation hinges on confirming a 24V system with compatible wiring, mounting the backplate correctly, wiring each conductor to the proper terminal, and completing app-based setup with a test run. Always prioritize safety by de-energizing the HVAC circuit before wiring and consulting a professional for nonstandard systems. Thermostat Care’s guidance centers on accuracy, proper labeling, and careful testing to ensure reliable comfort and energy savings.
Tools & Materials
- Screwdriver set (Phillips and flathead)(Precision bits recommended for thermostat mounting screws.)
- Non-contact voltage tester(Check for live voltage before handling wires.)
- Wire strippers/cutters(Useful for trimming and preparing conductors.)
- Drill and bit set(Only if wall anchors are needed for mounting plate.)
- Nest thermostat kit (thermostat, base, screws)(Have compatible model for your system.)
- Wire labels or tape(Label wires as you detach them to prevent miswiring.)
- Camera or smartphone(Document existing wiring for reference.)
Steps
Estimated time: 30-60 minutes
- 1
Power down and confirm system type
Turn off power at the furnace/air handler and at the home’s main breaker before touching any wires. Verify your HVAC control uses 24V (low voltage) wiring, not high voltage, to ensure Nest compatibility. If you’re unsure, pause and consult the HVAC schematic or manufacturer documentation.
Tip: Use the non-contact tester to double-check that no voltage is present before touching conductors. - 2
Label wires and remove the old thermostat
Carefully remove the old thermostat faceplate and detach wires one by one. Label each wire with its terminal letter (R, C, W, Y, G, O/B, AUX) to map them to the Nest terminals later. Take a photo of the wiring at both the thermostat and the furnace control board for reference.
Tip: Keep wire labels visible while you work so you don’t mix up functions. - 3
Mount the Nest backplate
Use the included screws and anchors to mount the Nest backplate on the wall. Use a level to ensure it sits straight, then tighten screws until snug but not over-tightened. If you need to patch the wall, do so before mounting to avoid misalignment.
Tip: A level mount minimizes display tilt and improves user interaction. - 4
Connect wires to the Nest base
Insert each labeled wire into the corresponding Nest terminal: R to R, C to C, W to W, Y to Y, G to G, and O/B/AUX as applicable. Push wires firmly to ensure a solid connection and avoid loose strands.
Tip: Check each connection with a gentle pull to confirm it’s secure. - 5
Attach the display and restore power
Snap the Nest display onto the base. Restore power to the HVAC system and the home circuit. The Nest should power up and begin its initial configuration flow. If the screen stays dark, recheck wire insertions and power connections.
Tip: If power is unstable, re-seat R and C wires or consider using a separate power adaptor per Nest guidelines. - 6
Configure in the Nest app and test
Open the Nest app, add the thermostat, connect to your Wi‑Fi, and select your HVAC type (gas, electric, heat pump). Run a quick test for heating, cooling, and fan to verify responses match your expectations. Save and set a basic schedule.
Tip: Run a quick test after setup to catch miswiring early.
Questions & Answers
Is Nest Thermostat compatible with my HVAC system?
Most residential HVAC systems using 24V controls are compatible with the Nest thermostat, especially those with standard R, C, W, Y, and G wires. If you have a heat pump or unusual wiring, consult Nest’s wiring guides and your HVAC documentation to confirm compatibility.
Most 24V systems are compatible, but check your wires and the heat pump setup if you have a heat pump.
Do I need a C-wire for Nest thermostat installation?
A C-wire is commonly recommended for reliable Nest power, but some setups can operate with existing wires using Nest’s power options. If you don’t have a C-wire, consider adding one or using the Nest Power Connector per official guidance.
A C-wire is often recommended, but you may be able to power Nest without one depending on your system.
Can I install the Nest thermostat myself, or should I hire a pro?
If you have a standard 24V system with clearly labeled wires and you’re comfortable working with electrical components, DIY installation is feasible. If you encounter high-voltage components, multi-stage cooling/heating, or uncertain wiring, hire a licensed HVAC technician.
DIY is possible for simple setups, but hire a pro for complex systems.
What should I do if Nest won’t power on after installation?
Double-check power connections at R and C, ensure the wires are fully seated, and confirm the HVAC circuit is on. If the Nest still won’t power, reset the device and rewire according to the Nest wiring diagram or consult official Nest support.
Check power wiring and circuit status; reset if needed and try again.
Will Nest affect my furnace warranty?
Installing a thermostat generally does not void a furnace warranty when installed correctly. However, improper wiring or damage during installation can create issues. Always follow manufacturer guidelines and keep documentation in case of warranty questions.
Generally fine if installed correctly; keep records just in case.
What if my system has multiple zones or stages?
Many Nest models support multiple stages and zone control, but you may need additional wiring or a compatible HVAC control module. Check your system’s diagrams and Nest’s multi-stage guidance.
Multi-stage setups can work, but may require extra wiring or hardware.
How long does installation typically take?
A straightforward residential installation usually takes 30 to 60 minutes, depending on wiring complexity and wall conditions. If you run into unusual wiring, allocate more time for careful wiring and testing.
Most installs finish in half an hour to an hour under normal conditions.
Watch Video
What to Remember
- Verify 24V system compatibility before wiring
- Label wires and document existing wiring with photos
- Mount the backplate level and secure connections
- Configure in-app and test heating, cooling, and fan
- Consult a pro if wiring appears nonstandard or unsafe