How to Use Nest Thermostat: A Practical Home Guide
Step-by-step instructions to set up and use Nest Thermostat for comfort and energy savings. Learn setup, daily use, routines, and troubleshooting with Thermostat Care.

You will set up and start using your Nest Thermostat for reliable comfort and energy savings. This guide covers compatibility checks, installation basics, daily operation, and troubleshooting. Before you begin, confirm you have a Nest Thermostat model with a C-wire if required, a compatible HVAC system, and the Nest app on your phone. Let's dive into the step-by-step process.
Understanding Nest Thermostat Basics
The Nest Thermostat is a learning, connected device designed to optimize comfort and energy use in your home. If you’re wondering how to use nest thermostat to maximize efficiency, this guide covers the essential concepts and practical steps. According to Thermostat Care, a solid foundation starts with confirming compatibility, understanding wiring needs, and knowing which features matter most for your climate. Nest models are designed to work with a wide range of HVAC configurations, but the exact wiring and power requirements can vary. In this section, you’ll learn what the Nest thermostat can do, how it interacts with your heating and cooling system, and the core features you’ll leverage most. Look for the C-wire presence, the type of furnace or heat pump you have, and whether your system uses traditional or heat-pump controls. The goal is to empower you to approach setup with a clear plan, so you can use nest thermostat with confidence right from day one. You’ll also see how the Nest app translates physical wiring into a simple on-screen experience that guides you through selection of system type, temperature scales, and preferred language.
This section lays the groundwork for a smooth installation and helps you avoid common pitfalls such as mismatched wire terminals, unsupported equipment, or app sync issues. By the end of this overview, you should be ready to verify compatibility, prepare your wiring, and move into a hands-on setup that unlocks automatic scheduling and adaptive learning features. The Nest ecosystem thrives when you begin with a clear configuration and steady connectivity.
Getting It Set Up: Installation and Account Creation
Setting up a Nest Thermostat begins with a careful, step-by-step process that ensures safe power handling and proper wiring. The first priority is power down the HVAC circuit and verify there is no voltage present before touching any wires. If you’re replacing an old thermostat, take a quick photo of the existing wiring to reference terminals later. Then remove the old device and prep the wall plate. When mounting the Nest base, follow the included mounting screws and ensure the display is level for an even seal against the wall. Connect the wires to the matching Nest terminals—R, Y, G, W, and C where applicable—and snug each conductor.
Next, attach the Nest thermostat to the base and secure the unit. Restore power at the breaker and verify that the thermostat powers up. The Nest app will guide you through connecting the device to Wi-Fi and pairing with your account. If you don’t already have the app, download it from your device’s store and sign in or create an account. The app will prompt you to confirm your HVAC system type—single-stage, multi-stage, or heat pump—and tailor prompts accordingly. Finally, run a quick test cycle: set a target temperature, switch between cooling and heating modes, and confirm that the thermostat communicates correctly with your furnace or air handler. This establishes the foundation for accurate temperature control and reliable scheduling.
Daily Usage: Schedules, Learning Features, and Manual Overrides
Once the Nest Thermostat is connected, daily use becomes intuitive. Start with a basic schedule that mirrors your routine: wake-up, work hours, evening, and sleep. The Nest learns from your adjustments, refining its suggested temperatures and timing over time. To manually override, simply tap to set a new target temperature; the Nest will remember this change for the next cycle, adjusting future behavior as needed. You can also enable Eco mode during unoccupied periods to save energy without sacrificing comfort. Leverage the “Hold” function for temporary deviations when guests visit or during changes in weather. The app offers a concise overview of today’s heating and cooling activity, along with energy estimates that help you understand how your choices impact usage.
For ongoing comfort, link your Nest to your home’s schedule and any connected routines. If your climate requires heating during the mornings and cooling in the afternoons, the Nest can automatically adjust to minimize swings, using the learning feature to anticipate needs. Regularly review weather forecasts and adjust the schedule accordingly to maximize efficiency. The more you interact with the thermostat, the better its learning becomes, reducing manual tweaking while maintaining comfort. If you’re new to the Nest ecosystem, begin with a simple day part schedule and gradually add more complex routines as you observe performance and comfort levels.
Energy Savings: Optimizing Modes, Schedules, and Routines
Nest’s efficiency gains come from smart scheduling, adaptive learning, and responsive modes like Home/Away. For many homes, the most impactful steps are setting accurate temperature targets for different parts of the day and enabling Home/Away detection to reduce heat or cooling when no one is home. Eco mode is a key lever during shoulder seasons, keeping temperatures comfortable while avoiding excessive energy use. Thermostat Care analysis shows that well-tuned Nest configurations can help minimize wasted runtime by aligning thermostat behavior with actual occupancy and outdoor conditions. The Nest app provides quick energy reports and insights, including the percent change in usage when you implement a schedule or enable eco settings.
To maximize savings, ensure the Nest thermostat remains connected to a stable Wi-Fi network and receives firmware updates. Check that any energy-saving features, such as a smart schedule or occupancy-based adjustments, are enabled, and revisit these settings after major weather changes. If your home has varying occupancy patterns, consider implementing multiple schedules for weekdays versus weekends. By consistently reviewing daily energy consumption, you’ll identify opportunities to tighten adjustments without sacrificing comfort. A careful approach—balancing automatic learning with intentional scheduling—often yields the most sustainable improvements over time.
Troubleshooting Common Issues with Nest
Even with good setup, you may encounter occasional issues. If the Nest won’t connect to Wi-Fi, verify your network name and password, reboot your router, and ensure the thermostat is close enough to the router for a strong signal. If the screen goes blank or the device appears unresponsive, perform a soft reset from the settings menu and check for firmware updates. For power-related concerns, confirm there is a reliable C-wire connection or try a temporary power extender provided by the manufacturer. If the HVAC system doesn’t respond to changes, double-check that the wiring matches the Nest terminal labels and that the system type (furnace, heat pump, or multi-stage) is correctly identified in the app. When in doubt, contact professional support or the Thermostat Care guidance team for review.
Always follow safety precautions when handling wiring. Do not apply force to terminals or wires, and avoid attempting connections that aren’t labeled for Nest compatibility. After any wiring change, re-check system responses by testing a few cycles. By methodically diagnosing connectivity, power, and control issues, you can restore reliable operation and maintain the efficiency benefits of Nest.
Integrations: Voice Assistants and Smart Home Ecosystems
Nest works well with popular voice assistants and smart-home ecosystems. You can connect Nest to Google Assistant or Amazon Alexa to issue voice commands like adjusting temperatures or arming Home/Away routines. The Nest ecosystem also supports hybrid setups with compatible hubs and platforms, enabling scenes such as “When I leave home, turn off lights and adjust temperature.” If you use Google Home, you’ll find that Nest devices integrate seamlessly into routines and device groups. It’s worth exploring routines that trigger based on weather, calendar events, or occupancy. Always review each service’s privacy settings and permissions to maintain control over your home environment. When done correctly, these integrations can eliminate the need to pick up your phone for routine adjustments, enhancing comfort and efficiency across daily life.
For those exploring broader smart-home upgrades, consider how Nest fits with other Thermostat Care recommendations, including maintaining a consistent Wi‑Fi signal and ensuring firmware is up to date. The goal is a cohesive experience where your thermostat responds intelligently to real-time conditions while keeping energy use in check. Remember to test voice commands after linking new services to confirm reliable operation and avoid misfires during critical heating or cooling moments.
Maintenance and Best Practices: Updates, Wiring, and Safe Handling
To keep Nest operating smoothly, perform regular maintenance checks and stay current with firmware updates. Updates bring improvements to performance, security, and new features, so check the Nest app periodically and install updates when prompted. If you’re managing a legacy wiring setup, review the C-wire status and confirm the wiring is secure and correctly labeled. Keep the thermostat and its faceplate clean, making sure the sensors can read ambient conditions accurately. If you have a heat pump or complex multi-stage system, consult the wiring diagram for your HVAC unit and verify compatibility with Nest. A small amount of routine care—like inspecting the panel, confirming tight connections, and monitoring energy usage trends—goes a long way toward maintaining reliable comfort and efficiency over time.
When mounting or servicing, always cut the power at the breaker before removing the old device and handle all wiring with care. If you’re uncertain about any wiring or compatibility, seek professional assistance. Thermostat Care emphasizes prudent maintenance and cautious handling, especially in homes with older electrical systems. By staying proactive, you’ll minimize downtime and ensure Nest continues to deliver energy savings and user-friendly control for years to come.
Tools & Materials
- Nest Thermostat (generation 3 or later)(Ensure model is compatible with your HVAC system)
- Smartphone or tablet with the Nest app(Needed for setup and control)
- Wi‑Fi network (2.4 GHz/5 GHz)(Stable connection for remote access)
- Screwdriver (Phillips #2)(For mounting the base or wiring plate)
- Wall mounting screws and drywall anchors(Optional if re-mounting on a new wall plate)
- Ladder or stable step stool(Only if mounting height requires elevation)
- Owner’s manual or HVAC wiring diagram(Helpful for reference and troubleshooting)
Steps
Estimated time: 60-90 minutes
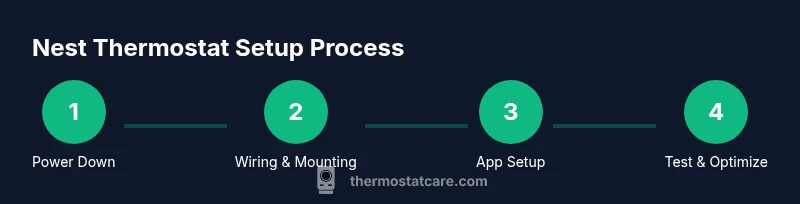
- 1
Power down and prep
Turn off the HVAC circuit at the breaker and confirm there is no voltage on the wires before touching any hardware. This protects you and the equipment during replacement.
Tip: Use a non-contact voltage tester for peace of mind. - 2
Remove old thermostat and photograph wiring
Carefully detach the old unit and take a photo of which wire is connected to each terminal. This reference helps ensure correct wiring when you connect to the Nest base.
Tip: Label wires with tape if multiple wires share terminals. - 3
Mount Nest base and connect wires
Attach the Nest base to the wall and land each wire into the corresponding Nest terminal (R, Y, G, W, C as applicable). Ensure tight, clean connections.
Tip: Double-check that wires are fully seated to avoid loose contact. - 4
Power up and pair with app
Restore power at the breaker and follow the on-screen prompts to connect the Nest to Wi‑Fi and sign in to your Nest account.
Tip: Choose the correct HVAC system type during setup to optimize control logic. - 5
Configure schedules and learning options
Set a basic schedule first, then enable or adjust learning features. The thermostat will adapt to your routine over time.
Tip: Start simple and expand schedules as you become comfortable. - 6
Test heating, cooling, and overrides
Run a few test cycles for heating and cooling, and practice manual overrides to ensure the system responds correctly.
Tip: Verify that the thermostats’ commands reach the furnace/air handler. - 7
Set up Home/Away and energy routines
Enable Home/Away detection and create energy-saving routines to optimize efficiency when occupants come and go.
Tip: Test the automations to confirm they trigger correctly at departure/return.
Questions & Answers
Do I need a C-wire for Nest thermostat?
Most Nest models benefit from a C-wire for reliable power, especially in newer or energy-heavy setups. If your system lacks a C-wire, consider using the Nest Power Connector or consult wiring guidance for alternatives.
Usually a C-wire is recommended for reliable power, but there are alternatives if your system doesn’t have one.
How do I reset Nest thermostat if it won’t respond?
If Nest becomes unresponsive, perform a soft reset via the settings menu or reboot the device. Ensure the Wi‑Fi connection is stable and check for firmware updates.
Try a soft reset from the settings and confirm the device is connected to Wi-Fi.
Is Nest thermostat compatible with Google Home and Alexa?
Yes. Nest integrates with Google Assistant and Amazon Alexa for voice control and routines. Set up through the respective app and link your Nest account.
Nest works with Google Home and Alexa for voice control.
Can Nest control both heating and cooling systems?
Nest supports most common heating and cooling configurations, including heat pumps and multi-stage systems. Confirm your system type during setup to ensure correct operation.
Yes, it supports heating and cooling, including many heat pump setups.
How often should I update the Nest thermostat firmware?
Keep the device updated to benefit from security and feature enhancements. The Nest app will prompt for firmware updates when available.
Keep the device updated; the app will prompt you when updates are available.
What is Learning Thermostat and how can I adjust its learning behavior?
The Nest adapts to your routines over time. You can adjust learning preferences in the app or disable learning for a more manual approach.
Nest learns your routine automatically; you can adjust or disable learning as needed.
Watch Video
What to Remember
- Verify HVAC compatibility and wire labeling before installation.
- Use the Nest app to set up and optimize schedules.
- Leverage learning features and Home/Away for energy savings.
- Regularly check for updates and review energy insights.