Nest Smart Thermostat: Complete How-To Guide for Homeowners
Learn how to install, connect, and optimize a nest smart thermostat for reliable comfort and energy savings. This comprehensive how-to covers compatibility, wiring, app setup, troubleshooting, and maintenance.

With this guide you will install and configure your Nest smart thermostat and get it running for reliable comfort and energy savings. You’ll verify compatibility with your HVAC, safely power down equipment, wire the base, connect to Wi-Fi, and complete setup in the Nest app. Expect practical steps, common pitfalls, and quick optimization tips to maximize efficiency.
What is a Nest Smart Thermostat and Why It Matters
According to Thermostat Care, a nest smart thermostat is a connected device that learns your routines and adjusts heating and cooling accordingly. It goes beyond a traditional thermostat by offering auto-scheduling, occupancy sensing, remote control via the Nest app, and energy usage reports that help you make informed decisions about comfort and efficiency. The Nest platform can integrate with Google Home and other smart-home ecosystems, enabling voice control and automation routines. For homeowners, this means fewer manual tweaks, a better match between comfort and energy cost, and the potential for longer-term savings. While many HVAC systems support smart thermostats, real benefits come from correct wiring, accurate configuration, and consistent use of schedules and geofencing. Thermostat Care highlights that the most noticeable gains come when you pair a Nest with a thoughtful schedule and occupancy-aware features that adapt to your daily life.
Compatibility and Wiring Basics
A Nest smart thermostat works with most standard 24-volt heating and cooling systems, including many single-stage, multi-stage, and heat pump configurations. Before you begin, confirm that your system is compatible by checking the wire count and the presence of a 24V power source. The most critical wire is the C-wire, which provides a continuous power supply to the thermostat so it can operate its display and Wi-Fi module without relying on power stealing. If your current setup lacks a dedicated C-wire, you have options such as upgrading the wiring, using a Nest power connector, or consulting a qualified technician for a safe solution. When wiring, label each conductor before removing the old thermostat, and take a photo of the connections for reference. The Nest base uses a standard terminal layout, but some unconventional systems require alternative wiring or adapters. Always refer to the Nest wiring guide for the exact terminals corresponding to your system type.
Preparing for Installation
Gather the necessary tools and create a safe workspace before you touch any wires. Power down the HVAC circuit at the breaker to eliminate shock risk, and verify that no components hold residual voltage. Have a small container for screws and a labeling method for wires. A level helps ensure the mounting plate sits flush, which improves sensor performance and display alignment. If you’re replacing a mechanical thermostat, you may need to detach a furnace transformer connector or adjust mounting holes. Keep the user manual handy and set up a temporary phone stand so you can follow along with the Nest setup app as you go. Finally, check that your Wi‑Fi network is stable and supports the 2.4 GHz band for best range.
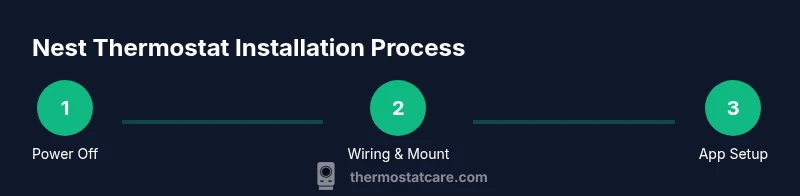
Step-By-Step Installation Overview
This section walks through the core steps you’ll perform in sequence during installation. Start with safety checks, then remove the old thermostat, verify wire colors and terminals, mount the Nest base, connect the wires, and power the device back on. After the hardware is in place, you’ll configure the Nest app, join your Wi‑Fi network, and complete the initial setup. Each step includes a brief rationale so you understand why it matters, not just what to do. If you encounter a mismatch (for example, extra wires or a non-standard terminal), pause and consult the troubleshooting tips before proceeding.
Configuring the Nest App and Wi-Fi
With hardware in place, connect the Nest thermostat to your home network and sign in to your Nest account. The app will guide you through selecting your system type, configuring heating and cooling preferences, and setting up schedules. Enable geofencing to let the thermostat adjust when you leave or return home, and review energy-saving features like occupancy-based learning and Eco mode. If you have multiple sensors or smart-home devices, pair them within the Nest app to enable cross‑device automations. After linking, perform a quick test to verify that commands from the app translate to real changes on the HVAC equipment.
Common Troubleshooting Pitfalls
Even well-planned installs run into issues. Common problems include the thermostat displaying a blank screen, power cycling unexpectedly, or Wi‑Fi dropouts. Ensure the C-wire is properly connected and that the power is stable at the breaker. Recheck wire placement against the Nest compatibility guide, and if you see a warning about multi-stage systems, confirm you have the correct wiring adapter or the appropriate Nest model for your setup. If the thermostat connects to Wi‑Fi but cannot communicate with HVAC, verify the settings in the app and confirm the furnace is responsive to commands. When in doubt, consult the Nest support resources or a qualified installer.
Energy Savings and Scheduling Tips
To maximize energy savings, rely on the Nest’s learning features rather than rigid manual schedules. Start with a modest setback during the day and reduce the schedule complexity as you observe comfort levels. Use occupancy and geofence features to minimize energy use when you’re away. Review energy reports in the app to identify trends, and adjust Eco or Auto‑Away modes to match your lifestyle. Keep in mind that different climates and home insulation levels affect results, so your gains may vary. Regularly review and update your schedules with seasonal changes for sustained savings.
Maintenance and Long-Term Care
Keep the Nest thermostat clean by gently dusting the screen and vents and ensuring the surface is free of debris that could block sensors. Periodically check the mounting plate and wires for signs of wear or looseness, especially after renovations or HVAC maintenance. Update the firmware when prompted to ensure you have the latest security patches and feature improvements. If you notice sensor drift or lag in response, a quick reboot after verifying wiring can resolve most issues. Finally, store any spare mounting screws and the user manual in a safe place for future reference.
Tools & Materials
- Nest Thermostat (third generation or newer)(Ensure it includes the power connector if your wiring lacks a C-wire.)
- Screwdriver set (Phillips #2 is typical)(Needed for mounting plate and backplate screws.)
- Voltage tester / multimeter(Confirm no live voltage before handling wires.)
- Wire labels or tape(Label wires as you remove them to avoid miswiring.)
- Level and pencil(Align the base plate for accurate sensor positioning.)
- Native thermostat compatibility guide(Optional quick reference if you have a unique system.)
- Smartphone with the Nest app installed(For setup, Wi-Fi configuration, and scheduling.)
- Stable 2.4 GHz Wi-Fi network(Best performance for Nest initial setup and updates.)
Steps
Estimated time: 60-90 minutes
- 1
Power down and verify safety
Turn off the HVAC circuit at the main breaker and confirm the thermostat is not receiving power. This prevents shocks and protects sensitive electronics during wiring.
Tip: Use a non-contact voltage tester to confirm no power at the old thermostat wires before touching them. - 2
Remove old thermostat and inspect wires
Carefully detach the old unit, take a photo of the wiring, and note terminal labels. This helps you map wires to Nest terminals accurately.
Tip: Label each wire with its terminal letter before removing it. - 3
Verify wiring and prepare mounting
Count the wires and ensure you have a C-wire or an appropriate alternative. Mount the Nest base level using the included screws and wall anchors.
Tip: If you lack a C-wire, consider the Nest power connector option after confirming compatibility. - 4
Connect wires to the Nest base
Attach each wire to its corresponding Nest terminal following the wiring diagram for your system. Avoid loose or cross-connected wires.
Tip: Double-check that the connections are snug and fully seated. - 5
Mount the display and restore power
Attach the Nest display to the base and restore power at the breaker. Wait for the device to boot and reach the setup screen.
Tip: If the screen stays blank, recheck the C-wire and power supply. - 6
Connect to Wi-Fi and sign in
Open the Nest app, connect to your 2.4 GHz network, and sign in or create an account. This enables remote control and updates.
Tip: Prefer a secure home network with a reliable signal for best performance. - 7
Configure system type and preferences
In the app, select your HVAC type (gas, electric, heat pump), and set temperature targets, fan settings, and schedules.
Tip: Start simple—build a baseline schedule and adjust over a week. - 8
Run a quick test and validate operation
Test heating and cooling commands from the app and confirm physical response from the HVAC equipment. Verify sensor readings are reasonable.
Tip: If a command doesn’t trigger a response, re-check wiring and app settings before calling support.
Questions & Answers
Do I need a C-wire for a Nest thermostat?
Most Nest thermostats require a C-wire for reliable power. If your system lacks a C-wire, use the Nest power connector option or consult a pro to avoid power issues.
A C-wire is typically needed for a stable Nest power supply; if you don’t have one, consider the power connector option or professional help.
Is Nest compatible with older HVAC systems?
Nest supports many older systems, including common gas and electric furnaces, boilers, and heat pumps. Some legacy setups may require adapters or a professional assessment.
Most older systems are compatible, but some unique configurations may need adapters or expert help.
How long does installation take?
Most installations fit within 30–90 minutes depending on wiring complexity and HVAC type. Allow extra time for app configuration and testing.
Most installs take under two hours, depending on wiring and HVAC complexity.
Can I install a Nest thermostat myself or should I hire a pro?
If you’re comfortable with basic wiring and safety procedures, you can install a Nest thermostat yourself. For complex systems or multi-stage heat pumps, a professional is recommended.
DIY is possible for many systems, but hire a pro for complex setups to avoid mistakes.
Will Nest work with other smart home devices like Google Home?
Yes. Nest integrates with Google Home and other smart-home ecosystems for voice control and automations. Ensure accounts are linked in the Nest app.
Yes, it plays well with Google Home and other smart devices when connected in the app.
Watch Video
What to Remember
- Verify HVAC compatibility before starting.
- Label and document wire connections to prevent miswiring.
- Configure Nest app settings and schedules for energy savings.
- Test HVAC responses after installation and adjust as needed.