Nest Thermostat Installation: A Comprehensive DIY Guide
A complete, educator-friendly guide to installing a Nest thermostat, covering compatibility checks, wiring basics, app setup, testing, and energy-saving tips for homeowners and DIY enthusiasts.

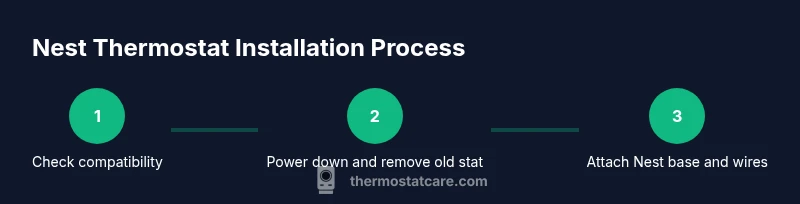
This quick guide shows homeowners how to install a Nest thermostat safely and effectively. You will verify compatibility, power down the system, replace the old thermostat, connect wires to the Nest base, and complete setup in the Nest app. You’ll need a compatible Nest unit, basic hand tools, a smartphone, and a C-wire adapter if your system requires one.
Compatibility and Baseline Requirements
Nest thermostat installation starts with compatibility checks to prevent dead ends in the middle of a project. Nest thermostats work with most standard 24‑V heating and cooling systems, but configurations vary: heat pumps, multi‑stage setups, or proprietary controls may require adapters or professional input. According to Thermostat Care, begin by verifying that your system supports a basic 24‑V thermostat and note whether you have a common wire (C‑wire) available. If you don’t, plan for a C‑wire adapter or a dedicated power option recommended by Nest. Also confirm that your electrical panel and furnace access are reachable during the install, and ensure the HVAC system is powered down before you begin to avoid shocks.
This step reduces surprises and helps you decide whether to proceed as a DIY task or call a pro for complex configurations. If you find anything unusual—unlabeled wires, unusual transformer configurations, or a lack of a reliable C-wire—pause and consult a professional. Thermostat Care emphasizes starting with the right baseline so the installation goes smoothly and safely.
In short, compatibility is the gatekeeper: verify 24‑V operation, C-wire availability, and safe access to the equipment before you touch anything.
Required Tools and Safety Precautions
Before you start, gather the essential tools and observe safety guidelines. A compatible Nest thermostat relies on standard heating and cooling wiring, but the physical install requires basic hand tools and careful handling of live wires. Always power down the HVAC system at the breaker before touching any wiring, and avoid working near damp or poorly ventilated areas. Use a non-contact tester if you’re unsure about wire voltage, and never force wires into terminals. Having a small container for screws and a magnetic tray helps keep fasteners organized.
Thermostat Care recommends wearing safety glasses if you’re working near exposed electrical components and taking a quick photo of the existing wiring before disconnecting anything. Keep pets away and ensure the wall surface is dry and clean so the Nest base sits flush. Also confirm that your smartphone has the Nest app installed and a reliable Wi‑Fi connection for setup.
With these precautions, you reduce the risk of shocks, damage, and miswiring while creating a solid foundation for the installation.
Understanding Your HVAC Wiring: Common Scenarios
Wiring configurations vary across systems, so understanding your particular setup is essential. Most Nest installations support common terminals such as R (or Rc/Rh), C, G, Y, W, and sometimes O/B for heat pumps. If you have a heat pump or multi‑stage system, you may see additional wires or require a common‑wire adapter. Always label wires as you remove them so you can reproduce the correct connections on the Nest base. If your system uses proprietary controls or a higher level of sophistication, Nest or a professional may provide a wiring guide tailored to that setup.
In some homes, the C‑wire is not present, which can cause the Nest to power cycle or dim the display. In those cases, you can use a Nest power adaptor or a C‑wire extender approved for your system. Thermostat Care notes that accurate identification of wires and adapters is the difference between a smooth setup and ongoing connectivity issues. If you’re unsure about any wire, stop and consult a professional to avoid damage to the control board or furnace.
Preparing the Nest Base: Terminal Labels and Adapters
The Nest base is where your wires land. Start by inspecting the base for the correct terminal labels and ensuring you’re using the right size screws for your wall plate. If you’re missing a C-wire and your system needs one, prepare to connect an adapter (or use Nest’s recommended wiring method) as directed by the app. When attaching wires, straighten each conductor and trim any frayed ends to ensure a clean connection. Don’t twist wires together; use individual terminals as labeled on the Nest base.
If you encounter a spare wire you can’t identify, stop and recheck the labeling. A wrong wire in the wrong terminal is one of the most common causes of post‑install malfunctions. After wiring, gently tug each wire at the terminal to confirm a secure grip. Finally, remove any old wall plate hardware that could obstruct a flush fit for the Nest thermostat.
Installation Flow: Wiring and Mounting Steps
The installation flow is straightforward when you follow a steady sequence: ensure power is off, remove the old device, identify wires, attach the base to the wall plate, connect each wire to the corresponding Nest terminal, mount the Nest display, and restore power for setup. Always follow the Nest app prompts for wiring configuration—this helps match the hardware to your system type (gas, electric, heat pump, etc.). If you’re using a C-wire adapter, install it according to Nest’s instructions before connecting the wires to the Nest base.
During mounting, make sure the wall is clean and dry, and the base sits flat against the surface. If you notice any gaps or wobble, use spacers or a different wall anchor to ensure a solid mount. After securing the base, you’re ready to begin app configuration, which guides you through system type, outdoor unit, and zone controls.
Post-Installation: App Setup, Testing, and Fine-Tuning
Power up the system and launch the Nest app to begin configuration. The app will guide you through selecting your system type, connecting to Wi‑Fi, and naming rooms or zones for scheduling. When wiring has been confirmed, test the thermostat by setting a few target temperatures and verifying that the furnace and AC respond as expected. The Nest app also provides energy-saving tips and reports that help you fine‑tune settings for comfort and efficiency.
Thermostat Care recommends running a few quick tests: warm air on demand, cooling response, and fan operation. If the system doesn’t respond, double‑check wire connections and ensure the home Wi‑Fi is active. After the install, create comfort schedules and enable features like Easy HVAC, Home/Away assist, and energy reports to maximize savings.
Troubleshooting Common Issues and When to Call a Pro
Common issues after Nest installation include the thermostat showing ‘no power,’ inconsistent temperature, or the HVAC system not answering to setpoints. Recheck wire connections, confirm the C-wire presence if required, and verify that the Nest base is properly grounded and flush. If you still encounter problems, consult the Nest app’s diagnostic tools and Nest support articles for guidance on basic troubleshooting. For complex systems, multi-stage configurations, or risky wiring (high voltage, proprietary controls), it’s safer to contact a licensed HVAC technician.
Thermostat Care emphasizes safety: never bypass safety interlocks or force wires into mismatched terminals. If you smell burning, hear popping noises, or notice buzzing, turn off power immediately and seek professional help.
What to Expect After Installation
Once installed, your Nest thermostat should provide accurate temperature control and display status in the app. Expect energy-savings analytics and usage reports within the Nest app, plus remote scheduling and voice assistant integration on compatible devices. If you want to optimize performance, adjust settings for seasonal changes, enable Eco Temperatures, and review energy history to identify opportunities for further savings. With Wi‑Fi enabled, your thermostat can receive remote updates and improved features over time—this is part of the Nest ecosystem, designed to simplify home comfort.
Tools & Materials
- Nest Thermostat (latest model)(Confirm model compatibility with your HVAC system)
- Screwdriver set(Phillips #2 and flathead for base and cover screws)
- Smartphone with Nest app(iOS/Android with internet access)
- Wi‑Fi network(2.4 GHz recommended; 5 GHz also works with Nest)
- C-wire adapter or jumper (if needed)(Needed if your HVAC lacks a dedicated C-wire)
- Electrical tape and wire strippers(For securing wires and trimming ends)
- Non-contact voltage tester(Optional safety check)
- Owner’s manual and HVAC access to panel(Keep handy for reference)
Steps
Estimated time: 60-90 minutes
- 1
Power down and verify compatibility
Turn off the HVAC circuit at the breaker and confirm your system is a supported 24‑V setup using the Nest compatibility tool or Nest app prompts. This prevents shocks and ensures the wiring you choose will be compatible with the Nest base.
Tip: Double-check that the breaker is fully switched off before touching any wires. - 2
Remove the old thermostat and label wires
Carefully remove the old thermostat faceplate and take a clear photo of the wire connections before disconnecting. Label each wire with its terminal letter (R, C, G, Y, W, etc.) to avoid confusion during reassembly.
Tip: Keep screws and wires organized in a labeled container. - 3
Identify wires and determine wiring configuration
Match each wire to known terminals; determine if a C-wire exists and whether adapters are needed for your system. If you’re unsure about a wire’s purpose, consult the Nest wiring guide or pause to seek professional input.
Tip: Do not assume color corresponds to function—verify with the existing terminals. - 4
Attach Nest base to wall plate
Mount the Nest base on the wall using provided screws and ensure it sits flush. Thread wires through the base’s central opening and prepare for terminal connections.
Tip: Use a level to keep the base flat for a clean finish. - 5
Connect wires to Nest base terminals
Insert each wire into its corresponding Nest terminal (R, C, G, Y, W, O/B) according to your labeling. If a C-wire is missing, connect an adapter if required by your configuration.
Tip: Secure each wire with a gentle tug to confirm a solid connection. - 6
Attach the Nest display and secure the unit
Place the Nest display onto the base until it clicks into place. Ensure it sits level and cleanly against the wall before proceeding to power up.
Tip: Avoid bending wires sharply; keep them routed neatly behind the display. - 7
Power back on and start app configuration
Restore power at the breaker and open the Nest app to begin configuration. Follow in-app prompts to select system type, connect to Wi‑Fi, and name rooms.
Tip: Choose a strong Wi‑Fi password and enable secure login for remote access. - 8
Test, calibrate, and finalize settings
Test heating and cooling, verify fan operation, and adjust Eco Temperatures and scheduling as needed. Review energy history to optimize performance over time.
Tip: Run a few cycles to confirm the HVAC responds promptly to app commands.
Questions & Answers
Is Nest installation a DIY-friendly task for most homes?
Yes for many standard 24V systems, but complex heating setups or proprietary controls may require professional help. Always start with compatibility checks and turn off power before handling wiring.
Yes for many standard systems, but complex setups may require a pro. Start with compatibility checks and power down before wiring.
Do I need a C-wire for a Nest thermostat?
A C-wire provides a continuous power source for the Nest. If your system lacks one, you may need an adapter or a different power option recommended by Nest.
A C-wire powers the Nest continuously. If you don't have one, use the recommended adapter or power option.
Will Nest work with heat pumps or multi-stage systems?
Nest supports many heat pump and multi-stage configurations, but some setups require adapters or professional input. Check the Nest app’s configuration options during setup.
Nest works with many heat pumps and multi-stage systems, but some may need adapters or expert input.
What should I do if my old thermostat uses proprietary wiring?
Proprietary or unusual controls may not be compatible with Nest without professional assistance. Use the compatibility tool and consult a technician if unsure.
If wiring is proprietary, check compatibility and consider professional help.
How long does Nest installation take on average?
Most DIY installations take about one hour to two hours depending on wiring, access, and whether a C-wire adapter is required.
Typically around one to two hours depending on wiring.
What are common mistakes to avoid after installation?
Rushing wiring, skipping compatibility checks, or failing to secure the base can cause malfunctions. Always verify connections and test basic functions before finishing.
Avoid skipping compatibility checks and never rush wiring. Test the basics first.
Where can I find reliable troubleshooting resources?
Start with Nest support documentation, and consult Thermostat Care’s troubleshooting guides for best-practice steps and safety reminders.
Use official Nest support and Thermostat Care guides for troubleshooting.
Can I use Nest with non‑Wi‑Fi setups?
Nest functions best with a reliable Wi‑Fi connection for app control and updates; some features may be limited without Wi‑Fi.
Wi‑Fi enables full features; without it some functions may be limited.
Watch Video
What to Remember
- Check compatibility before starting.
- Label wires and prep tools beforehand.
- Follow the Nest base wiring precisely.
- Complete setup in the Nest app and connect Wi-Fi.
- Test and adjust for energy efficiency.