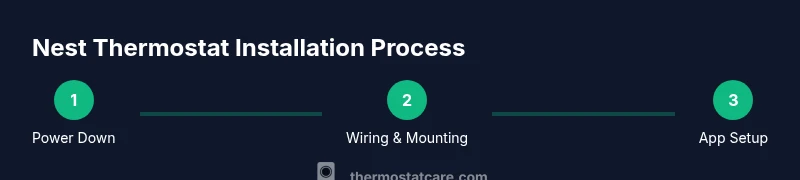
Nest Thermostat Instructions: A Complete DIY Guide
Learn nest thermostat instructions for safe installation, proper wiring, Wi‑Fi setup, and optimization tips. This expert guide covers compatibility checks, wiring steps, common issues, and maintenance to maximize comfort and energy savings in 2026.

You will learn nest thermostat instructions to safely install and set up your Nest thermostat, verify compatibility, and configure Wi‑Fi and app settings for optimal performance. Start by confirming your HVAC system supports a common wire (C-wire) and that the Nest model matches your region. Then follow safe wiring steps, connect to Wi‑Fi, and complete the initial setup.
Nest Thermostat Fundamentals: What It Is and What It Does
Nest thermostats are wired, internet-connected devices that learn your schedule and adjust heating and cooling for comfort and efficiency. This section introduces nest thermostat instructions for common models, including compatibility with typical HVAC setups and how the thermostat communicates with your home network. By following appropriate Nest thermostat instructions, homeowners can avoid common mistakes and ensure safe, reliable operation. The Nest system uses a low-voltage connection and often requires a common wire to power the device, which is essential for non-battery models. In 2026, energy-saving features and improved app controls make correct installation especially important for long-term performance.
- Understand what a Nest thermostat does: learns routines, optimizes heating/cooling, and provides remote access.
- Identify your HVAC configuration: forced air, heat pump, boiler, or radiant systems.
- Expect power considerations: most Nest models rely on a C-wire or a power-stealing design that benefits from a dedicated common wire when available.
According to Thermostat Care, starting with the right expectations and a clear plan reduces surprises during nest thermostat instructions.
Check Compatibility Before You Begin
Before you touch wires, confirm that your home’s HVAC system and electrical setup align with Nest thermostat instructions. Not all systems are compatible with all Nest models. Key checks include: whether you have a C-wire, whether your heating is heat-only or heat-cool, and whether your control board supports 24V switching.
- Verify that your old thermostat is a 24V system with standard wiring. If you have a millivolt system or older proprietary controls, you may need additional adapters or a different solution.
- Determine if your current wiring includes common wire (C). If not, plan for a C-wire adapter or alternative power option.
- Check regional compatibility: Nest models vary by country and electrical standards. Ensure the model you select matches your region’s specifications.
Thermostat Care analysis shows that confirming compatibility up front reduces installation errors and post-install troubleshooting time in 2026.
Preparing Your Tools and Safety Precautions
Gather the tools and materials you’ll need for nest thermostat instructions. Working with HVAC wiring involves electrical safety, so take precautions and follow step-by-step guidelines.
- Tools: screwdriver (Phillips and flat-head), wire stripper, multimeter or non-contact voltage tester, level, and a smartphone with the Nest app.
- Safety: turn off power at the HVAC circuit breaker and the thermostat circuit to avoid shock. Do not bypass safety features.
- Documentation: take a photo of the existing wiring before removing anything to help with reattachment and labeling.
Having the right tools and a safety plan ensures you can follow nest thermostat instructions with confidence.
Wiring Essentials: Key Concepts for Nest Thermostat Instructions
Wiring is where missteps most often occur, so follow nest thermostat instructions carefully. Common scenarios include standard 4-wire systems (R, W, Y, G) with or without a C-wire, heat pumps with O/B reversing valve, and systems using a dedicated humidifier or dehumidifier circuit.
- Identify wires by color and function; label if necessary.
- Understand terminal mapping on the Nest base: R (power), C (common), Y (compressor), G (fan), W (heat). Some systems require jumpers or adapters.
- For heat pumps, confirm O or B wiring and the orientation of reversing valve signals.
This section reinforces how to interpret wires and prepare them for nest thermostat instructions, reducing wiring errors and the need for rework later.
Setup, Wi‑Fi, and App Registration
After the physical installation, setting up the Nest thermostat involves connecting the device to your home Wi‑Fi network and provisioning it in the Nest app. This enables remote control, energy reports, and scheduling.
- Power up the Nest display and follow on-screen prompts to select language and location.
- Connect to your home Wi‑Fi network using the Nest app or the built-in interface.
- Sign in or create a Google/Nest account and complete device pairing.
- Configure desired temperature schedules, Eco modes, and energy-saving settings.
By following nest thermostat instructions for app setup, you gain access to remote control, energy history, and responsive performance across devices.
Post-Install Testing and Calibration
With the Nest thermostat installed and online, run a full set of diagnostic checks to verify correct operation. This includes testing heating and cooling calls, fan operation, and system responses to temperature changes. Calibrate any sensor readings if the Nest prompts you to do so.
- Run a system test: heat only, cool only, and auto mode if supported.
- Check for odd temperature readings or delays and re-check wiring if needed.
- Update firmware automatically via the Nest app to ensure you have the latest features and security updates.
Ongoing calibration and testing help ensure nest thermostat instructions yield reliable performance and comfort.
Tools & Materials
- Nest Thermostat (3rd generation or newer)(Ensure model matches your region and HVAC compatibility.)
- Screwdriver set (Phillips #2 and flat-head)(Needed to remove old mounting screws and attach the Nest base.)
- Non-contact voltage tester(Verify power is off before handling wires.)
- Wire stripper/cliers(Useful for trimming and preparing conductors.)
- C-wire adapter kit (optional if no C-wire exists)(Use if your system lacks a common wire; not always needed.)
- Smartphone with Nest app(Required to configure, monitor, and control the thermostat.)
Steps
Estimated time: 45-90 minutes
- 1
Power Down the System
Turn off power to the HVAC system at the circuit breaker and the thermostat circuit if present. This prevents electric shock and protects the control board during wiring changes.
Tip: Double-check that power is off using the voltage tester before any wire handling. - 2
Remove the Old Thermostat Cover
Carefully detach the front cover and document the wiring configuration. Avoid pulling wires loose and keep screws organized for reinstallation.
Tip: Take a photo of the wiring from multiple angles for reference during nest thermostat instructions. - 3
Label Wires and Photograph Connections
Label each wire by terminal and take a clear photo of the backplate. This helps map wires to Nest terminals during installation.
Tip: If wires lack color coding, use masking tape to label each wire with its function. - 4
Remove the Mounting Plate
Remove the existing mounting plate from the wall, exposing the electrical box. Prepare the wall surface for the Nest base.
Tip: Use a stud finder to avoid wall damage and ensure a secure mount. - 5
Attach the Nest Base to the Wall
Mount the Nest base using the included screws. Ensure the base is level and firmly affixed to support the thermostat.
Tip: Use a level to align the base precisely; misalignment can affect display fit and sensor readings. - 6
Connect Wires to Nest Terminals
Reconnect wires to the appropriate Nest terminals based on your prior labeling. Push wires fully into terminals and secure.
Tip: If a C-wire is available, connect it to C; if not, install the adapter kit if your system requires it. - 7
Attach Nest Display and Restore Power
Attach the display, reapply the faceplate, and switch the circuit breaker back on. The Nest will boot and begin initial configuration.
Tip: Do not force cables; ensure wires are properly seated before powering up. - 8
Configure in the Nest App
Open the Nest app, add the new thermostat, and follow on-screen prompts to connect Wi‑Fi, enter location, and set schedules.
Tip: Enable Eco modes and energy reports early to maximize savings. - 9
Test and Finalize Settings
Test heating and cooling calls, verify temperatures respond correctly, and adjust settings like fan control and hold times as needed.
Tip: Record initial energy baselines to compare future savings.
Questions & Answers
Do I need a C-wire for the Nest thermostat?
Most Nest models require a 24V power source, and a C-wire helps provide reliable power. If your system lacks a C-wire, consider a C-wire adapter kit or consult a professional for alternatives.
A C-wire often helps Nest stay powered reliably. If you don’t have one, a compatibility adapter can help, or you may want to have a tech install it for you.
Is my HVAC system compatible with Nest thermostat instructions?
Nest is compatible with many 24V heating and cooling systems, but some proprietary or millivolt setups aren’t. Check your system type and existing wiring first, then reference Nest’s supported configurations.
Nest supports most 24V systems, but some rare setups aren’t compatible. Verify your wiring before starting nest thermostat instructions.
Can I install the Nest thermostat myself?
Yes, many homeowners perform nest thermostat instructions themselves. Follow safety steps, label wires, and use the Nest app to complete installation. If you encounter unfamiliar components, consult a professional.
You can install it yourself if you’re comfortable with wiring and safety steps; otherwise a professional can guard against mistakes.
What if the Nest won’t connect to Wi‑Fi?
Ensure your network is accessible, the 2.4 GHz band is enabled if required, and the Nest is within range. Reboot the router and reattempt pairing in the app before troubleshooting deeper.
If Wi‑Fi won’t connect, check your router, try again, and move the thermostat closer to the router if needed.
How long does a typical nest thermostat installation take?
Most installations take 45 to 90 minutes depending on wiring complexity and whether you need a C-wire adapter. Starting with clear nest thermostat instructions helps keep this on track.
Expect about 45 to 90 minutes for a typical install; more time may be needed for tricky wiring.
Can I use a Nest thermostat with a heat pump?
Nest supports many heat pump configurations, but you must configure the reversing valve (O/B) correctly and set thermostat mode to heat pump when appropriate.
Yes, Nest works with many heat pumps; just ensure the reversing valve is set properly in the app.
What maintenance does a Nest thermostat require?
Nest requires minimal maintenance beyond occasional app updates and firmware checks. Periodically verify sensor accuracy and check for software updates for optimal performance.
Minimal maintenance—just keep the app updated and verify settings if you notice any anomalies.
Watch Video
What to Remember
- Verify compatibility before starting nest thermostat instructions.
- Label wires clearly to ease installation and future maintenance.
- Use the Nest app to configure Wi‑Fi and schedules for best energy savings.
- Test all functions (heat, cool, fan) after installation.
- Maintain safety by powering down before wiring changes.