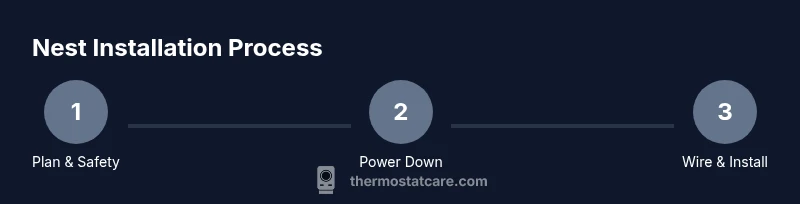
How to Install Nest Thermostat
A complete DIY guide to installing a Nest Thermostat, with safety tips, required tools, step-by-step instructions, and testing advice from Thermostat Care.

This quick answer outlines how to install thermostat nest in a few steps, plus safety checks and common caveats. You'll learn the essential tools, wiring checks, and app setup to ensure a reliable installation. According to Thermostat Care, planning compatibility first reduces surprises. This quick answer provides the prerequisites, a steps overview, and safety cautions so you can decide if you should proceed.
Why Nest Thermostat installation matters for home comfort and energy savings
Installing a Nest Thermostat is more than a convenience—it's a smart move for home comfort and energy efficiency. When you learn how to install thermostat nest correctly, you gain precise temperature control, the ability to schedule heating and cooling around your routine, and real-time energy insights that can lower utility bills over time. Nest models learn your preferences and adapt, reducing unnecessary cycling and making your HVAC system operate more smoothly. For homeowners, this means fewer manual adjustments and more consistent comfort in every room. From an energy-savings perspective, a properly installed Nest can optimize runtime, minimize wasted energy, and help you target comfortable settings during peak periods. The process also gives you a chance to review your existing wiring and verify compatibility with your current system. If you’re asking how to install thermostat nest, you’ll want to start with a solid plan, confirm your wires, and follow the Nest installation steps closely. According to Thermostat Care, a cautious, informed approach reduces post-install surprises and gives you a reliable thermostat that works well with your home.
Safety, compatibility, and prerequisites
Before you begin any electrical work, safety comes first. Nest thermostats work with many 24 VAC heating and cooling systems, but not all configurations are compatible. The most common showstoppers involve older or unconventional systems, multi-transformer setups, and certain boiler configurations. A quick compatibility check helps you decide if DIY installation is feasible or if a pro should handle the job. In practical terms, ensure your current thermostat is powered by a standard low-voltage control circuit, confirm you have a C-wire or a Nest Power Connector option if your system lacks a dedicated common wire, and verify that your HVAC equipment is compatible with a smart thermostat. Thermostat Care analysis suggests that taking time to confirm compatibility and wiring conditions before you dive in reduces the risk of power issues and mis-wiring after activation. Keep a photo of your old wiring arrangement for reference, and note any unusual colors or abnormal wire counts. If in doubt, consult a professional, especially for heat pump configurations or complex gas/oil boiler systems.
Tools and materials you’ll need before starting
Having the right tools on hand makes the installation smoother. Gather essentials before you power down or remove anything. This list is designed to cover most residential setups and avoid last-minute trips to the hardware store:
- Nest Thermostat (Gen 3 or later) – essential device for the project
- Screwdriver (Phillips #2) – for mounting screws and terminal connections
- Non-contact voltage tester – to confirm power is off before handling wiring
- Wire labels or tape – to mark wires for easy reattachment
- Pencil and notepad – for quick sketches and wire labeling reminders
- Optional spare wire or Nest Power Connector if your current wiring lacks a C-wire
Having these items ready reduces delays and helps you stay organized as you work through the steps. Thermostat Care notes that preparation is half the battle in a successful Nest installation.
Step zero: Power down and verify wiring compatibility
Safety first is non-negotiable. Start by turning off power to the thermostat at both the circuit breaker and the furnace control board if accessible. Use your non-contact voltage tester to confirm there is no live voltage on the thermostat wires. If you detect any voltage, wait and recheck, or call a professional. This step protects you from shocks and prevents damage to the HVAC controls. While you wait for power to drop, review your old thermostat’s wiring diagram and verify that your system is a typical 24 VAC configuration. If you have a heat pump, or multiple stages or a unique transformer arrangement, review Nest’s compatibility notes and consider professional advice before proceeding.
Remove old thermostat and document wiring
Carefully remove the old thermostat’s faceplate and base from the wall. Take clear photos of the wiring as you disconnect so you have a reference when wiring the Nest base. Label each wire with its identifying terminal letter (R, C, W, Y, G, etc.) using tape or labels. If any wires are not clearly labeled, set them aside and label them according to what you see on the old thermostat. Double-check that you captured the color-to-terminal associations, because a mismatch here is a common installation pitfall. Keep the wires tidy and away from any dust or debris in the wall cavity. After you’ve documented the wiring, remove the old mounting plate if needed and prepare the wall for the Nest base installation.
Install the Nest base, connect wires, and secure
Position the Nest base level against the wall and use the supplied screws to mount it. Feed the labeled wires into the appropriate terminals on the Nest base as guided by the Nest wiring map: connect R to R, W to W, Y to Y, G to G, and C to C if you have a C-wire. If your system uses a different configuration or has a heat pump, follow Nest’s compatibility guidelines to adjust connections accordingly. Make sure wires lie flat under the terminal clamps and do not protrude beyond the base. Secure the base to the wall, then assemble the supporting cover. If you notice any loose wires or unusual resistance at the terminals, power down again and re-seat them. Proper seating is essential for reliable operation and avoids intermittent power issues.
Attach the display, power on, and begin setup in the Nest app
Attach the Nest display to the base and power the unit. The screen should boot up and guide you through an initial setup on Wi-Fi and location. Follow the on-screen prompts to identify your system type (gas, electric, or heat pump), confirm wire connections, and connect to your home network. During setup, you’ll be prompted to choose your Nest account and configure basic preferences like language, temperature units, and schedules. If you encounter an error message, consult Nest’s troubleshooting prompts and re-check wire connections. Once the app is connected, you can view live status and begin learning your preferred temperatures. This is also a good time to test forced heat and cool cycles from the app to confirm the Nest keeps power and communicates with the HVAC.
Configure the Nest app, connect to Wi-Fi, and run a test
With the Nest app linked to your thermostat, you’ll able to fine-tune schedules, energy-saving settings, and compatibility with any connected smart home platforms. Setup involves connecting to your home Wi-Fi network, selecting your home, and customizing routines for weekdays and weekends. Run a quick test of heating and cooling to ensure responsive changes and proper system operation. If your system uses a C-wire and has multiple stages, test each mode to confirm the Nest is pulling power reliably and not depleting power when calling for heat or cool. Review energy-saving tips like eco mode, auto-away, and occupancy-based adjustments to maximize efficiency. Keep your house’s energy usage in mind and adjust the Nest’s routines to reflect real-life occupancy patterns.
Troubleshooting and post-install checks
Even with careful preparation, you may encounter a few snags after installation. Common issues include Nest displaying a "No Power" message, incorrect wiring labels, or inaccurate temperature readings. If the power drops unexpectedly, recheck the C-wire connection and transformer compatibility. If the Nest fails to connect to Wi-Fi, verify your network credentials, ensure your router supports 2.4 GHz Wi-Fi, and consider rebooting your router and Nest. If the temperature readings seem off, calibrate the sensor settings in the Nest app or compare against a separate thermometer in a known-good room. For complex HVAC setups (two-transformer systems, multi-stage cooling/heating), consult a professional to avoid mis-wiring or control failures.
AUTHORITY SOURCES
For deeper learning and official guidance, consult these credible sources:
- https://www.energy.gov/eere/buildings/articles/thermostats
- https://www.energystar.gov/products/heating_cooling/smart_thermostats
- https://www.nist.gov/topics/thermostats
What to do next: maintenance and future-proofing
After installation, keep an eye on performance and schedule regular checks. Update the Nest firmware when prompted, review energy reports in the app, and adjust schedules when seasons change. If you upgraded your HVAC system or added new zoning, revisit Nest’s wiring map to ensure continued compatibility. Thermostat Care recommends documenting all wiring connections and keeping a copy of the old thermostat wiring diagram for future reference. With proper setup and periodic maintenance, your Nest thermostat can deliver reliable comfort and energy savings for years to come.
Tools & Materials
- Nest Thermostat (Gen 3 or later)(Essential device for the installation; check compatibility with your HVAC system before purchase.)
- Screwdriver (Phillips #2)(Needed to mount the base and secure terminals.)
- Non-contact voltage tester(Used to ensure power is off before touching wiring.)
- Wire labels or painter’s tape(Label wires by terminal during removal to avoid miswiring.)
- Pencil and notepad(Record wiring configurations and notes for reference.)
- Optional: Nest Power Connector or spare wire(Use if a dedicated C-wire is not present.)
- Existing thermostat manual(Useful for cross-checking wiring diagrams and compatibility notes.)
Steps
Estimated time: 45-75 minutes
- 1
Turn off power at the breaker and verify no voltage
Switch off the circuit breaker feeding the thermostat and use a non-contact tester to confirm absence of voltage on the wires. This prevents shocks and protects HVAC controls while you work. If you detect voltage, wait and recheck before proceeding.
Tip: Always double-check with the tester before touching wires. - 2
Remove the old thermostat and take photos
Carefully pull the old unit from the wall and remove the faceplate. Take multiple photos from different angles to capture wire routing and terminal labels. This visual reference helps when wiring the Nest base later.
Tip: Photograph both front and back of the old thermostat for reference. - 3
Label wires and confirm terminals
Label each wire according to its terminal (R, W, Y, G, C, etc.) and note any color changes. If a wire color doesn’t match standard expectations, rely on the terminal label rather than wire color. This minimizes confusion during reattachment.
Tip: Use color-coded labels and write the corresponding terminal letter on each label. - 4
Check compatibility and plan wiring
Verify the Nest compatibility for your system type (gas, electric, heat pump) and confirm whether a C-wire is present or if a Nest Power Connector is needed. Use Nest’s wiring map to map labeled wires to Nest terminals.
Tip: If you lack a C-wire, plan for a Power Connector or a professional upgrade. - 5
Mount the Nest base and route wires
Attach the Nest base to the wall, aligning it with the mounting holes. Gently route the wires through the base and position them for terminal attachment, ensuring there are no stray strands.
Tip: Leave a little slack on wires to avoid crimping when the display is snapped on. - 6
Connect wires to Nest terminals
Insert each labeled wire into the corresponding Nest terminal (R, C, W, Y, G, etc.). Ensure each wire is fully seated and snug under the terminal clamp. If a terminal is not used, cap the wire and tuck it away neatly.
Tip: Double-check that each wire is under the correct terminal to avoid miswiring. - 7
Attach the display and power
Snap the Nest display onto the base and restore power. The thermostat should boot and guide you through the initial setup, including system type and location. If the display doesn’t power on, recheck wire connections and power supply.
Tip: If the screen is dim, verify the C-wire connection and ensure all wires are seated. - 8
Set up in the Nest app and connect to Wi-Fi
Open the Nest app, sign in or create an account, and follow the prompts to connect to your Wi-Fi network. Choose your HVAC configuration in the app and calibrate temperature settings. Finish with a test cycle to verify heating and cooling respond correctly.
Tip: Test a manual heat and cool call from the app to confirm full control. - 9
Test, calibrate, and finalize
Run a short test cycle and adjust schedules as needed. Review energy-saving suggestions in the app and confirm that the thermostat reports accurate readings. Confirm the unit stays powered during calls for heat and cool.
Tip: Note any discrepancy in readings and recalibrate if needed.
Questions & Answers
Is Nest compatible with all HVAC systems?
Nest supports most 24 VAC heating and cooling systems, but some systems (like certain boilers or unconventional setups) may require extra steps or professional help. Always verify compatibility before starting.
Most systems are compatible, but check your boiler or heat pump configuration first. If unsure, consult Nest guidelines or a professional.
Do I need a C-wire for Nest?
A common (C) wire provides steady power for Nest. If you don’t have a C-wire, Nest can use alternate options like a Nest Power Connector or a compatible adapter, depending on your system.
A C-wire is typically needed, but there are alternatives if your system lacks one.
Can I install Nest myself or should I hire a pro?
Many homeowners can install Nest themselves, especially with standard 24 VAC setups. If your system includes heat pumps with multiple stages or unconventional wiring, consider a professional.
DIY is usually fine for standard systems, but complex setups warrant a pro.
What if Nest shows 'No Power' after installation?
Recheck C-wire connections and power supply. Ensure the old wiring matches the Nest terminal map, and confirm the transformer is supplying the correct voltage.
No power usually means wiring or power supply needs rechecking.
Will Nest work with heat pumps?
Yes, Nest supports many heat pump configurations, but you may need to configure auxiliary heat and ensure proper wiring for cooling and heating stages.
Nest supports heat pumps with proper wiring; follow Nest’s step-by-step prompts.
How do I reset Nest after installation?
You can reset from the Nest app or on-device settings if needed. Note that a reset will require you to re-enter your preferences and Wi-Fi details.
Resetting is available in settings; you’ll need to reconfigure basics afterward.
Watch Video
What to Remember
- Verify system compatibility before starting
- Label wires clearly to avoid miswiring
- Power off and test connections during installation
- Set up and test in the Nest app for reliability
- Consult a pro for complex HVAC setups or uncertain wiring