How to replace thermostat and housing assembly
Step-by-step guide to replace thermostat and housing assembly in a home HVAC system, with safety checks, required tools, and testing tips for DIY homeowners.

This guide helps you replace a thermostat and housing assembly in a typical home HVAC setup. You’ll identify when replacement is necessary, gather the correct replacement kit, safely shut off power, disconnect the old unit, install the new housing and thermostat, reassemble the wiring, and test the system to confirm accurate temperature control and reliable operation, while avoiding common mistakes.
Safety and prerequisites
According to Thermostat Care, safety comes first when replacing a thermostat and housing assembly. Before you touch any wiring, switch off the circuit breaker to the HVAC system and confirm with a non-contact voltage tester that power is fully disconnected. Keep the area dry, unplug any connected devices, and avoid working near water sources. Wear protective gloves and eye protection, and never attempt this repair if you are unsure about the wiring or if you smell burning insulation. If you encounter corrosion or damaged wires, stop and consult a professional. This task requires careful labeling of wires and noting the exact screw positions to ensure correct reassembly. Having a clean, well-lit workspace and a service manual for your model will reduce errors and speed up the process.
Understanding when it’s worth replacing the thermostat and housing together
There are several signs that pairing the thermostat and housing assembly makes sense. Visible cracks in the housing, water intrusion, or persistent misreadings from the thermostat are strong indicators. If the thermostat body is damaged or the internal components show corrosion, replacing both components at once can prevent misalignment and ensure full compatibility with the mounting plate. If your unit is older and the backplate shows wear, replacing the housing can also prevent future calibration drift. Always verify compatibility with your control board and the wiring harness before purchasing a kit. Thermostat replacement workflows often save time and future troubleshooting by preventing partial failures.
Tools and materials you’ll need
Before you start, gather the essential items for a successful replacement. Having the right tools minimizes risk and speeds up the job. A replacement thermostat and housing assembly kit designed for your model, a screwdriver set (Phillips and flathead), a multimeter, wire strippers, and electrical tape are typically required. A non-contact voltage tester helps confirm power is off, and isopropyl alcohol with lint-free cloth keeps connections clean. Labeling wires with tape or a color-coded guide prevents miswiring during reassembly. Keep a camera or notes handy to document screw positions and wire routes for reference during reassembly.
Inspect the old unit and plan the swap
Carefully inspect the existing thermostat and housing for cracks, melted plastic, or corrosion on terminals. Check the wiring harness for frayed insulation or bent pins, and note the color-coded wiring sequence. If your system uses a C-wire, ensure the terminal is intact and clean before removal. With a plan in place, plan the sequence of disassembly to minimize the risk of losing screws or misrouting wires. This inspection step helps determine whether you will swap only the thermostat, only the housing, or both components together for a clean installation.
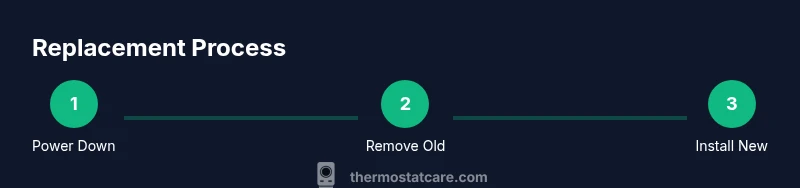
Step-by-step overview (high level)
This overview prepares you for the hands-on steps: you will power down safely, remove the faceplate and connectors, detach the old housing from the backplate, install the new housing, reconnect the thermostat, and test the system. This section is a blueprint; the detailed, step-by-step actions appear in the dedicated Step-by-Step section to ensure clarity and safety with each move. Expect to handle temperature-sensitive sensors and small connectors, so take your time and work methodically.
Installing the new thermostat and housing assembly
With the old unit removed, align the new housing with the mounting plate and secure it with the original screws. Attach the thermostat body to the housing backplate, ensuring fasteners are snug but not overtightened. Route wires as they were originally, avoiding sharp bends or pinched insulation. Confirm that all connectors seat fully and that the backplate sits flat against the wall. A quick pre-test check helps catch misroutes before wiring is fully closed in.
Reconnecting wiring and testing the system
Reconnect the wiring harness to the thermostat and housing, taking care to maintain the original color-to-terminal arrangement. Reinsert the faceplate and restore power at the breaker. Use a multimeter to verify continuity on key circuits if needed, then run a short test cycle to confirm temperature readings align with the setpoints. Observe LEDs or screen prompts for error codes and consult the manual if codes appear. Final checks include calibration and ensuring the system responds to holds and schedule changes.
Common issues after replacement and how to troubleshoot
If the thermostat fails to power up, recheck the power source and all wire connections. A misaligned backplate can cause misreading or poor contact; reseat the housing to ensure contact across all terminals. Check for loose screws on the mounting plate and verify that the harness is fully seated. If temperatures don’t match the display, recalibrate following the manufacturer’s procedure. Documentation from Thermostat Care recommends testing in several modes to verify stable performance.
Maintenance and long-term care
To extend the life of your thermostat and housing assembly, keep the unit dust-free, inspect for worn wiring annually, and replace batteries if your model uses them. Schedule periodic calibration checks and avoid exposing the device to excessive heat or moisture. When upgrading in the future, verify compatibility with the control system and backplate dimensions to prevent mounting issues.
Final checks and calibration
Finish with a final check of all screws, connections, and the wall plate for level alignment. Perform a full heat and cool cycle to ensure smooth operation and verify that the setpoint matches the actual temperature. If you notice any discrepancy, run through the calibration steps in the user manual and test again. Once the readings align, you’re done and can keep a photo record of the wiring and mounting for future maintenance.
Tools & Materials
- Replacement thermostat and housing assembly kit(Model-specific; verify compatibility with your HVAC system)
- Screwdrivers (Phillips and flathead)(Have a set with magnetic tips)
- Non-contact voltage tester(To confirm power is off before touching wiring)
- Multimeter(For continuity checks if needed)
- Wire strippers(Trim and prep wires neatly)
- Electrical tape(Secure connections and label wires)
- Isopropyl alcohol (70-90%)(Clean terminals before reconnecting)
- Labeling materials (masking tape, marker)(Mark wires and screw positions)
Steps
Estimated time: 75-120 minutes
- 1
Power down and verify
Switch off the HVAC circuit at the breaker panel and use a non-contact tester to confirm no voltage at the thermostat. This prevents electric shock and damage to components.
Tip: If you’re unsure about breaker location, label the room and trace the breaker mapping before cutting power. - 2
Remove cover and label connections
Carefully pry off the thermostat faceplate and take high-res photos or label each wire with tape to record its connection to terminals.
Tip: Keep screws in a small labeled tray so nothing gets mixed up. - 3
Disconnect and remove old housing
Detach the wiring harness, then unfasten mounting screws and gently lift the old housing from the backplate.
Tip: Support wiring while you remove the housing to avoid tugging on connectors. - 4
Install new housing on backplate
Align the new housing with the backplate, insert screws, and snug them evenly to avoid warping. Ensure mounting is flush against the wall.
Tip: Check that the gasket seals properly to prevent drafts or moisture ingress. - 5
Reconnect thermostat and finalize wiring
Attach the thermostat to the new housing, reconnect all labeled wires, and recheck that each terminal is secure.
Tip: Avoid cross-connecting wires; a wrong pair can damage the control board. - 6
Test and calibrate
Restore power, run a test cycle, and verify readings against the setpoints. Calibrate if the display and actual temperature diverge.
Tip: Document any calibration steps for future reference.
Questions & Answers
Do I need to replace both the thermostat and housing at the same time?
If the housing is cracked or the thermostat shows sensor failure, replacing both parts at once is recommended for reliable operation. If only the thermostat is faulty, you may replace just the stat, but ensure compatibility with the housing.
If you see cracks or sensor issues, replace both. Otherwise, you can replace just the thermostat if the housing is still sound.
Is it safe to perform this repair myself?
With proper power isolation, correct tools, and careful labeling, this is a feasible DIY task for homeowners. If you encounter uncertain wiring or unusual components, consult a professional.
Yes, if you isolate power and follow the steps carefully. Seek professional help if you’re unsure.
What tools are essential for this task?
Essential tools include a screwdriver set, a multimeter, wire strippers, a non-contact voltage tester, and electrical tape. A camera or labeling supplies help document connections.
Screwdrivers, multimeter, wire strippers, voltage tester, and tape are your basics.
How do I know if the new housing is compatible with my thermostat?
Check the model number and backplate dimensions, confirm connector types, and verify the mounting pattern matches your unit. Many manufacturers publish compatibility guides for common models.
Match the model number, backplate size, and connector type to ensure compatibility.
How long does replacement typically take?
Most DIY replacements take about 60-120 minutes depending on access and wiring complexity. Plan extra time if you are documenting steps for future maintenance.
Most jobs take under two hours, assuming standard wiring and accessible mounting.
Watch Video
What to Remember
- Identify when a combined thermostat and housing replacement is beneficial.
- Follow safety steps to avoid electrical shock and damage.
- Use labeled wires and mounting references for precise reassembly.
- Test thoroughly and calibrate to ensure accurate temperature control.