How to Put Thermostat in Housing: A Step-by-Step Guide
A homeowner-friendly guide to putting a thermostat in housing safely and correctly. Learn safety checks, wiring basics, mounting, and testing to ensure reliable, accurate temperature control in your space.

Learn how to put thermostat in housing safely and correctly with this homeowner-friendly guide. You’ll verify compatibility, shut off power, remove the old unit, wire connections, mount securely, and test the system for reliable temperature control. According to Thermostat Care, following structured steps reduces risk and helps ensure accurate readings.
Safety First: Power Down and Prep
If you’re wondering how to put thermostat in housing safely, the very first step is shutting off power to the HVAC circuit at the main breaker. Use a non-contact voltage tester to confirm there is no live current before touching any wires. Establish a clean, well-lit workspace and gather your tools so you don’t have to search mid-task. Thermostat installations require respect for electricity, even in seemingly simple jobs. By starting here, you reduce the risk of shocks, short circuits, or accidental damage to the control board. In this guide, we’ll walk through the process methodically so you can confidently complete each action and verify results before finishing. Thermostat Care emphasizes safety as the foundation of a reliable install.
Understanding the Housing and Wiring Layout
Different housing configurations exist for wall-mounted thermostats, but the core principles stay the same: a stable mounting surface, accessible wiring, and clearly marked terminals. When you study how to put thermostat in housing, take note of how many wires are present and which terminals they connect to on the old unit. Photograph the backplate and label each wire with its function (e.g., R, C, W, Y, G). This mapping ensures you’ll connect the new thermostat to the correct terminals. If your system uses a heat pump or multi-stage configuration, consult the thermostat’s wiring diagram to avoid miswiring that could trigger inaccurate readings or system faults. A careful assessment now saves troubleshooting later.
Compatibility Check: Is This Housing Right for Your Thermostat?
Before starting the wiring, confirm that the new thermostat is compatible with your heating and cooling system and with the existing housing. Some low-voltage thermostats assume a common C-wire, while others operate on power stealing or batteries. If your housing lacks a C-wire, you may need to run a new conductor or choose a model compatible with two-wire configurations. Ensure the mounting plate fits the wall box and aligns with nearby outlets or switches. As Thermostat Care notes, compatibility is the linchpin of a smooth install, reducing the need for post-install rewiring.
Remove the Old Thermostat from the Housing
Gently remove the old thermostat from its housing by loosening mounting screws and carefully pulling the unit away from the wall. If wires are long, leave them connected to avoid snapping wires. Take another quick photo of the wiring inside the wall and the back of the old unit for reference. Label each wire with a quick note or color code so you can match it to the new thermostat. This step sets the stage for a clean transition to the new device and helps prevent miswiring that could affect performance.
Prepare the Wiring: Label, Inspect, and Plan
With the old unit removed, inspect the wires for any signs of damage or corrosion. If insulation looks worn or the conductor is nicked, cut back the affected section and strip fresh insulation. Label wires using tape or a permanent marker to preserve the original mapping. Before you connect anything, review the new thermostat’s installation diagram and confirm terminal names align with your labeled wires. If you have questions about a wire that doesn’t correspond to a standard color code, consult the manual or a professional. Proper preparation reduces surprises during the actual connections.
Connect Wires to the New Thermostat in Housing
Begin by attaching the new mounting plate to the housing, making sure it sits flat and level. Then connect wires to the corresponding terminals on the new thermostat base: R to R, W to W, Y to Y, G to G, and C to C if a common wire is available. Tighten terminal screws firmly, but avoid overtightening that could strip the screw or damage the terminal. Double-check that each wire is fully inserted and secured. If a wire is too short, you may need to extend it with an approved conductor or pigtail, keeping the conductor routing neat and away from dynamic components. This is the point where accuracy matters most: misplacing a wire can lead to incorrect temperature control or a non-operational system.
Mounting the Thermostat in the Housing
With wires connected, carefully tuck them into the wall box and attach the thermostat base to the mounting plate. Use the appropriate screws so the unit sits flush against the wall and doesn’t rock or protrude. Attach the faceplate and snap it into place, then attach the cover or screen. Make sure the thermostat doesn’t press on any wires or adapters. This step ensures a clean, professional look and reduces the risk of wire pinching, which can cause intermittent readings or display issues.
Power Up, Test, and Fine-Tune
Restore power at the breaker and observe the thermostat display as it powers up. Run through a basic heating and cooling cycle to confirm the system responds correctly. If your thermostat offers system tests, use them to verify each function—heat, cool, fan, hold, and scheduling. Check the temperature reading against a known reference and adjust calibration if your model supports it. If readings lag or drift, review wiring and settings, then re-test. A careful test run ensures reliable comfort control and avoids needless thermostat rebates or energy waste.
Troubleshooting Common Issues
If the thermostat fails to power on after installation, recheck the main power, verify the wiring diagram, and confirm the C-wire is properly connected (if used). If readings appear inaccurate, confirm wiring matches the old configuration and that the thermostat is configured for your system type (single-stage vs. multi-stage). Visual cues like a buzzing base, loose screws, or tripped breakers indicate hardware faults or miswiring. In such cases, revisit the steps above and consult the user manual. Persistent issues may require a professional inspection to avoid damage to your HVAC equipment.
Tools & Materials
- Voltage tester(Confirm no live voltage at wires before handling)
- Screwdriver set (Phillips and flathead)(For mounting screws and terminal screws)
- Wire cutter/stripper(Trim insulation cleanly; exposes fresh copper)
- Electrical tape(Cap exposed conductors and secure label ends)
- Wire nuts(Secure wire connections inside the housing)
- Thermostat mounting base(Backplate that fits your housing and unit)
- Replacement thermostat(New unit compatible with your system)
- Pencil and label tape(Labeling wires and notes for future reference)
- Level(Ensure mounting is even for a clean install)
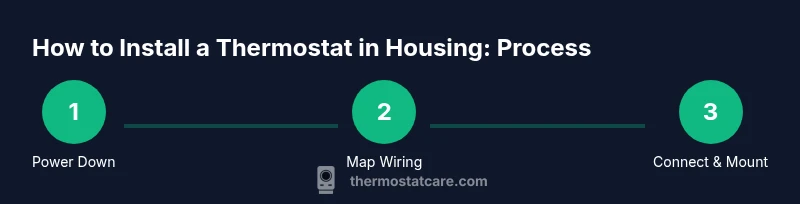
Steps
Estimated time: 60-120 minutes
- 1
Power down and prep
Shut off power at the HVAC breaker and confirm with a voltage tester that no electricity is present. Gather your tools and set a clear workspace. This initial action is essential to safely begin the process of how to put thermostat in housing.
Tip: Always verify power off at the breaker; never rely on the thermostat alone. - 2
Remove the old thermostat
Carefully unscrew the old thermostat from the housing and disconnect wires. Keep the wires accessible to prevent detaching or breaking any conduit. Take a photo or two of the old wiring for reference.
Tip: Keep the existing wires attached until you’re ready to map them to the new unit. - 3
Label and photograph wiring
Label each wire with its function and snap a clear photo of the backplate and terminal blocks. This creates a reliable map for the new thermostat’s terminals and helps prevent miswiring.
Tip: Label wires by color and terminal name to avoid confusion later. - 4
Inspect housing and wires
Look for damaged insulation, scorched marks, or loose connections inside the housing. If you see damage, replace wires or the box as needed before continuing. Damaged components can cause safety hazards or improper operation.
Tip: If insulation is nicked or wires are burnt, stop and consult a pro. - 5
Attach the new base to the housing
Mount the new thermostat base to the housing with appropriate screws. Ensure the base sits flat and level against the wall. A secure base prevents loose connections and displays a clean finish.
Tip: Use a level to keep the base perfectly horizontal. - 6
Connect wires to the new thermostat
Connect each labeled wire to the corresponding terminal on the new thermostat base. Tighten screws firmly but avoid overtightening. Recheck each connection after wiring.
Tip: Double-check terminal mapping against your photos and the manual. - 7
Mount and secure the thermostat in housing
Carefully tuck wires inside the housing and attach the thermostat to the base. Ensure no wires are pinched and the unit is flush with the wall. Attach the cover plate for a finished look.
Tip: Wires should be neatly organized to avoid blockage behind the screen. - 8
Power up, test, and calibrate
Restore power at the breaker and test heating and cooling functions. Verify display readings align with actual room temperature and calibrate if your model supports it. Run a cycle to confirm reliability.
Tip: Observe both heating and cooling cycles to catch any miswiring early. - 9
Finalize and document
Record the wiring map and any settings for future service. Keep a note of model, date of install, and any calibration changes. This creates a reliable reference for maintenance or future upgrades.
Tip: Store documentation with home electrical records for easy access.
Questions & Answers
Is it safe to install a thermostat in housing without a professional?
If you follow the manual and stay within low-voltage wiring guidelines, basic thermostat installations are doable for many homeowners. Avoid high-risk scenarios, such as damaged wires or unfamiliar systems. When in doubt, hire a licensed electrician or HVAC technician.
DIY is possible for simple setups, but for complex systems or damaged wiring, hire a professional.
How do I know my thermostat is compatible with my housing?
Check the thermostat’s wiring diagram and the housing’s rated voltage and terminals. Ensure you have the required C-wire for power or an alternative power design if your model supports it. If the housing is outdated, you may need a compatible mounting plate.
Compatibility depends on wiring, voltage, and mounting fit.
What should I do if the thermostat won’t power on after installation?
First verify that the breaker is on and that all connections are secure. Check the C-wire connection if used. If power still fails, reassess the wiring map and reference the install manual. Persistent issues may require professional help.
Double-check power and wiring; if unresolved, consult a pro.
How long does installation typically take?
Most standard installations take about 30-90 minutes, depending on wiring complexity and how well the housing accommodates the new base. Plan for extra time if you’re running new conductors or debugging settings.
Expect about an hour on average, more if wiring is complex.
Do I need a new mounting plate for a new thermostat?
Often you can reuse the existing housing if the backplate is compatible with the new thermostat. If not, purchase a mounting plate designed for your unit and housing. A proper plate ensures secure mounting and proper display alignment.
Sometimes you’ll need a new mounting plate for compatibility.
What if my system uses a C-wire and I don’t have one?
A C-wire is typically needed for powered thermostats. If it’s missing, you can run a new conductor or use a power extender kit if the model supports it. Avoid forcing power without a proper C-wire as it can damage the thermostat or HVAC control.
You may need to add a C-wire or a power kit.
Watch Video
What to Remember
- Power down before starting any wiring.
- Label wires to prevent miswiring.
- Verify housing compatibility and mounting fit.
- Test heating and cooling after installation.
- Document wiring steps for future maintenance.