How to Replace Thermostat and Housing Assembly
Practical, safety-first guide to how to replace thermostat and housing assembly in a home HVAC. Learn required tools, a step-by-step installation, tips, and troubleshooting for reliable temperature control.

Goal: Replace the thermostat and housing assembly on a typical home system. By following this guide, you’ll safely power down, confirm compatibility, remove the old unit, install the new housing, reconnect wiring, and test for proper operation. According to Thermostat Care, using the correct housing and sealing properly prevents future leaks and thermostat faults.
Why replace thermostat and housing assembly
Replacing the thermostat and housing assembly is a practical repair when you notice inaccurate temperature readings, slow response to setpoint changes, visible cracks in the housing, or corrosion at the wiring terminals. The thermostat controls your HVAC system, and a compromised housing can allow moisture and dust to reach sensitive electronics, shortening life and triggering intermittent faults. According to Thermostat Care, replacing the thermostat and housing assembly is a practical repair that restores reliability when done with the right parts and safety steps. A matched housing assembly eliminates misfits that cause air leaks and sensor drift, and it simplifies installation by providing a ready-to-connect interface. Before you buy replacement parts, confirm the model and compatibility, because wrong backplates or incompatible terminals create more problems than they solve. In many homes, the original housing has degraded seals due to heat cycles, causing temperature drift or false readings. A fresh assembly provides a clean seal and a solid mounting surface to reduce future issues. While the replacement adds a small upfront cost, it pays off through improved accuracy, fewer callbacks, and better comfort control. This section covers how to choose the right assembly, what to inspect on the old unit, and how to plan the job with safety and efficiency in mind.
Tools and safety precautions
Safety comes first when replacing a thermostat and housing assembly. Begin by turning off power at the HVAC disconnect or the dedicated circuit breaker for the furnace. If you have a visible control panel, switch it to the OFF position and confirm there is no voltage on the thermostat wires with a non-contact tester. Wear safety glasses and insulated gloves to protect against sharp edges and incidental contact with live components. Keep a camera or label set handy to photograph wire positions for reference. Thermostat Care recommends performing the work on a dry, clean surface and keeping screws in labeled containers to avoid mismatches during reassembly. Remember, the goal is not just to replace hardware but to restore reliable, room-accurate temperature control with a secure, sealed housing.
Choosing the correct housing assembly
Compatibility is the cornerstone of a successful replacement. Start by locating the model number on the back of the old thermostat or inside the wall plate. The new housing should match the same backplate layout, terminal block, and connector types. Check the gasket material and mounting screws; a tight seal prevents air leaks that can skew temperature readings. If you have a multi-stage system or a heat pump, verify that the housing supports the same terminals and wiring scheme. Thermostat Care emphasizes using a genuine or clearly compatible replacement to avoid misfit screws or odd connector spacing, which can complicate installation and lead to connector damage over time. Finally, review the wiring diagram included with the replacement kit and compare it with your existing wiring to ensure you are connecting the same color-coded wires to the appropriate terminals.
Preparation for replacement
Once you have the correct housing assembly, lay out all parts and tools before you begin. Take a photo of the current wiring at each terminal and label wires with tape or a marker so you can reconnect them accurately. Remove the old housing by unscrewing and gently pulling the unit away from the wall. Inspect the wall box for damage or moisture and consider replacing any degraded gaskets or wall plate components. If the mounting surface is uneven, use a shim or thin backing plate to ensure the new housing sits flush. Clean dust or debris from the wiring channel to prevent interference with the new terminals. In this pre-installation phase, ensure you can safely reach all connections without stretching wires, which helps avoid future faults. The goal of preparation is to create a stable, clean foundation for the replacement and to minimize handle-time during actual wiring.
Installation and wiring best practices
With the new housing ready, position it on the wall and loosely secure the mounting screws so you can still adjust alignment. Reconnect each wire to the matching terminal on the new housing as per the labeling or wiring diagram. If you label wires, you can double-check that color codes align with the new terminal layout. Tighten screws evenly and avoid over-tightening, which can strip plastic terminals or crack the housing. Once all wires are connected, reattach the thermostat faceplate and secure any covers. Before powering up, confirm that there is no exposed wiring and that all connections sit inside but clear of any mounting screw heads. A snug fit ensures the new housing maintains a proper seal and reduces vibration that could loosen connections over time.
Testing, calibration, and final checks
Power the system back on at the breaker and observe the thermostat display. Set an initial target temperature and listen for the HVAC system as it begins to respond. If your unit supports it, run through a quick heat and cool cycle to verify that readings match room temperature and that the system responds promptly to setting changes. Check that the backplate remains flush against the wall and that the seal around the housing is intact. If the display is dim or the system behaves erratically, recheck your wiring and ensure no loose terminals. Thermostat Care notes that accurate calibration after a housing replacement helps maintain energy efficiency and consistent comfort. Finally, tidy the wiring with zip ties and replace any faceplates or covers you removed during the process.
Common mistakes and how to avoid them
Avoid mixing up wires or forcing terminals. Always verify compatibility before purchase, and label wires to prevent mis-wiring. Do not reuse old gaskets if the new housing provides a fresh seal, as a degraded gasket will undermine performance. Avoid over-tightening mounting screws, which can crack the housing. If you encounter damaged conductors or alarms during installation, stop and consult a professional. Following these practices reduces post-installation callbacks and ensures the thermostat and housing assembly replacement delivers reliable temperature control for years to come.
Tools & Materials
- New thermostat and housing assembly(Ensure model matches HVAC system and wall backplate.)
- Phillips head screwdriver(Medium size (#2) for most residential units.)
- Flathead screwdriver(For prying if needed and terminal access.)
- Needle-nose pliers(Useful for pinching connectors and gentle wire management.)
- Non-contact voltage tester(Confirm no live voltage on thermostat wires before handling.)
- Electrical tape or wire labels(Label wires before disconnecting; helps during reconnection.)
- Dielectric grease (optional)(Lightly coat metal terminals to reduce corrosion.)
- Multimeter (optional)(Optional tool to verify voltage or continuity if needed.)
- Safety glasses and insulated gloves(Personal protection during handling of components.)
Steps
Estimated time: 60-120 minutes
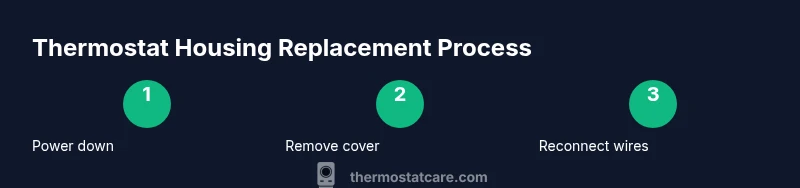
- 1
Power down the system
Turn off the HVAC circuit breaker and switch off the furnace control if accessible. Use a non-contact tester to verify no voltage on thermostat wires before touching any terminals.
Tip: Label the breaker and take a quick photo of wiring before disconnecting anything. - 2
Remove the thermostat cover
Use the appropriate screwdriver to remove the front plate. Gently lift the cover and set it aside, exposing the wiring terminals.
Tip: Keep track of screws; a small magnetic tray helps prevent loss. - 3
Label wires
Label each wire with its terminal color or function so you can reconnect them correctly to the new housing.
Tip: Take a clear photo from multiple angles before removing wires. - 4
Disconnect wires from the old thermostat
Loosen terminals and free the wire ends. Do not pull on the wires themselves; remove them from the terminal blocks.
Tip: If a wire is stubborn, use gentle pliers, but avoid bending conductors excessively. - 5
Remove the old housing
Unscrew the mounting screws and detach the backplate housing from the wall. Inspect the wall box for damage or moisture.
Tip: If the box shows water damage, address it before continuing. - 6
Prepare the new housing
Compare the new housing with the old one to ensure the same backplate layout and gasket compatibility. Clean the mounting area and ensure the new seal is intact.
Tip: If the gasket is damaged, replace it before installation. - 7
Mount the new housing
Position the new housing on the wall and loosely secure the mounting screws to allow alignment. Ensure the unit sits flush against the wall.
Tip: Leave screws slightly loose until final wire connections are verified. - 8
Reconnect wires to the new housing
Attach each wire to the corresponding terminal on the new housing according to your labels or the wiring diagram.
Tip: Double-check that colors and functions match the labels you created. - 9
Secure the faceplate and covers
Tighten all mounting screws evenly and snap on the faceplate. Ensure no wires are pinched.
Tip: Test the cover fit by gently pressing around edges to confirm a tight seal. - 10
Restore power and test
Turn the breaker back on and power the unit. Set a target temperature and verify the HVAC responds with the correct operation.
Tip: If readings seem off, recheck connections and verify the unit is locked in on the correct terminals. - 11
Calibrate and verify
Allow the system to run through a cycle and verify that display readings align with room temperature. Look for any error codes.
Tip: Document any codes and consult the manual if needed. - 12
Cleanup and finalize
Tidy wiring with zip ties, replace panels, and store tools. Keep the old parts in case you need a future troubleshooting reference.
Tip: Take one final photo of the completed installation for future reference.
Questions & Answers
Is replacement safe for DIYers?
Yes for basic low voltage systems when power is off and you follow the wiring diagram. If you work with high voltage or gas furnaces, consider a pro.
DIY replacement is safe for simple, low voltage setups if you power down first and follow the wiring diagram.
How do I know which housing to buy?
Match the model number, backplate layout, and connector type with your existing unit. Check the gasket and mounting screws for a proper seal.
Choose a housing that matches your model number and backplate layout, then verify the gasket and screws fit.
Will this affect thermostat accuracy?
A properly sealed and seated housing reduces drift and improves readings. Re-calibrate if your thermostat supports it after installation.
Yes, a good seal and correct installation improve accuracy; recalibrate if your model allows.
Do I need a professional for this?
Not usually for standard low voltage thermostats. If you face damaged wires, high voltage, or gas furnaces, hire a pro.
Usually not necessary for basic jobs, but get a pro if wiring or safety concerns arise.
How long does the replacement take?
Most homeowners complete the job in 60 to 120 minutes depending on access and wiring complexity.
Most people finish in about an hour or two.
Watch Video
What to Remember
- Power safety first; de-energize before touching wires
- Verify compatibility before buying a housing
- Label wires and photograph the wiring layout
- Ensure a proper seal to prevent leaks and drift
- Test after installation and calibrate if needed