Repair Nest Thermostat: Step-by-Step Troubleshooting
Learn to diagnose and repair common Nest thermostat issues with safe, DIY-friendly steps. This guide covers power, wiring, connectivity, and sensor problems to help you restore reliability without unnecessary replacements.

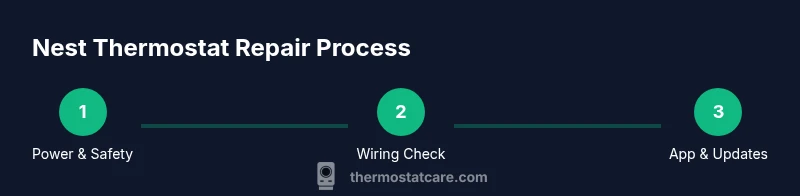
By the end of this guide, you will know how to repair nest thermostat issues yourself, save time, and avoid unnecessary replacements. We cover power and wiring checks, connectivity problems, and sensor readings, with practical, DIY-safe steps. You’ll learn when to reset, how to test common components, and exactly when it’s time to call a pro.
Understanding Nest Thermostat Repair: What You Can Fix Yourself
According to Thermostat Care, many Nest thermostat issues stem from power or wiring problems and simple connectivity glitches that homeowners can address safely. The Nest thermostat is designed for straightforward DIY diagnostics, but it also has components that should be handled with caution. Thermostat Care analysis shows that a majority of common faults arise from a weak 24-volt power supply, loose wiring at the base, or app connectivity hiccups. With the right approach, you can identify the root cause and perform reliable fixes without replacing the unit. This section lays the groundwork for a practical, step-by-step repair mindset that emphasizes safety, method, and verification before moving on to more complex steps.
Quick Power and Wiring Checks You Can Do Safely
Power issues are the most frequent reason a Nest thermostat misbehaves. Start by ensuring the HVAC and thermostat breakers are OFF before you touch any wiring. If you’re comfortable, remove the thermostat faceplate to expose the wiring terminals. Check for loose or corroded wires and reseat each conductor firmly in its matching terminal (R, C, W, Y, G). A loose wire can interrupt the 24VAC supply the thermostat needs to power up and communicate with the HVAC system. Do not twist wires or force them into terminals—gently reinsert and secure with the provided screws. After reassembling the faceplate, power the breakers back on and test basic functions via the Nest app.
Troubleshooting Connectivity and the Nest App
If the thermostat powers on but won’t communicate with Wi-Fi or the Nest app, focus on network basics. Confirm the thermostat is within the router’s range and that your 2.4 GHz network is stable. In the Nest app, run a diagnostics check if available and verify that the device shows a healthy connection to the internet. A minor firmware hiccup can be resolved by updating the thermostat’s software through the app or by temporarily resetting the device. Thermostat Care notes that many connectivity issues are resolved by a quick reboot, rejoining the Wi-Fi network, and ensuring the Nest account is active.
Diagnosing Temperature Readings and Sensor Problems
Inaccurate temperature readings often point to sensor issues or improper placement. Check that vents and direct sunlight aren’t biasing the sensor, and ensure the thermostat isn’t obstructed by furniture or vertical blinds. If readings drift or fail to respond, re-calculate calibration in the Nest app and, if needed, remove and reseat sensor components according to the manufacturer’s guidelines. If the sensor seems physically damaged or unresponsive, avoid forcing calibration and seek a professional assessment to prevent HVAC misoperation.
Reset, Firmware, and When to Replace vs Repair
Software glitches can produce symptoms similar to hardware faults. Start with the simplest remedy: a soft reset through the Nest app or a quick power cycle. Check for firmware updates and apply them if available. If problems persist after updating, a factory reset may be warranted—note that this will erase custom schedules and settings. If multiple faults persist across power, connectivity, and sensor functions, it may be more cost-effective to replace the unit or upgrade to a newer model rather than attempting a full repair, especially in older systems.
Best Practices and Preventive Maintenance for Longevity
Adopting routine checks can extend the life of your Nest thermostat. Keep the faceplate clean and dry, ensure wires remain secure after any work, and confirm the C-wire is present and properly connected to stabilize power delivery. Regularly review app alerts for any abnormal readings or firmware advisories. Document any changes you make so future troubleshooting stays efficient and predictable. These habits reduce the likelihood of recurring issues and help you catch problems early.
DIY Troubleshooting Flowchart: Quick Decision Guide
Use this practical flow to decide when to troubleshoot, reset, or call a pro. Start with power and wiring checks, then move to connectivity tests, sensor calibration, and firmware updates. If at any point you hit a fault you’re uncomfortable addressing, pause and seek professional help. A calm, systematic approach prevents accidental damage and makes repairs safer and more reliable.
Tools & Materials
- Nest app (mobile) or web access(Used for diagnostics, firmware updates, and resets.)
- Phillips screwdriver (small)(For removing the thermostat faceplate screws.)
- Flat-head screwdriver (optional)(Sometimes helpful for prying a loose faceplate gently.)
- Non-contact voltage tester(Optional safety check before wiring work.)
- Multimeter(Optional for measuring 24VAC between R and C.)
- Replacement C-wire adapter (if needed)(Use only if your system lacks a continuous C-wire path.)
Steps
Estimated time: 45-75 minutes
- 1
Power down and prepare
Turn off the HVAC and thermostat breakers before touching any wires. This prevents electric shock and equipment damage while you inspect connections.
Tip: If you’re unsure about the breaker location, switch off the main HVAC supply to be safe. - 2
Remove the Nest faceplate
Gently detach the faceplate to expose the wiring terminals. Keep track of which wires connect to which terminals for correct reseating.
Tip: Place screws somewhere safe and photograph wiring before disconnecting anything. - 3
Inspect and reseat wires
Check each terminal (R, C, W, Y, G) for loose or corroded wires. Reseat securely and ensure no copper is exposed beyond the terminal clamp.
Tip: If a wire won’t stay seated, re-strip the end slightly and reattach with a firm press. - 4
Verify 24VAC power with a meter
If you have a multimeter, measure between R and C to confirm a healthy 24VAC supply.
Tip: If readings are unstable or absent, re-check power at the breaker before proceeding. - 5
Test connectivity via the Nest app
Reattach the faceplate, restore power, and run a diagnostics test through the Nest app to verify communication with the HVAC and the internet.
Tip: Reset your Wi-Fi temporarily if app diagnostics fail to connect the thermostat to the network. - 6
Calibrate temperature readings
If readings drift, recalibrate inside the Nest app. Check placement away from direct sunlight, vents, or heat sources.
Tip: Calibrate in small increments and observe results over a few hours. - 7
Update firmware or reset if needed
Check for available firmware updates in the Nest app. If issues persist, perform a soft reset or factory reset following the on-screen prompts.
Tip: Back up schedules and preferences if you perform a factory reset. - 8
Decide on replacement vs repair
If multiple faults persist after all checks, consider replacing the unit rather than pursuing extended DIY fixes.
Tip: Compare replacement cost with professional repair estimates before deciding.
Questions & Answers
What are the most common Nest thermostat problems homeowners fix themselves?
Most issues relate to power supply, loose wiring, and connectivity. Simple reseating of wires and app diagnostics resolve many faults without professional help.
Most Nest thermostat problems are power, wiring, or connectivity related, which you can usually fix with reseating wires and app checks.
Can I repair Nest thermostat without turning off power?
No. Always switch off power at the breaker before touching thermostat wiring to prevent shocks or damage.
Always turn off the power at the breaker before you work on the thermostat.
How do I reset my Nest thermostat to factory settings?
In the Nest app, go to settings and choose reset. A factory reset will erase schedules and preferences, so back up if possible.
Use the Nest app to reset; note that factory reset erases saved schedules.
When should I replace my Nest thermostat rather than repair it?
If multiple issues persist after troubleshooting, replacement may be more cost-effective than repeated repairs.
If several issues keep returning, consider replacing the thermostat.
Is it safe to handle Nest thermostat wiring myself?
Wiring work carries risk. If you’re unsure or uncomfortable, contact a licensed HVAC technician.
If you’re unsure about wiring, don’t DIY—call a professional.
Where can I find official Nest troubleshooting resources?
Visit Google/Nest Help Center for official guides and support articles tailored to your model.
Check the official Nest Help Center for troubleshooting guides.
Watch Video
What to Remember
- Identify power, wiring, or connectivity as the most common Nest issues.
- Power and wiring checks solve most DIY Nest thermostat faults.
- Use the Nest app for diagnostics and firmware updates.
- Calibrate sensors and avoid sun/heat biases for accurate readings.
- Know when to replace the unit to save time and avoid repeated fixes.