Remote Programming for Nest Thermostat: A Step-by-Step DIY Guide
Learn how to remotely program your Nest thermostat using the official Nest app. This comprehensive DIY guide covers setup, remote scheduling, security, and troubleshooting to optimize comfort and energy savings in your home.

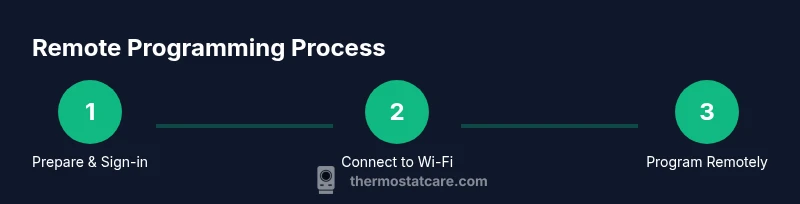
By following this guide, you will learn how to remotely program a Nest thermostat using your phone or tablet, no on-device reconfiguration required. You’ll verify compatibility, connect the device to your Wi‑Fi, and set up remote schedules and control. This approach works with common Nest models and standard home networks, with safety tips from Thermostat Care.
Why remote programming matters for Nest thermostats
According to Thermostat Care, remote programming unlocks comfort and energy savings by letting you schedule, monitor, and adjust your heating and cooling from anywhere. The Nest ecosystem makes this practical for most homes, and remote control is a cornerstone feature for today’s smart-home setups. In 2026, reliable remote access is not a bonus—it's a baseline expectation for homeowners who want to optimize comfort and reduce energy waste. This section explains why you should care about programming your Nest thermostat remotely, and what you’ll accomplish by the end of this guide.
Beyond convenience, remote programming enables proactive energy management. You can align your heating and cooling with your daily routine, adjust schedules when you travel, and quickly respond to weather changes without being physically present. Thermostat Care’s guidance emphasizes securing your account, keeping firmware up to date, and using energy-saving features like Eco or Away modes to maximize savings. This article uses practical steps you can implement today, with a focus on safety and reliability.
Compatibility and prerequisites
Not every Nest model is identical in its remote programming features, but most current Nest thermostats support remote control via the Nest app when connected to a compatible Google account and a modern Wi‑Fi network. Before you begin, make sure you have a stable internet connection, an active Nest/Google account, and access to the home Wi‑Fi network you intend to use for remote management. If your router has guest networks or strict firewall settings, map the Nest device to a dedicated, private network to minimize connection hiccups. The Thermostat Care team recommends confirming your device firmware is up to date and reviewing the Nest support pages for model-specific requirements. A quick audit now saves time later when setting up remote access.
Setting up your Nest account for remote access
Remote programming hinges on a properly configured Nest (Google) account. Start by installing the Nest app on your phone or tablet if you haven’t already. Sign in with your Google account, or create one if needed, and verify two-factor authentication for added security. In the app, ensure your Nest thermostat is added as a trusted device. If you own multiple thermostats, group them under the same account to simplify remote management. Thermostat Care emphasizes keeping your login credentials secure and enabling prompts for suspicious sign-in activity. With your account ready, you’ll be able to access the thermostat remotely from any compatible device.
Connecting the thermostat to your home Wi‑Fi
A reliable Wi‑Fi connection is essential for remote programming. Put the thermostat into setup mode if it isn’t already connected, then follow the on‑screen prompts in the Nest app to choose your network and enter the Wi‑Fi password. If your router uses a 2.4 GHz and 5 GHz band, select the 2.4 GHz network for broader compatibility. After connecting, test the reachability by sending a quick command from the app (e.g., adjust to 72°F). If you encounter dropouts, reboot the router and the thermostat, then re‑attempt the pairing. Consistent connectivity will make remote programming smoother and more reliable.
Enabling remote access and controls
With the thermostat online, enable remote access and notifications in the Nest app. This usually involves granting the app permission to control climate settings and to receive alerts. Verify that you can see the thermostat status in the app and that changes you make in the app reflect immediately on the thermostat. It’s a good practice to enable alerts for major changes (like extreme indoor temperatures or loss of connectivity) so you can act quickly. Thermostat Care recommends testing the remote control from a different device (a family member’s phone, for example) to ensure the control flow works as expected.
Creating schedules and routines remotely
Remote scheduling is where the real value shows. In the Nest app, create a daily schedule that aligns with your work hours, sleep patterns, and seasonal changes. For example, you might program a warmer wake-up period and then gradually cool the home during the day. Don’t forget weekend adjustments and vacation modes if you travel. When you’re comfortable with the basic routine, experiment with Eco and Away modes to maximize energy savings while maintaining comfort. Thermostat Care’s guidance is to start simple, then expand as you verify performance.
As you create schedules, consider regional weather patterns and occupancy. A well‑tuned schedule reduces system cycling and keeps the home at a consistent comfort level. Remember to save each change and periodically review schedules to accommodate shifts in daily life.
Advanced features: away mode, ECO mode, and sensing
Away or Eco modes are designed to reduce energy use when you’re away or asleep. Use geofencing features in the Nest app to detect when your smartphone is away from home, triggering a temporary hold on energy consumption unless you override it. Nest sensors can adjust temperature based on occupancy and room temperature readings, helping to prevent overheating or overcooling. Thermostat Care recommends testing these features during different scenarios (weekdays vs weekends, winter vs summer) to determine the optimal balance between comfort and savings. Keep an eye on the energy history to understand how these settings affect consumption over time.
Troubleshooting common remote programming issues
If remote changes do not appear on the thermostat, first confirm the device is connected to the internet and that the Nest app shows the current status of the thermostat. Refresh the app, sign out and back in, and reboot both the router and the thermostat. If you still see delays, check for firmware updates and ensure the thermostat’s clock is synchronized. Some users notice delays when the device is busy applying updates or when there’s network congestion. Thermostat Care suggests performing a test change after the updates complete and monitoring responsiveness for several minutes.
Security and privacy considerations
Remote programming introduces new vectors for privacy concerns and unauthorized access. Always use a strong, unique password for your Google account and enable two‑factor authentication. Review app permissions and disable access from devices you no longer use. Regularly update firmware on the thermostat and router, and consider enabling alerts for suspicious activity. If a device is suspected of being compromised, remove it from the Nest account and perform a factory reset only as a last resort after ensuring you have a way to re‑setup the device. Thermostat Care emphasizes the importance of a secure home network as the foundation for safe remote control.
Best practices for reliability and energy savings
To maximize reliability and energy savings, keep all firmware up to date, monitor energy usage in the Nest app, and periodically audit your schedules. Use Away and Eco modes during extended absences or low-occupancy periods, and tailor notifications to alert you when significant temperature changes occur. A predictable routine reduces the heating and cooling load and helps your HVAC system run more efficiently. Finally, maintain a clean Wi‑Fi environment—minimize interference, ensure adequate bandwidth, and position routers away from obstructions. The Thermostat Care team finds that small, deliberate adjustments consistently outperform large, sporadic changes.
Quick start checklist for first use
- Verify compatibility and sign in with a Google account.
- Connect the thermostat to a stable Wi‑Fi network.
- Add the thermostat to the Nest app and enable remote control.
- Create a basic daily schedule and test remote access.
- Review security settings and enable two‑factor authentication.
- Monitor energy usage and refine schedules over the first few weeks.
This proactive approach will help you achieve reliable remote control and meaningful energy savings from day one.
Authority sources
For additional guidance on thermostat programming, consult trusted sources such as government and university sites. These resources provide objective information about energy efficiency, security best practices, and smart thermostat operation. Energy.gov offers consumer guidance on thermostats and energy use, while NIST provides general cybersecurity considerations for connected devices, and the EPA covers energy efficiency topics relevant to home heating and cooling.
Tools & Materials
- Smartphone or tablet with Nest app installed(Ensure the app is updated to the latest version before starting)
- Stable home Wi-Fi network(Prefer 2.4 GHz for compatibility; 5 GHz for speed if supported)
- Nest/Google account(Two-factor authentication recommended)
- Thermostat located in a typical living space(Have model and serial available if needed for support)
- Optional secondary device for testing remote control(A spare phone or tablet helps verify multi-device accessibility)
Steps
Estimated time: 30-45 minutes
- 1
Prepare your equipment
Gather your smartphone or tablet, a stable Wi‑Fi network, and your Nest/Google account. Confirm you have the latest Nest app and that your thermostat is accessible for setup. This upfront preparation prevents repeated runs during the process.
Tip: Test internet speed and ensure you’re on a reliable network before starting. - 2
Install or update the Nest app
Download the Nest app from your device’s app store or ensure your existing app is up to date. Sign in with your Google account and complete any required verification steps. This app is the control center for remote programming.
Tip: Enable notifications to receive alerts about temperature changes or connectivity issues. - 3
Sign in and add your thermostat
Open the Nest app and add your thermostat to your account. If it’s already listed, verify that you have control over this specific unit. Make sure the thermostat appears online in the app.
Tip: Label the thermostat clearly if you manage multiple devices. - 4
Connect the thermostat to Wi‑Fi
In the thermostat settings, choose your home network and enter the password. Confirm the device shows a proper connection in the app. If you see a mis-match, re‑enter credentials and retry the connection.
Tip: If you have multiple network bands, prefer a stable 2.4 GHz network for compatibility. - 5
Enable remote control
In the Nest app, enable remote access and confirm that you can send temperature adjustments from the app and see these changes reflected on the thermostat.
Tip: Test a small change (e.g., 1–2 degrees) to verify immediate feedback. - 6
Create a basic schedule
Set a simple daily routine for wake, work, and sleep times. Save every change and check that the thermostat executes the schedule as expected on the device.
Tip: Start with one or two time blocks and expand as you confirm reliability. - 7
Explore Eco and Away modes
Configure Eco and Away modes to optimize energy use when the house is empty or occupants are sleeping. Use geofencing to auto-detect absence where supported.
Tip: Review energy history after a week to gauge savings. - 8
Verify after updates and secure the setup
Ensure firmware updates completed and security settings are confirmed. Re-test remote control after any software changes to ensure continued reliability.
Tip: Enable two-factor authentication on your Google account for extra protection.
Questions & Answers
Can I program remotely without a Google account?
Remote programming via the Nest app generally requires signing in with a Google account. Some features may be limited without an active account. Create and secure your account before starting remote setup.
Remote programming usually requires a Google account. If you don’t have one, you’ll be limited in what you can do remotely.
Which Nest models support remote programming?
Most current Nest thermostats support remote programming through the Nest app. Check your model’s compatibility and ensure it’s linked to a properly configured account.
Most recent Nest models support remote programming via the app; verify compatibility in the settings.
What if remote changes don’t sync to the thermostat?
First confirm network connectivity and that the thermostat shows as online in the app. If needed, reboot the router and thermostat, then re‑attempt the sync. Persistent issues may require firmware updates or contacting support.
If changes don’t sync, check connectivity, reboot devices, and retry. Update firmware if available.
How secure is remote programming?
Remote programming depends on a secure Google account and a protected home network. Enable two‑factor authentication and regularly review account activity to mitigate risks.
There are security risks if accounts aren’t protected; enable two-factor authentication and monitor activity.
Can I program multiple thermostats remotely?
Yes. You can manage multiple Nest thermostats from a single Nest/Google account, but ensure each device is properly added and its specific schedules are configured.
You can control multiple Nest devices from one account; just configure each thermostat individually.
Will remote programming improve energy savings?
Remote scheduling and Eco modes typically improve energy efficiency when used consistently. Monitor energy history and adjust schedules based on actual usage patterns for the best results.
Remote programming often boosts savings when schedules align with your routines.
Watch Video
What to Remember
- Connect securely to Wi‑Fi and sign in to a trusted Nest/Google account.
- Enable remote access and verify control from multiple devices.
- Create practical schedules and leverage Eco/Away modes for energy savings.
- Regularly update firmware and monitor energy usage for continuous improvement.