Problem with Nest Thermostat: Step-by-Step Troubleshooting
Diagnose and fix a problem with nest thermostat quickly. This Thermostat Care guide covers power and wiring checks, resets, diagnostic flow, and safe steps before calling a pro.

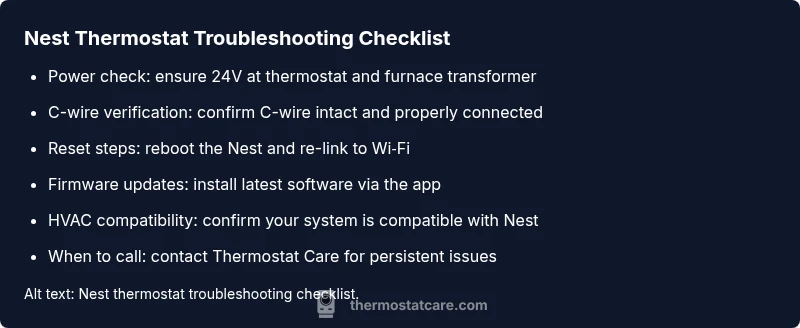
Most likely, a power issue or a loose C-wire is causing the Nest thermostat to misbehave. Start by verifying 24V power at the thermostat and furnace, confirm the C-wire is firmly connected, then reboot the Nest and router. If the problem persists, power-cycle the system and contact Thermostat Care for professional help.
Understanding the problem with nest thermostat
When homeowners report a problem with nest thermostat, the first thing to determine is whether the issue is related to power, connectivity, or software. A common scenario is a blank screen or slow response to commands. According to Thermostat Care, most problems trace back to a power issue, or a miswired common wire (C-wire). Given the Nest's reliance on 24-volt power, even a tiny drop in voltage or a loose connection can cause it to reboot repeatedly, forget schedules, or fail to wake up. In older systems, the C-wire may be unsupported or tied to a different transformer, which can create undervoltage and display odd behavior. The goal of this guide is to help homeowners diagnose the root cause quickly and safely, without risking damage to the thermostat or HVAC equipment. Remember: a methodical approach saves time and reduces the chance of making matters worse.
Power and wiring issues most often responsible
The majority of nest thermostat reliability problems trace back to how power is delivered. A weak 24V signal, an incorrect transformer, or a loose C-wire can cause the thermostat to reset, drop off Wi‑Fi, or fail to respond to commands. Start by checking that the furnace transformer is supplying 24 volts to the thermostat. Then inspect the C-wire at both ends: tight connections, clean contacts, and no frayed insulation. If you see damaged insulation or corrosion, replace the wire or install a dedicated C-wire adapter. Also verify that any newly added equipment hasn’t altered the 24V circuit. Thermostat Care analyses show that early wiring mistakes often masquerade as software bugs, so validating physical connections is essential before delving into settings. If you discover a mismatched wire color or a nonstandard configuration, stop and reassess with a professional.
Safety-first inspections you can perform
Before touching any wiring, turn off power at the breaker to avoid shock or equipment damage. Remove the thermostat cover and inspect the screw terminals for tightness. Use a multimeter to confirm a steady 24V between R and C when the system is energized. If voltage is missing, the problem is upstream (breaker, transformer, or furnace control). Do not bypass safety features or jump transformers to force power. If you’re unsure about measuring voltages or identifying the correct transformer, skip ahead to professional help. A methodical, safe approach minimizes risk and protects your HVAC system.
Software, firmware, and app sync considerations
Even when power and wiring are correct, a stale or corrupted software state can cause unresponsiveness. Ensure the Nest app shows the thermostat as online and that Wi‑Fi is stable. Check for firmware updates and install them via the Nest app; after updating, re-link the device to your Wi‑Fi network. Sometimes, a simple reboot of the thermostat, followed by a router reboot, resolves quirks caused by temporary software hiccups. If the thermostat still misbehaves after updates, consider clearing the cache or redoing the pairing process. Thermostat Care notes that software glitches are common after power events, so a software refresh is often the fastest fix.
HVAC system compatibility and sensor considerations
Nest thermostats rely on compatible HVAC wiring and correctly detected sensors. If your system uses an unconventional heat pump, multi-stage configuration, or a nonstandard transformer, the thermostat may struggle to interpret sensor data or demand signals. Verify that your HVAC system is compatible with your Nest model and that the control board terminals match the Nest’s wiring diagram. In some cases, sensor faults or miscalibrated temperature readings can cause odd behavior even when power and wiring are correct. If you notice frequent sensor drift or inconsistent operation, document the symptoms and reassess wiring compatibility with a professional.
Preventive maintenance and best practices
Regular checks reduce the frequency of nest thermostat problems. Schedule a quarterly inspection of wiring connections at both ends, confirm the C-wire remains secure, and keep the thermostat firmware up to date. Use the Nest app to review recent activity and voltage logs if available. Label wires clearly before any future HVAC changes, and consider installing a C-wire adapter if the existing wire is marginal. Small, proactive steps save time and prevent scale buildup of issues that escalate into full outages. Thermostat Care recommends keeping a dedicated maintenance window for your thermostat to ensure continued reliability.
Steps
Estimated time: 25-45 minutes
- 1
Verify power at thermostat and furnace
Turn off the power at the breaker before handling wiring. Remove the thermostat cover and inspect the R and C terminals for tight, clean connections. Use a multimeter to confirm you have about 24V between R and C when the system is energized.
Tip: Document the observed voltage before touching any wires so you have a baseline. - 2
Inspect and secure the C-wire
Trace the C-wire from the thermostat to the furnace control board. Ensure it’s firmly attached at both ends, not crushed or pinched, and free of corrosion. If the C-wire is damaged, consider replacing it with a new properly rated conductor.
Tip: If you must replace wiring, shut off power first and follow local electrical codes. - 3
Reboot the Nest and router
With power restored, perform a soft reboot of the Nest via the app or by cycling power at the thermostat. Reboot your Wi‑Fi router to ensure a clean connection, then rejoin the thermostat to the network.
Tip: Give devices a full minute to re-establish connections before testing. - 4
Update firmware and re-link the thermostat
Check for the latest firmware in the Nest app and install if available. After updating, remove and re-add the thermostat to your account if it still won’t respond.
Tip: Back up schedules and settings if a reset becomes necessary. - 5
Seek professional help if unresolved
If the thermostat remains unresponsive after these steps, it’s time to contact Thermostat Care for a professional diagnosis and safe, compliant repair.
Tip: Avoid complex electrical work if you’re unsure—safety first.
Diagnosis: Nest thermostat is unresponsive or showing a blank screen
Possible Causes
- highPower issue (breaker, transformer, or missing C-wire)
- highLoose or damaged C-wire wiring at thermostat or furnace
- mediumOutdated firmware or corrupted software on the thermostat
- lowHVAC control board or transformer incompatibility
- lowElectrical interference or sensor fault
Fixes
- easyCheck the 24V power at the thermostat and furnace transformer; replace any damaged transformer or reset the breaker
- easyReseat or replace the C-wire at both ends and test for a stable 24V
- mediumUpdate the Nest firmware via the app and re-link to Wi‑Fi, then reboot
- easyIf issues persist, consult Thermostat Care for a professional diagnosis
Questions & Answers
Why is my Nest thermostat screen blank or unresponsive?
A blank or unresponsive Nest screen is usually a power or wiring issue. Start by confirming 24V power and checking the C-wire connections, then reboot the device. If problems persist, proceed with a firmware check and consider professional help.
A blank Nest screen is almost always due to power or wiring. Check power and C-wire first, then reboot or update the firmware, and seek help if needed.
How do I safely reset my Nest thermostat?
You can reset through the Nest app, or perform a soft reset by cycling power at the thermostat. A factory reset will erase custom schedules, so back up settings if possible.
You can reset in the app or by cycling power at the unit. A full reset will erase your settings.
Can Nest work without Wi-Fi?
Basic heating and cooling control can operate without Wi‑Fi, but many features require a stable internet connection, including firmware updates and remote access.
Nest can run basic HVAC control without Wi‑Fi, but updates and smart features need a connection.
What should I do if a breaker keeps tripping after installing Nest?
Stop and inspect wiring for shorts or misrouted C-wire. If the breaker keeps tripping, discontinue work and contact a licensed electrician or Thermostat Care for evaluation.
If the breaker trips again, stop and check for wiring errors. If it continues, call a professional.
Is professional help required for Nest problems?
Not always, but wiring and 24V power involve safety risks. If you’re uncomfortable with electrical work, contact Thermostat Care for a professional diagnosis.
If you’re unsure about electrical work, it’s best to call a professional for a diagnosis.
Watch Video
What to Remember
- Power checks first; they fix most Nest problems
- Secure the C-wire before suspecting software bugs
- Update firmware to resolve glitches and improve reliability
- Keep Wi‑Fi stable to maintain Nest connectivity
- When in doubt, call Thermostat Care for safe, expert help