Nest Thermostat No Power: Urgent Troubleshooting Guide
Urgent guide to diagnose and fix a Nest thermostat that won’t power on. Quick checks, diagnostics, a step-by-step fix, safety tips, and when to call a pro for stubborn power issues.

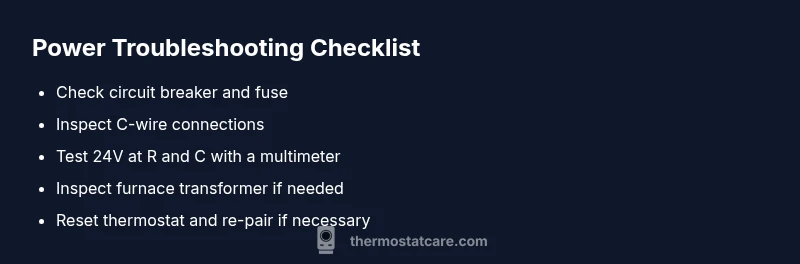
If your Nest thermostat no power, start with the simplest checks before touching wiring. Check the circuit breaker or fuse, then inspect the C-wire connection and the furnace power supply. In most cases, restoring power or reconnecting the C-wire fixes the problem; if not, reset the thermostat and seek help.
Understanding the problem: nest thermostat no power
When a Nest thermostat shows no power, it often means a power supply or wiring fault rather than a defect in the thermostat itself. The symptom can manifest as a blank screen, unresponsive buttons, or a unit that won’t wake from sleep, even when temperature settings are changing on the HVAC system. For homeowners, the term nest thermostat no power captures a range of scenarios—from a dead display to a unit that intermittently powers on and off. According to Thermostat Care Team, most power-related failures come from simple, fixable sources like an tripped breaker, a loose C-wire, or a furnace power problem. By treating power issues as a chain of small, testable steps, you can quickly isolate the cause and determine the safest next move. This mindset—not guesswork—keeps you safe and speeds up resolution.
Primary causes you should examine first
Power problems are almost always rooted in three buckets: (1) the electrical supply to the thermostat area (breakers, fuses, or adapters), (2) the 24V control circuit from the HVAC system (R and C wires, thermostat power connector), and (3) a fault in the thermostat itself or its wiring harness. Common culprits are a tripped breaker, a loose or disconnected C-wire, or a faulty furnace transformer. Less common but possible issues include a degraded power connector or an aging Nest base that no longer pulls enough current from the HVAC circuit. Systematically testing each area helps avoid unnecessary replacements and gives you confidence your Nest thermostat power issue is resolved.
Safety and preparedness before you start
Before you begin any inspection, power down the circuit to the thermostat at the main breaker to avoid shock or equipment damage. Use insulated tools and keep metal jewelry away from exposed terminal blocks. If you smell burning, see scorch marks, or hear buzzing from the furnace, stop immediately and call a licensed HVAC technician. Never work on live electrical components if you’re unsure of what you’re doing. Safety first protects you and your equipment, and can prevent dangerous faults from worsening.
Quick checks you can do before diving deeper
Begin with the simplest checks: verify the circuit breaker hasn’t tripped and that the thermostat’s display has been powered by a 24V source. Inspect the C-wire at both ends (thermostat base and furnace control board) for any loose connectors or damaged insulation. If you have access to a multimeter, test between the R (24V) and C lines to confirm a live 24V supply. At this stage, you’re looking to answer: is there power reaching the thermostat base? If the answer is yes but the display remains blank, the issue is likely inside the thermostat or its wiring harness. If there’s no power reaching the thermostat, focus on the HVAC power feed or the C-wire connection first.
When to escalate and what happens next
If basic checks don’t restore power, you’ll want to escalate to more detailed steps or a professional evaluation. A stubborn nest thermostat no power can indicate a faulty 24V transformer, a damaged furnace control board, or a compromised power connector on the thermostat base. The next moves include rechecking wiring configurations, testing the furnace transformer with appropriate tools, and, if necessary, replacing the transformer or power module. Remember: some steps involve working inside the HVAC cabinet, which should only be done by trained technicians to prevent electric shock or exposure to live circuits.
Prevention tips to avoid future power problems
To minimize recurrence, ensure clean, tight wiring connections at both the thermostat and furnace, replace aged power adapters or connectors, and schedule a routine check of the HVAC control board and wiring harness. Label wires when disconnecting, keep a maintenance log, and test the 24V supply periodically. Protect the thermostat from moisture and dust, and consider installing a dedicated, surge-protected circuit for the thermostat to keep sensitive electronics safe during power fluctuations.
Steps
Estimated time: 1 hour 20 minutes
- 1
Power down and safety prep
Go to the main breaker panel and switch off the breaker serving the thermostat and HVAC equipment. Wait 60 seconds to dissipate any residual charge, then confirm the power is off with a non-contact tester. This protects you during inspections and prevents electrical shock.
Tip: Always assume wiring is live until proven otherwise with a tester. - 2
Inspect the thermostat wiring
Remove the thermostat faceplate and check all wires, especially the C-wire, for loose screws or frayed insulation. Re-seat any loose connections and ensure wire ends are clean and properly inserted into the terminals.
Tip: Take a photo of the existing wiring before reseating anything. - 3
Verify 24V at R and C
Using a multimeter, measure the voltage between R and C at the furnace control board. A stable 24V reading indicates the power path is intact; a low or absent reading points to a transformer or control board issue.
Tip: If you’re unsure what a correct reading looks like, consult your furnace’s manual or a pro. - 4
Check the C-wire continuity
Trace the C-wire from the thermostat to the furnace; ensure there are no breaks in insulation and that the conductor isn’t damaged. A broken C-wire can stop power flow and cause a dead display.
Tip: Replace damaged wire with the same gauge to maintain proper current flow. - 5
Test the thermostat reset
With power restored, perform a standard reset on the Nest thermostat from the settings menu. If the unit powers but uses a boot loop, a full reset and re-pairing with the HVAC may be required.
Tip: Avoid frequent resets; it’s best used as a last resort after wiring checks. - 6
Evaluate the need for professional service
If the thermostat still won’t power on after these steps, this is a strong signal to contact an HVAC technician. A professional can safely test the transformer, control board, and power module and confirm thermostat compatibility.
Tip: Provide them your wiring photos and any readings you took to speed up diagnosis.
Diagnosis: Nest thermostat won't power on
Possible Causes
- highTripped circuit breaker or blown fuse
- highDisconnected or loose C-wire
- mediumHVAC transformer or control board issue
- lowNest power connector issue or old battery
Fixes
- easyReset the circuit breaker or replace the fuse
- easyReconnect the C-wire firmly at both ends
- mediumTest the furnace transformer/24V supply; call a pro if unsure
- mediumReplace the thermostat power connector or adapter
- hardIf power remains absent, escalate to an HVAC technician
Questions & Answers
What is the first step when my Nest thermostat shows no power?
Begin with power basics: check the circuit breaker, confirm the C-wire is connected, and verify the HVAC 24V supply. If power returns but the display stays blank, proceed with wiring checks or a reset.
First, check the breaker and C-wire; then verify the 24V supply. If the display stays blank after power returns, move on to wiring checks and a reset.
How can I tell if the C-wire is the problem?
Use a multimeter to test for 24V between R and C at the furnace. If voltage is low or absent, the C-wire or its connection is likely the culprit.
Test between R and C with a multimeter. If there’s no 24V, the C-wire is probably the issue.
Should I reset the Nest thermostat if it won’t power on?
Resetting can help after you restore power and confirm wiring. If issues persist after a reset, re-check wiring or call a pro.
Yes, reset after power is restored. If problems last, re-check wiring or contact a pro.
Can a power outage affect Nest thermostat?
A power outage can reset or disrupt the thermostat, but power should return after the outage. If the unit doesn’t power back on, inspect power and wiring before calling a pro.
Power outages can disrupt the thermostat, but usually power returns. If not, check power and wiring first.
When should I call a professional for Nest thermostat power issues?
If basic checks don’t restore power or you detect burning, smoke, or a tripped breaker repeatedly, a licensed HVAC technician should inspect the system.
Call a pro if power can’t be restored after checks or you notice burning or recurring breaker trips.
Is it risky to DIY diagnose nest thermostat power problems?
There is risk of shock or equipment damage—always cut power at the breaker and follow safety steps. If uncertain, stop and contact a professional.
DIY can be risky; cut power and follow safety steps, and seek a professional if unsure.
Watch Video
What to Remember
- Identify the power issue before changing parts.
- Start with the breaker, C-wire, and 24V supply.
- Follow a safe, stepwise diagnostic flow.
- Call a pro if the problem persists after checks.