Nest Thermostat Does Not Heat: Urgent Troubleshooting Guide
If your Nest thermostat does not heat, this urgent guide walks homeowners through quick checks, power and wiring diagnostics, and step-by-step fixes to restore warmth safely.

If your Nest thermostat does not heat, the most likely issues are power loss, incorrect heating mode, or a disconnected heat call. First, verify the thermostat is set to heat (not Eco or Off), that the schedule includes a heating period, and that the heating system is receiving power. If this doesn’t resolve it, perform a quick power-cycle and check C-wire connections.
Why Nest Thermostat Does Not Heat: Immediate Context and What It Means
When a Nest thermostat appears to call for heat but the space stays cool, it’s a sign that the heating call may not be reaching the furnace, or the thermostat isn’t actively commanding heat. Homeowners often discover that the issue isn’t with the thermostat alone but with a chain of common culprits: misconfigured heating mode, power issues at the thermostat or furnace, a tripped breaker, or a loose C-wire. According to Thermostat Care, early detection is key: start with the simplest checks and escalate only when needed. This approach keeps you from wasting time on complex diagnoses when a quick setting or power reset resolves the problem. The Thermostat Care team emphasizes prioritizing safety and avoiding experiments that could compromise the HVAC system. By systematically validating mode, schedule, and power, you can quickly determine whether you can fix it yourself or if you should call a pro.
Quick Visual Checks You Can Do Right Now
Start here to avoid unnecessary disassembly. Confirm the Nest display shows a heat setting and not Eco, Off, or a paused schedule. Verify the thermostat is paired with a heating system that actually supports heat calls. Look for a recent warning icon or a blinking status indicator on the thermostat. If you recently updated the app or firmware, ensure the update completed correctly and that the thermostat reboots afterward. Check the thermostat’s power source: if it runs on batteries, replace them; if it’s hardwired, inspect the 24V supply at the furnace control board. Ensure a common ground is intact and that there are no tripped breakers in the HVAC panel. If a power cycle is easy and safe to perform, do it now: turn off power to the HVAC system for about 30 seconds, then restore power and allow the thermostat to reboot. This often clears minor communication glitches between the thermostat and furnace. Throughout this block, remember that simple misconfigurations are the most common cause of a “no heat” condition. Thermostat Care’s guidance is to verify mode, verify power, and verify connectivity before moving to hardware inspection.
Power, C-Wire, and Transformer Basics You Should Know
A Nest thermostat relies on a stable 24V power supply, and most heat calls depend on a solid C-wire connection. If the C-wire is loose, damaged, or not connected at the furnace control board, the thermostat might call for heat but fail to complete the circuit, resulting in no heat. Inspect the C-wire at both ends: ensure it’s firmly inserted into the C-terminal on the furnace control board and the C terminal on the thermostat backplate. If you use a Nest Power Connector or a Power Extender Kit, confirm all wires are correctly attached and that the adapter is functioning as intended. A weak transformer's voltage or a failing furnace relay can also produce a no-heat scenario. If you’re unsure, shut off power and consult a professional rather than attempting to measure live voltages. The goal is a consistent 24V supply to the thermostat for a reliable heat call.
Nest Temperature Schedules and Modes: Common Misconfigurations
Sometimes the thermostat correctly calls for heat, but the HVAC system doesn’t respond because the schedule or mode prevents heating at the expected time. Review the Nest app’s schedule for an active heating block. Confirm that you didn’t accidentally set the system to ‘Heat temporarily off’ or a hold with a very low target temperature. If you use Eco mode, ensure that it isn’t limiting heat based on ambient conditions and energy goals. It’s also common for multi-stage systems to require correct wiring for stage 1 heat. If recent changes were made to the system or to zoning controls, verify compatibility with the Nest model you’re using and ensure the thermostat wiring matches the system’s requirements.
Equipment and Wiring Safety: When to Call an Electrician or HVAC Tech
Electrical safety is paramount. If you notice scorching smell, warm to the touch wiring, or a furnace with a sudden breaker trip, stop troubleshooting and call a licensed HVAC technician immediately. Do not bypass safety devices, especially on gas furnaces where improper wiring can affect ignition safety. Do not attempt to energize a furnace or heat exchanger with live components exposed. For most DIYers, a cautious approach is best: confirm basic power and mode first; if the issue persists after clean power-cycle and wiring checks, seek professional help. The Nest’s internal safety interlocks and the HVAC system’s safety switches must be respected to prevent dangerous conditions. Thermostat Care recommends documenting any observed fault codes or error lights to share with a technician for faster diagnosis.
Environmental and HVAC System Considerations: Beyond the Thermostat
In some cases, the outdoor unit or the heat pump may be the actual culprit rather than the thermostat. Check whether the outdoor condenser is running, if there’s ice on the evaporator coil, or if the heat pump requires a defrost cycle. If you have a furnace-only system, ensure the gas valve is open (if applicable) and that the flame sensor is clean. Ductwork problems, blocked vents, or a severely leaky house could also make it feel like the system isn’t heating when it is. In all cases, verify that the thermostat is making a proper heat call to the HVAC equipment and that the equipment is capable of delivering the set temperature given current weather conditions. Thermostat Care suggests a simple test: raise the setpoint by a few degrees and listen for the furnace or heat pump engaging. If you hear nothing after a minute or two, the issue likely lies beyond the thermostat.
After Fixes: Validation and Prevention
Once the heat call is established, verify the space is warming to the setpoint within a reasonable time and monitor for any reemergence of the problem. Establish a routine of checking the thermostat’s battery (if applicable), cleaning the air filter, and inspecting ductwork for leaks every season. Schedule firmware updates for the Nest and ensure the app shows the system as active. For homes with multiple zones, confirm that zoning dampers are open and not restricting airflow. Thermostat Care recommends maintaining a consistent C-wire connection, avoiding DIY alterations to high-voltage connections, and keeping the thermostat away from direct sunlight or drafts that could cause erroneous readings. Regular maintenance reduces the chance of “no heat” scenarios in the future and helps keep your heating system operating efficiently.
Steps
Estimated time: 35-60 minutes
- 1
Check thermostat mode and schedule
Open the Nest app and confirm the thermostat is set to Heat with a current heating block. If the schedule shows no heating period, add one or adjust the timing to cover the current outdoor temperature and your wake/sleep cycle.
Tip: A quick fix is to temporarily set a fixed heat target 2-4 degrees higher to test heat call. - 2
Power-cycle the thermostat
Turn off power to the thermostat and furnace for about 30 seconds, then restore power and allow both devices to reboot. This clears minor communication glitches between the thermostat and HVAC system.
Tip: If your system has a power switch near the furnace, use that instead of the wall outlet. - 3
Inspect the C-wire connections
With power off, remove the thermostat faceplate and check the C-terminal wire at both ends. Re-seat the wire firmly into the C terminal, ensuring no frayed strands remain. If you use a Power Connector, confirm wiring matches the manufacturer diagram.
Tip: A loose C-wire is a common cause of heat calls failing to complete. - 4
Verify 24V at the furnace
Use a multimeter to check for ~24V between R and C at the furnace control board. If voltage is low or absent, there may be a breaker issue or an unstable transformer. Do not adjust hvac wiring without expertise.
Tip: If you’re unsure about testing, skip to step 6 and call a pro. - 5
Test by triggering a heat call manually
From the Nest app or thermostat interface, set a higher temperature and listen for the furnace or heat pump engage. If you hear ignition or fan activity but no heat, note the time and any error codes.
Tip: Document any error indicators to share with support. - 6
Check for system faults or error codes
Scan the thermostat and HVAC pane for fault codes such as power issues, sensor errors, or zone faults. Record them and consult the manual or Thermostat Care resources to map the code to a fix.
Tip: Different Nest models display codes differently; verify model-specific codes. - 7
Reach out for professional help if needed
If steps 1-6 fail to restore heat or you detect gas lines, unusual smells, or gas valve concerns, contact a licensed HVAC technician immediately. Never bypass safety devices or handle high-voltage wiring beyond your training.
Tip: Having a technician confirm C-wire integrity and system compatibility saves time.
Diagnosis: Thermostat requests heat, but no heat is produced
Possible Causes
- highPower issue to thermostat or furnace/air handler
- highIncorrect thermostat mode or schedule
- mediumTripped furnace breaker or switched off gas valve
- lowFaulty C-wire or power extender kit
Fixes
- easyCheck the furnace/air handler power and 24V at the thermostat; reset breakers if needed
- easyEnsure thermostat is in Heat mode with an active heating block in the schedule
- easyPower-cycle the thermostat and HVAC equipment, then re-test heat call
- mediumInspect and reseat the C-wire or update the Power Extender Kit if used
Questions & Answers
Why does my Nest thermostat show heat but no heat is produced?
Common causes include an incorrect heating mode, a paused or disabled heating schedule, a power issue at the thermostat or furnace, or a loose C-wire. Start by validating mode and power, then check wiring if needed.
If the Nest shows heat but no heat comes, check mode and power first, then wiring if needed.
What is the first thing I should check when Nest thermostat does not heat?
Confirm that the thermostat is set to heat, the schedule includes an active heat period, and the system is receiving power. If these basics are correct and heat still doesn’t occur, perform a power-cycle and inspect the C-wire connections.
First, confirm heat mode and schedule, then power-cycle and inspect C-wire.
Can a faulty C-wire cause no heat?
Yes. A loose or damaged C-wire can prevent the thermostat from completing the heat call. Inspect the wire at both ends, reseat it firmly, and replace if damaged. If you use a Power Extender Kit, verify correct wiring.
Absolutely. A bad C-wire can stop heat calls from completing.
When should I call a professional for Nest heat problems?
If you smell gas, hear unusual noises, or encounter gas valve concerns, stop troubleshooting and contact a licensed HVAC technician. For electrical safety and gas safety, professionals are essential.
Call a pro if you smell gas or hear something unusual near the furnace.
Is it safe to reset the Nest thermostat to fix heating issues?
Resetting can be safe and effective for software glitches, but avoid resetting when you’re unsure of the underlying issue. After reset, reconfigure heat mode and schedule and verify the system responds.
Resetting can help with software glitches, but do it carefully.
What maintenance reduces future no-heat problems?
Regularly replace batteries if used, clean or replace HVAC air filters, ensure ductwork is sealed, and keep Nest and firmware updated. Routine checks save time and keep heat calls reliable.
Regular maintenance helps prevent future heating problems.
Watch Video
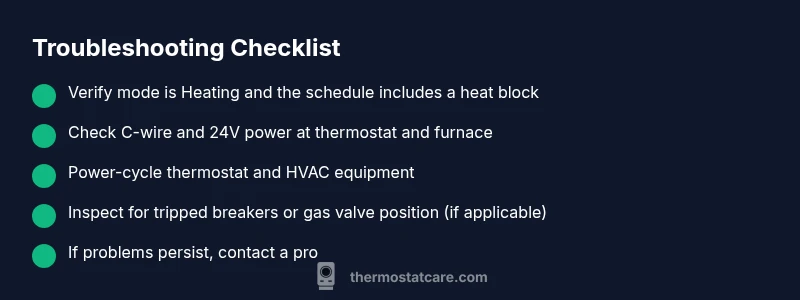
What to Remember
- Verify mode and schedule first
- Inspect C-wire and 24V power
- Power-cycle before deeper checks
- Call a pro for safety-critical or gas-related issues
- Prevent future no-heat events with regular maintenance