Nest Thermostat Problem with Y1 Wire: Troubleshooting Guide
Urgent, step-by-step troubleshooting for the Nest thermostat problem with Y1 wire. Learn how to diagnose, safely fix wiring issues, and prevent future Y1-related cooling failures.

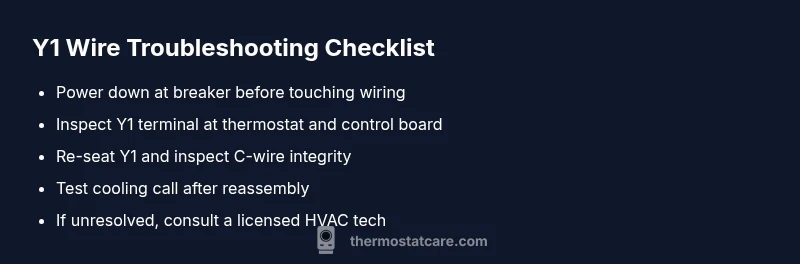
Most likely the Y1 wire is loose or miswired, causing the Nest to fail to call cooling. Start by powering down at the breaker, then reseat the Y1 wire at the Nest terminal and the furnace/air handler board. Check the C-wire and ensure clean contacts. If it still won’t run, recheck wiring diagrams and consider a pro if you’re unsure.
Nest Y1 Wire Essentials and Nest Compatibility
When troubleshooting a common Nest thermostat problem with y1 wire, the first thing to recognize is that Y1 is the cooling call line. If this wire is loose, corroded, or miswired, the Nest can’t prompt the outdoor condenser to engage, resulting in no cooling even when the thermostat shows ‘cool.’ According to Thermostat Care, wiring issues around the Y1 terminal are among the most frequent culprits in Nest heat/cool malfunctions. Homeowners should approach the problem with a methodical mindset: verify power, inspect terminal connections, and confirm proper labeling at both ends of the circuit. Ensuring the nest thermostat problem with y1 wire isn’t caused by a marginal C-wire or a shared terminal will often resolve the issue without more invasive work. Keep the system’s wiring diagram handy and take photos before unplugging anything, so you can retrace steps if needed.
With the right precautions, you can isolate whether the issue stems from the Y1 path, the power supply, or the thermostat’s configuration. This foundational understanding helps you avoid chasing phantom problems and accelerates repair in a home environment where time is critical. The Thermostat Care team recommends starting with the simplest checks and moving to the more complex ones only if needed.
Symptom Signals: When Y1 Wiring Shows Damage or Misconfiguration
The following symptoms often point to a Y1 wiring problem in Nest setups: the cooling sequence does not start even though the thermostat calls for cool; the outdoor unit cycles briefly and then stops; the Nest shows a blank screen or a low battery indicator while cooling is requested; or the status light blinks in a pattern that matches an error code related to the Y1 contact. In many cases, these signs indicate a loose terminal, a corroded blade, or a miswired terminal on the HVAC control board. It’s essential to differentiate between a true Y1 fault and a broader power issue or a bad C-wire. If you notice the thermostat’s battery is draining quickly or the screen flickers when Y1 is engaged, this is also a red flag. Work through the list of potential causes in a logical order to narrow down the root problem quickly. The goal is a quick fix that restores reliable cooling without risking damage to the system.
Quick Safety Checks You Can Perform Safely
Before touching any wires, turn off the HVAC power at the breaker and verify the thermostat is in a safe cooling mode. Remove the thermostat faceplate to visually inspect the Y1 terminal and its wire for signs of looseness, fraying, or discoloration. Reseat the Y1 wire firmly at both the thermostat terminal and the furnace/air handler board. If you see corrosion on the Y1 blade or its terminal screw, gently clean with a dry brush or contact cleaner, taking care not to disturb adjacent terminals. Confirm the C-wire is firmly connected and that the common path isn’t shared with a different terminal that could confuse signals. After reseating, restore power and test the cooling call through the Nest app or thermostat to confirm the fix. If you’re uncomfortable handling wiring or the issue persists, contact a licensed HVAC technician. Thermostat wiring safety is critical; never force a wire into a terminal or bypass safety features.
How Y1 Wiring Interacts with C-Wire and Power
Nest thermostats rely on a stable 24-volt power supply to maintain functions like scheduling, display, and remote commands. The Y1 wire is part of the cooling circuit and is energized when cooling is needed. Problems arise when the Y1 path is interrupted or when the C-wire (the common) fails to provide a return path, causing the Nest to misread voltage. A weak or intermittent C-wire can masquerade as a Y1 fault because the thermostat won’t hold the call long enough to engage the outdoor unit. In some configurations, a shared furnace terminal may confuse heat and cool calls, especially on heat pump systems or multi-stage setups. Understanding these interactions helps you diagnose without replacing hardware unnecessarily. If the C-wire or Y1 is not correctly landed on the control board, it can generate a false fault code or no cooling condition. Since the Y1 function is critical for cooling, addressing wiring integrity here often resolves the problem rapidly.
Diagnostic Flow: How We Narrow It Down
To methodically diagnose the nest thermostat problem with y1 wire, begin with the most common, simplest checks and progress toward more nuanced electrical tests. Start by ensuring power is available at the thermostat and the HVAC system. Then verify that the Y1 wire is properly landed on both ends: Nest terminal and the control board Y1 terminal. If power and wiring appear correct, test the Y1 signal by temporarily swapping in a spare wire (if available) or using a multimeter to verify 24V between Y1 and C when cooling is commanded. If the Y1 signal is present but the outdoor condenser does not engage, inspect the contactor at the outdoor unit and confirm the thermostat’s cooling settings are correct. Finally, confirm the problem persists with a different thermostat or a temporary jumper test only under professional supervision. If uncertainty remains, it’s prudent to call an HVAC technician to confirm board health and avoid misdiagnosis.
Step-by-Step: Fix for the Most Common Y1 Wire Root Cause
- Safety first: Shut off power at the main breaker and at the thermostat to prevent shocks or equipment damage. 2) Inspect visually: Remove the thermostat faceplate and examine Y1 and C-wire connections for looseness or corrosion. 3) Re-seat and secure: Reconnect the Y1 wire firmly at both ends, tightening screws without overtightening. 4) Check the control board: Verify the Y1 terminal is clean and the wire is not frayed. 5) Verify C-wire integrity: Ensure C-wire is attached and not sharing a terminal with another wire. 6) Test and verify: Restore power and command cooling; observe whether the outdoor unit engages and maintains operation. 7) Document and monitor: If the cooling cycle remains inconsistent, record symptom patterns for your HVAC tech and consider a professional inspection. Tip: Use a smartphone camera to capture terminal labels and wire colors for consistent reassembly.
Safety, Warnings, and Common Mistakes to Avoid
Never work on live HVAC components without turning off power. Do not yank or bend wires beyond their terminals, and never force wires into unfamiliar slots. Avoid using low-quality or damaged wires, as poor conductivity can mimic a Y1 fault. If you encounter burnt or melted insulation, stop and call a pro. Always verify the furnace/air handler power after making changes, and test cooling with the Nest to ensure a stable signal path.
Prevention: Keeping Y1 Wiring Healthy for Nest
Regularly inspect thermostat wiring connections, especially after HVAC service or weather events. Keep the Y1 and C terminals clean and dry, and replace frayed wires promptly. Maintain a consistent labeling system so you can quickly verify terminals at both ends of the line. Periodically test the Nest cooling function to catch issues early, and consider upgrading to a dedicated C-wire or a powered thermostat if persistent power issues occur. Proactively addressing wiring health reduces iterations and extends equipment life.
Steps
Estimated time: 60-90 minutes
- 1
Power Down and Safety Check
Turn off the HVAC breaker and switch off the thermostat. Confirm no power is flowing to prevent shocks. This is the foundational safety step before any wiring work.
Tip: Always verify power with a non-contact tester before touching wires. - 2
Inspect Y1 Terminals
Remove the thermostat cover and inspect the Y1 terminal on both ends for looseness or discoloration. If the wire is loose, gently re-seat it and secure with the terminal screw.
Tip: Take a photo of the wiring before adjusting to aid reassembly. - 3
Check the C-Wire Path
Inspect the C-wire connection at the thermostat and the furnace board. Ensure the common wire is firmly landed and not shared with another terminal that could confuse signals.
Tip: A weak C-wire is a common source of power instability. - 4
Test with Power On (Carefully)
Power the system back on and command cooling from the Nest. Observe if the outdoor condenser engages and remains on during cooling mode.
Tip: If you hear buzzing or see a tripped breaker, power down and reassess wiring. - 5
Verify Settings in Nest App
Open the Nest app and ensure cooling is enabled, Y1 is selected for cooling, and no shortcut or automation is overriding the call.
Tip: Sometimes app-level schedules override manual settings. - 6
Document and Plan Next Steps
If issues persist after these steps, document symptoms and consider scheduling a professional HVAC inspection to check the contactor, capacitor, and control board.
Tip: Professional help is advised for board-level faults or refrigerant concerns.
Diagnosis: Nest shows no cooling call or compressor activation when cooling is selected, suspect Y1-related wiring issue.
Possible Causes
- highLoose or corroded Y1 connection at thermostat
- highLoose or corroded Y1 connection at furnace/air handler board
- mediumWeak or intermittent C-wire causing undervoltage
Fixes
- easyPower down, reseat Y1 at thermostat and control board; inspect for corrosion
- mediumTighten terminal screws, replace damaged wires, and ensure C-wire integrity
- hardTest 24V between Y1 and C when cooling is commanded; replace damaged control board if voltage is absent
Questions & Answers
What does the Y1 wire do in a Nest thermostat system?
The Y1 wire is the cooling call line that tells the outdoor unit to turn on when cooling is needed. If Y1 is loose or miswired, the Nest may not engage the compressor. Proper Y1 wiring is crucial for reliable cooling control.
Y1 is the cooling call wire. If it’s loose or miswired, the cooling won’t start. Make sure the connection is solid at both ends.
Can I fix a loose Y1 wire myself?
Yes, for many residential setups you can reseat and secure the Y1 wire on the thermostat and control board. Turn off power first, inspect for corrosion, and test after reseating. If you see burnt insulation or persistent issues, stop and call a pro.
You can usually fix a loose Y1 wire by reseating it after turning off power. If you notice damage, seek professional help.
What if the Y1 wire looks fine but cooling still doesn’t engage?
If Y1 is solid but cooling doesn’t engage, test the C-wire for voltage and verify the outdoor unit’s contactor. The problem may be on the HVAC side rather than the thermostat, requiring a service visit.
If Y1 seems fine but cooling still fails, test C-wire voltage and check the outdoor contactor. The issue could be in the HVAC equipment.
Do I need a new thermostat or wiring harness?
Not necessarily. Most Y1 issues come from loose connections or damaged wires. A replacement thermostat is only needed if the current one is malfunctioning or the control board can’t supply stable power.
Usually you don’t need a new thermostat; check wiring first. Replace only if the thermostat itself is faulty.
When should I call a professional for a Nest/Y1 issue?
Call a licensed HVAC technician if you detect burnt insulation, a damaged control board, refrigerant concerns, or if you’re uncomfortable with wiring or testing voltages. They can safely diagnose and repair the Y1 circuit and related components.
Call a pro if you see damaged wires or board components, or if testing feels unsafe.
Can a faulty Y1 wire affect heating mode as well?
Y1 primarily controls cooling, but wiring faults can influence overall thermostat performance and power delivery, potentially impacting heating mode indirectly if power is unstable.
Y1 mainly handles cooling, but wiring faults can impact overall thermostat power and performance.
Watch Video
What to Remember
- Verify power first, then inspect Y1 and C-wire connections.
- Reseat and secure wiring at both thermostat and furnace boards.
- If symptoms persist, pursue a professional HVAC check.
- Regularly test cooling function to prevent future Y1-related issues.