Nest Thermostat Blinking Green Troubleshooting
Discover why your nest thermostat blinking green occurs and how to troubleshoot safely. Quick checks, common causes, power considerations, and when to call a professional for reliable comfort.

A blinking green light on a Nest thermostat usually signals startup, a firmware update, or a power/communication alert. The fastest fix is to restart the device, verify that the thermostat has stable 24-volt power, and confirm the C-wire is properly connected at the furnace. If the blink persists, consult Nest support for model-specific guidance.
Why nest thermostat blinking green light happens
According to Thermostat Care, the nest thermostat blinking green can signal a few different situations depending on model: the device is starting up after a power loss, a firmware update is in progress, or there is a power/communication issue with the HVAC system. Because models and software vary, your specific meaning might differ. In most cases, a blinking green light means the thermostat is either booting, updating software, or attempting to re-establish a connection with the HVAC equipment. Treat it as a warning to verify power, wiring, and network status before making replacements. By understanding the common triggers, you can quickly determine the right next step and minimize heat or cooling interruptions.
Common causes at a glance
- Startup reboot after power loss: The thermostat may blink briefly as it powers back up.
- Firmware updates in progress: A long or stalled update can show blinking green.
- Power issues: Inadequate 24V power, a weak transformer, or a loose C-wire can trigger the light.
- Wiring or control-board problems: A loose terminal or failing relay in the HVAC system can disrupt communication.
- Connectivity or sensor glitches: Network or sensor errors can also display blinking indicators on some models.
If you notice the blink while the system is running normally, prioritize power and wiring checks before assuming a software fault.
Quick checks you can do without tools
- Power cycle the thermostat and HVAC: Turn off the thermostat at the breaker for 30 seconds, then turn it back on and allow it to reboot.
- Inspect the C-wire: Make sure the common wire is securely attached at both the thermostat and furnace control board.
- Check the HVAC power: Verify the furnace has power, and the 24V transformer isn’t tripping the circuit.
- Look for obvious wire damage: Inspect exposed wires for fraying or loose insulation.
- Verify Wi-Fi and updates: If the thermostat is connected to Wi‑Fi, ensure it isn’t stuck updating in the background. If possible, attempt a manual firmware update later.
Note: Always turn off power before handling wires.
Diagnostic flow overview
This section maps a practical path from symptom to solution. Start with the simplest checks (power and wiring) and move toward likely culprits (HVAC control issues, then firmware). Each step should end with a decision point: did the blink stop or persist? If yes, proceed to the next fix; if no, pause and reassess. In most homes, restoring solid 24V power and a secure C-wire resolves the blinking green. If not, the problem may be the HVAC control board or a stalled software update.
Step-by-step: the most common fix explained
The most common fix for a persistent blinking green is to secure the power and wiring that feed the thermostat. Begin by ensuring the furnace/air handler has a steady 24-volt supply and that the C-wire is firmly connected. If you reach this point and the light stops blinking, you’re done. If not, the issue may be deeper in the HVAC control board or software. This section provides a high-level walkthrough of why those steps matter and how to prepare for deeper troubleshooting without jumping into device internals.
Safety, precautions, and when to call a pro
Safety first: never probe power terminals with the system energized. Always shut off power at the breaker before touching any thermostat wires. If you smell burning plastic, hear buzzing, or the panel trips repeatedly, stop and contact a licensed HVAC technician. A blinking green light can signal a non-trivial electrical or control-board issue that requires professional testing tools and expertise.
Prevention tricks to avoid future blinkings
- Schedule regular visual inspections of thermostat wiring and ensure connections remain tight.
- Keep the furnace area clean and dust-free to prevent contact corrosion on terminals.
- Use a proper C-wire or a reputable adapter if the existing wire is inadequate.
- Periodically verify firmware status in the thermostat app and install updates promptly when available.
- Consider a professional check if the system has outdated wiring or a history of voltage fluctuations.
Troubleshooting outline: what to document
Before you call for help, log the following: model of thermostat, current software version, time and date of the blinking events, recent changes (wiring, power, or HVAC service), and any error codes displayed in the app. This information speeds up diagnosis and helps a technician reproduce the issue accurately.
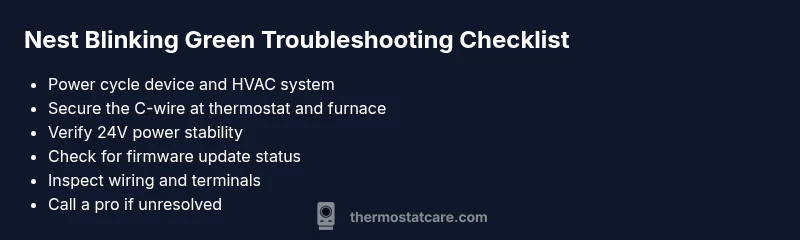
Steps
Estimated time: 30-60 minutes
- 1
Power cycle the thermostat and HVAC
Turn off the thermostat at the breaker, wait 30 seconds, then restore power and allow the thermostat to reboot. Observe whether the blinking green stops once it completes the boot sequence.
Tip: Resetting after a power loss often clears transient communication glitches. - 2
Check the C-wire connection
With power off, inspect the C-terminal at both the thermostat and furnace control board. Ensure the wire is fully inserted and secured under the terminal screws without frayed insulation.
Tip: A loose C-wire is a common cause of intermittent power to the thermostat. - 3
Verify 24V supply to the thermostat
Use a multimeter or the furnace’s diagnostic tools to confirm the transformer is delivering a steady 24V AC to the thermostat. Look for voltage fluctuations during switching cycles.
Tip: If voltage dips are frequent, the transformer or wiring may need replacement. - 4
Attempt a controlled firmware update or reset
If the device shows a pending update, allow it to complete; if stuck, initiate a safe reset from the app or hardware buttons per model guidance.
Tip: Interrupting firmware updates can brick the device—never cancel mid-update without following official steps. - 5
Inspect wiring condition and terminals
Check for damaged insulation, corroded terminals, or loose wire connections at both ends. Replace damaged wires as needed and re-tighten terminal screws.
Tip: Use non-conductive tools and wear safety glasses when handling exposed conductors. - 6
Call a pro if the issue persists
Persistent blinking after the above steps suggests deeper hardware or control-board faults. A licensed technician can diagnose HVAC-side issues with professional equipment.
Tip: HVAC work involves high voltage and refrigerant systems—don’t risk personal injury.
Diagnosis: Nest thermostat blinking green
Possible Causes
- highPower issue (low voltage or flaky C-wire)
- mediumFirmware update in progress
- lowCommunication issue with HVAC control board
Fixes
- easyPower cycle the thermostat and furnace; ensure 24V supply is steady
- easyRe-seat or replace the C-wire
- easyCheck for and reset firmware update if stuck
- mediumIf unresolved, contact a professional HVAC technician
Questions & Answers
What does a blinking green light mean on the Nest thermostat?
The meaning can vary by model, but it often signals booting, a software update, or power/communication issues. Start with power, wiring, and update status before replacing components.
Blinking green usually means the thermostat is rebooting or updating, or there’s a power issue. Start by checking power and wiring.
Should I reset the Nest thermostat if it blinks green?
Resetting can help if software is stuck, but begin with power cycling and wiring checks. Reserve a full factory reset for when other fixes fail.
Resetting can help if updates are stuck, but try power cycle and wiring checks first.
How do I check the C-wire on my Nest thermostat?
Turn off power, remove the thermostat cover, and inspect the C-terminal at both the thermostat and furnace. Ensure the wire is securely connected and undamaged.
Make sure the C-wire is connected securely at both ends before testing further.
Can a blinking green light indicate HVAC problems?
Yes. If power and wiring are solid, the issue may lie with the HVAC control board or relays. A professional should evaluate complex HVAC faults.
Yes, HVAC hardware issues can cause blinking if wiring is fine.
When should I contact a professional?
If blinking persists after basic checks, or you notice burning smells, buzzing sounds, or a non-responsive display, stop and get an HVAC technician.
If it keeps blinking after basic checks, call a pro for safety and accuracy.
Watch Video
What to Remember
- Power cycle first; most blink issues resolve with a simple reboot
- Secure and test the C-wire to restore reliable power
- Don’t interrupt firmware updates—let them finish when possible
- Call a pro if blinking persists after basic checks