Nest Temperature Sensor Not Connecting: Quick Fix and Troubleshooting
If your nest temperature sensor not connecting, this practical guide from Thermostat Care walks homeowners through fast checks, diagnostics, and step-by-step fixes to restore reliability and keep your smart home in sync.

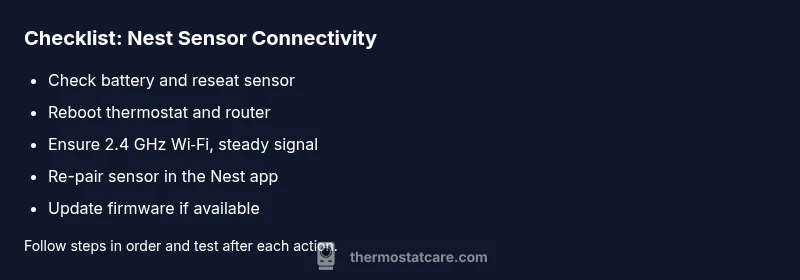
If you notice a nest temperature sensor not connecting, start with the basics: verify battery power, ensure the sensor is in pairing mode, and reboot both the Nest thermostat and your router. If the issue persists, re-pair the sensor in the Nest app and check for firmware updates. Thermostat Care recommends a methodical approach to avoid random fixes.
Understanding the problem: nest temperature sensor not connecting
When a Nest sensor fails to connect to the thermostat or the Home app, you’re typically dealing with a power, network, or pairing issue. The problem can feel urgent because it directly affects comfort and energy management. According to Thermostat Care, most connectivity hiccups are solvable with a structured sequence: confirm power, verify pairing mode, check network stability, and re-attach the sensor in the app. If you notice the nest temperature sensor not connecting, this guide will help you isolate the cause and restore a stable connection while keeping your data and routines intact.
Common symptoms and indicators
Reliability depends on consistent data flow between the sensor and the thermostat. Common signs of a connectivity issue include delayed temperature updates, sensor appears offline in the app, or a persistent pairing message. If the sensor shows a low battery icon or fails to pair after multiple attempts, it’s often a battery or firmware-related fault. Throughout this process, maintain a calm pace and document each change you make. Thermostat Care’s experience shows that methodical steps reduce repeat issues and shorten overall downtime.
Quick checks you can do now
Before diving into deeper diagnostics, perform these quick checks:
- Replace or recharge the sensor battery if accessible; a weak battery is a frequent culprit.
- Ensure the sensor is within a reasonable range of the Nest thermostat and router; wall materials or metal objects can create dead zones.
- Reboot the Nest thermostat and your Wi-Fi router to refresh connections.
- Confirm you’re pairing the sensor in the correct mode as described by the Nest app.
- Check that the Nest app is up to date and that your phone is on the same account; mismatched accounts can appear as a sensor not connecting.
If these steps don’t restore connectivity, proceed to the Diagnostic Flow.
Diagnostic flow overview
A systematic diagnostic flow helps you translate symptoms into a concrete cause and fix. Start with the simplest explanation (battery, pairing mode) and move toward network or firmware issues. A key principle is to test one change at a time to observe its effect. In practice, you’ll compare the sensor’s status before and after each step and record outcomes for accountability. Thermostat Care’s guidelines emphasize documenting each decision to avoid looping back to the same issue.
Step-by-step fix for the most common cause: battery and pairing
This section provides a proven sequence for the most common root cause: depleted battery or improper pairing. Follow each step and check after each action:
- Replace or fully recharge the sensor battery. Ensure proper polarity and reseat a loose battery.
- Put the sensor back into pairing mode following the Nest app prompts.
- Re-add the sensor to the Nest app and select the correct thermostat to pair with. Confirm the pairing completes successfully.
- If pairing fails, remove the sensor from the app, restart the app, and attempt pairing again.
- Verify that the thermostat recognizes the sensor and shows live readings. If not, proceed to the firmware check and network adjustments.
Tip: Keep a written log of each pairing attempt and time-stamp the results for easy reference.
Safety, warnings, and common mistakes
- Avoid opening the Nest hardware or tampering with internal components; risk of electric shock and voiding warranties.
- Do not force the sensor into pairing mode if the app indicates it’s not ready; wait a few minutes and retry.
- Never mix remote and local networks when configuring the Nest sensor; ensure the thermostat and sensor operate on the same Wi-Fi band and profile.
Following safe practices helps prevent accidental damage and reduces downtime.
Prevention and maintenance tips to avoid future disconnects
- Regularly check battery health or design life for the sensor and replace proactively.
- Keep firmware up to date on both the Nest thermostat and the sensor; enable automatic updates if available.
- Improve Wi-Fi coverage in the area where the sensor and thermostat reside; consider mesh networks or placing the router closer to the device.
- Maintain a consistent power source and avoid power cycling cycles that disrupt ongoing programming.
- Schedule periodic re-pairing checks as part of seasonal maintenance, especially after resets or network changes.
A proactive approach minimizes the likelihood of repeated nest temperature sensor not connecting issues.
When to call a pro: signs you need expert help
If after following the steps you still experience a nest temperature sensor not connecting, or if the thermostat shows hardware errors, consider professional support. A technician can verify hardware integrity, re-flash firmware safely, and check for compatibility issues with your HVAC system. Thermostat Care recommends reaching out when problems persist beyond basic steps, or when you encounter repeated disconnects after firmware updates.
Edge cases and model-specific notes
Different Nest models have slight variations in pairing flows and battery configurations. If you’re using an older Nest Thermostat with newer sensors, verify compatibility lists and model-specific pairing instructions. Some users report intermittent disconnects due to router firmware or 5 GHz network behavior; ensure the 2.4 GHz band is enabled and stable, as many sensors prefer that frequency for reliability.
Steps
Estimated time: 30-45 minutes
- 1
Check power and battery
Inspect or replace the sensor battery. Confirm it’s seated correctly and test whether the sensor shows any power indicators. A dead battery is a common cause of a nest temperature sensor not connecting.
Tip: Use fresh batteries recommended by the manufacturer and avoid mixed battery types. - 2
Reboot devices
Power cycle both the Nest thermostat and your Wi-Fi router. This clears transient network glitches that can block pairing. Wait 60 seconds before restoring power to observe improved connectivity.
Tip: After reboot, wait a few minutes for devices to re-establish connections. - 3
Verify pairing mode
Put the sensor in pairing mode according to the Nest app prompts. Ensure you follow the exact sequence; mis-timing can cause pairing to fail.
Tip: If you see a blue light sequence, you’re likely in pairing mode. - 4
Re-add the sensor to the app
In the Nest app, select add accessory and choose the sensor. Follow on-screen steps to complete pairing. Confirm the sensor appears as connected and shows live readings.
Tip: Avoid multiple devices trying to pair at the same time. - 5
Update firmware
Check for firmware updates for both thermostat and sensor. Apply updates and reboot again if prompted.
Tip: Enable automatic updates if your devices support it. - 6
Improve network reliability
If signals are weak, improve coverage with a mesh network or reposition the router. Ensure the device is on the 2.4 GHz band where many sensors perform best.
Tip: Keep other electronics away from the router to reduce interference. - 7
Factory reset and re-pair
As a last resort, perform a factory reset on the sensor and re-pair it from scratch. This clears corrupted pairing data.
Tip: Note that a reset erases saved configurations; have them handy to re-enter. - 8
Test and confirm connectivity
After re-pairing, observe live temperature data in the app and ensure updates occur in real time.
Tip: If the data lags, monitor for other devices causing bandwidth contention. - 9
Call support if unresolved
If the Nest sensor consistently won’t connect after all steps, contact support for hardware verification and compatibility checks.
Tip: Document serial numbers, firmware versions, and steps you've tried to speed up help.
Diagnosis: Nest temperature sensor not connecting to the Nest thermostat or Home app
Possible Causes
- highSensor battery depleted or not seated properly
- highIncorrect pairing mode or user skipped pairing step
- highWeak or unstable Wi-Fi signal / router settings
- mediumFirmware mismatch or outdated sensor/thermostat software
- lowInterference from other devices or placement issues blocking signal
Fixes
- easyReplace or recharge the sensor battery and reseat it properly
- easyReboot the thermostat and the router to refresh connections, then retry pairing
- easyMove the sensor or router to improve signal quality and ensure the 2.4 GHz band is used
- mediumUpdate firmware on the Nest thermostat and sensor to the latest version
- hardRemove and re-pair the sensor in the Nest app; perform a factory reset if needed
Questions & Answers
Why won't my Nest temperature sensor connect to the thermostat?
Most connection problems come from battery, pairing mode, or Wi-Fi issues. Start with a fresh battery, confirm pairing mode, and test the network. If these steps don’t help, update firmware and re-pair the sensor.
Typically, the sensor won’t connect due to power, pairing steps, or network issues. Try battery replacement, re-pairing, and firmware updates, then check your network.
Is battery level important for sensor connectivity?
Yes. A weak or depleted battery is a common reason a Nest temperature sensor won’t connect. Replace or recharge the battery, then retry pairing. Always use the correct battery type recommended by Nest.
Battery level is often the culprit. Replace it and retry pairing.
Can network settings affect pairing and connectivity?
Absolutely. A weak Wi‑Fi signal or misconfigured router can prevent the sensor from connecting. Verify 2.4 GHz support, stabilize the network, and avoid guest networks during setup.
Yes. Ensure the network is reliable and the device is on the right Wi‑Fi band.
Should I reset the thermostat or sensor if issues persist?
Resetting can fix stubborn pairing problems, but it erases saved settings. Try a soft reset first, then re-pair. Only perform a factory reset if advised by support.
Reset is a last resort; re-pair after a soft reset.
Will firmware updates resolve connectivity problems?
Firmware updates often address bugs and improve compatibility. Ensure both the thermostat and sensor run the latest versions, then test connectivity again.
Firmware updates can fix bugs; keep devices current.
When should I seek professional help?
If the sensor still won’t connect after all steps, or you suspect hardware damage, contact support. A professional can verify hardware health and compatibility.
If it still won’t connect after trying everything, get professional help.
Watch Video
What to Remember
- Verify power and pairing first.
- Keep firmware and networks current.
- Re-pair the sensor to resolve most issues.
- Escalate to professional help if problems persist.