Nest Sensor Not Connecting: Quick Troubleshooting Guide
Urgent guide to fix a Nest sensor not connecting to your thermostat. Follow quick checks, diagnostic flow, and safe steps to restore reliable smart home comfort.

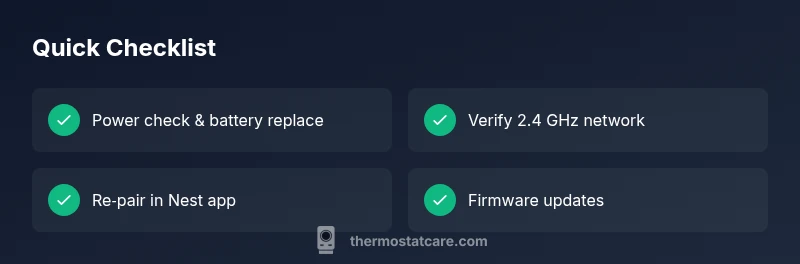
Most likely the Nest sensor isn’t connecting due to a weak Wi‑Fi signal or a low battery. Start by verifying the sensor is within range of your router, replace or charge batteries, and re-link the sensor in the Google Home/Nest app. If the issue persists, perform a quick reset and re-pair the sensor with your thermostat.
Understanding Why Nest Sensor Not Connecting
Connectivity problems with a Nest sensor not connecting often stem from power, Wi‑Fi, or pairing issues. In most homes, the sensor relies on a stable 2.4 GHz Wi‑Fi network and fresh batteries. If you notice the device blinking, showing offline in the Nest app, or the thermostat reports no sensor, begin with the simplest fixes before diving into advanced settings. Thermostat Care has found that most users regain reliable connectivity by addressing power first, then reviewing network stability, and finally re‑pairing the device. The goal is to restore a stable link between the sensor and thermostat so temperature data flows without gaps, ensuring you don’t lose comfort control at critical moments.
Steps
Estimated time: 30-45 minutes
- 1
Check sensor power
Inspect the sensor’s battery or power source. Replace dead batteries with fresh ones of the correct type and ensure the battery contacts are clean. Confirm the LED indicator shows normal activity after replacement.
Tip: Keep spare batteries on hand and label the sensor so you know which one to replace first during future maintenance. - 2
Verify Wi‑Fi and network band
Confirm the home Wi‑Fi is up and stable. Ensure the router is broadcasting a 2.4 GHz network, as many Nest sensors rely on that band for reliable connectivity. If you have a guest network, temporarily connect the sensor to the main network for testing.
Tip: If possible, place the Nest hub/thermostat within 20–30 feet of the router with a clear line of sight to minimize interference. - 3
Update firmware
Open the Nest app and check for available updates for both the sensor and thermostat. Install any pending firmware updates, then reboot both devices to apply changes.
Tip: Firmware updates can fix pairing glitches that appear as “not connecting” errors. - 4
Re‑pair the sensor
In the Nest app, remove or forget the sensor, then initiate a fresh pairing process. Follow on‑screen prompts to re‑link the sensor with the thermostat and confirm data flow in real time.
Tip: During pairing, keep the devices close to each other to ensure a strong initial connection. - 5
Power cycle the ecosystem
Power off the router, thermostat, and sensor for 30–60 seconds, then turn them back on in the same order. Allow a few minutes for devices to re‑sync and re‑establish a stable connection.
Tip: A clean reboot helps clear temporary network conflicts that may block pairing. - 6
Test the connection
After re‑pairing, verify that temperature readings appear in the Nest app and on the thermostat display. If readings are delayed or missing, repeat the pairing step and confirm the device shows as connected.
Tip: Document the pairing steps so you can repeat the process quickly in the future. - 7
If issues persist, consider a reset
As a last resort, perform a factory reset on the sensor and re‑install it from scratch. This clears old pairing data and often resolves stubborn connections.
Tip: Only reset after saving any custom settings in the app and ensuring you can re‑pair afterward.
Diagnosis: Nest sensor not connecting to thermostat
Possible Causes
- highDead or weak sensor battery
- highWeak Wi-Fi signal or router operating on a non-supported band
- mediumOutdated firmware on sensor or thermostat
- mediumIncorrect pairing or sensor removed from Nest app
- lowInterference from other devices or multiple networks
Fixes
- easyReplace or recharge the sensor battery and check power LED indicators
- easyMove the sensor closer to the router or improve 2.4 GHz coverage (avoid 5 GHz unless dual‑band support is confirmed)
- easyUpdate firmware for both sensor and thermostat via the Nest app, then restart affected devices
- mediumRemove the sensor from the Nest app and re‑pair it to the thermostat following prompts
- easyRestart the router, verify DHCP and IP assignment, and perform a full power cycle of the thermostat and sensor
Questions & Answers
Why won’t my Nest sensor connect to the thermostat?
Common causes are power issues, weak Wi‑Fi, or improper pairing. Start with fresh batteries and ensure the sensor is paired in the app before testing data flow.
Most connection problems come from power or pairing. Start with fresh batteries and re-pair in the app to restore data flow.
How do I re‑pair a Nest sensor with the thermostat?
Open the Nest app, remove or forget the sensor, then add the device again and follow prompts to pair. Keep devices close during setup.
Open the Nest app, remove the sensor, then re-add it and follow the prompts. Keep devices close during setup.
Can a firmware update fix connectivity issues?
Yes. Updating sensor and thermostat firmware often resolves compatibility and connectivity problems.
Firmware updates can fix connectivity issues. Update both devices in the app and reboot.
Is a 2.4 GHz network required for Nest sensors?
Most Nest sensors rely on 2.4 GHz. If your router only uses 5 GHz, enable 2.4 GHz temporarily or create a compatible guest network for testing.
Nest sensors typically need 2.4 GHz. If your router is on 5 GHz, enable 2.4 for testing.
Should I call a professional if it still won’t connect?
Most issues are user-serviceable. If you cannot restore the connection after following this guide, contact Thermostat Care for expert help.
If you still can’t connect after following steps, contact Thermostat Care for expert help.
What safety steps should I follow during troubleshooting?
Avoid opening electrical panels. Do not expose the sensor to moisture or extreme temperatures. Follow manufacturer guidelines during any resets.
Don’t mess with electrical systems. Keep sensors dry and follow the app prompts for resets.
Watch Video
What to Remember
- Check power first; most issues start with a dead battery.
- Ensure a stable 2.4 GHz Wi‑Fi connection for Nest sensors.
- Re‑pair the sensor in the Nest app to restore data flow.
- Update firmware and restart devices to clear glitches.
- If needed, reset and re‑install the sensor with the thermostat.